
Hello everyone!
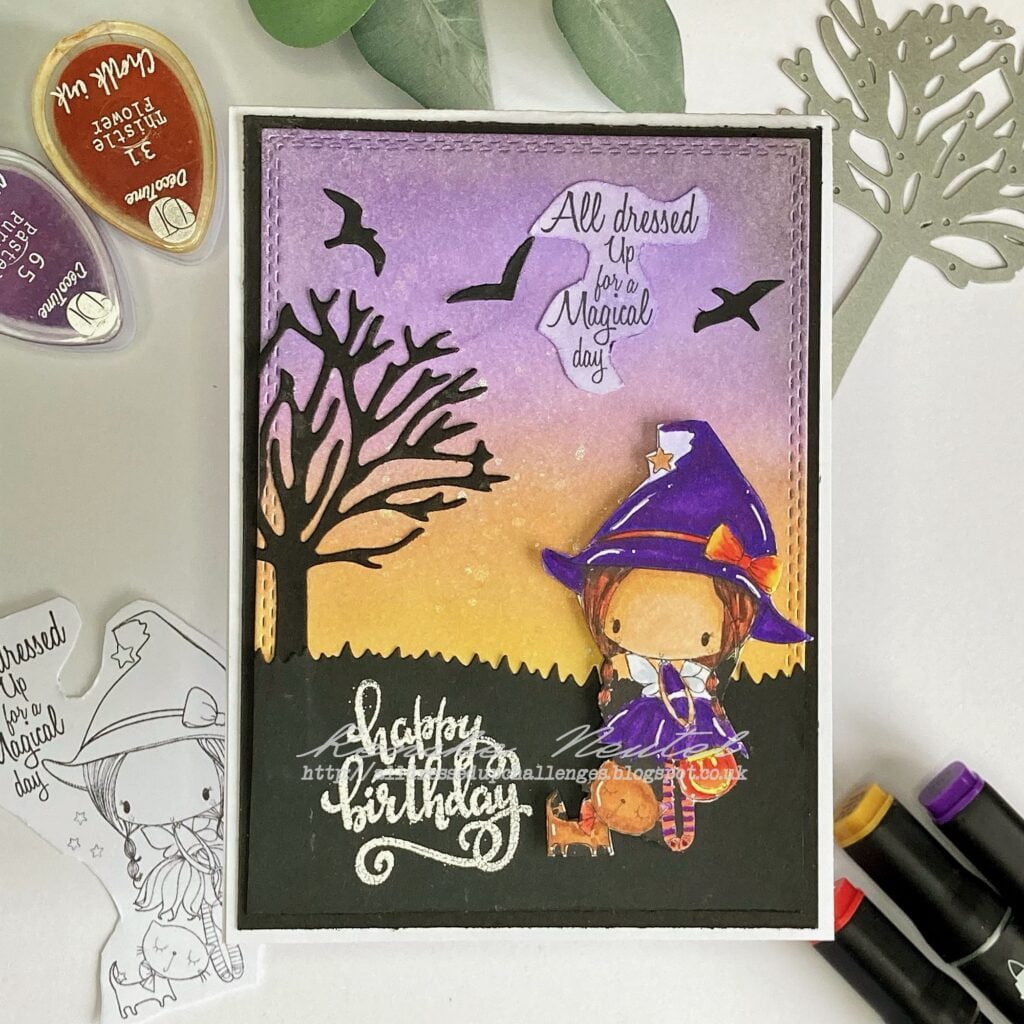
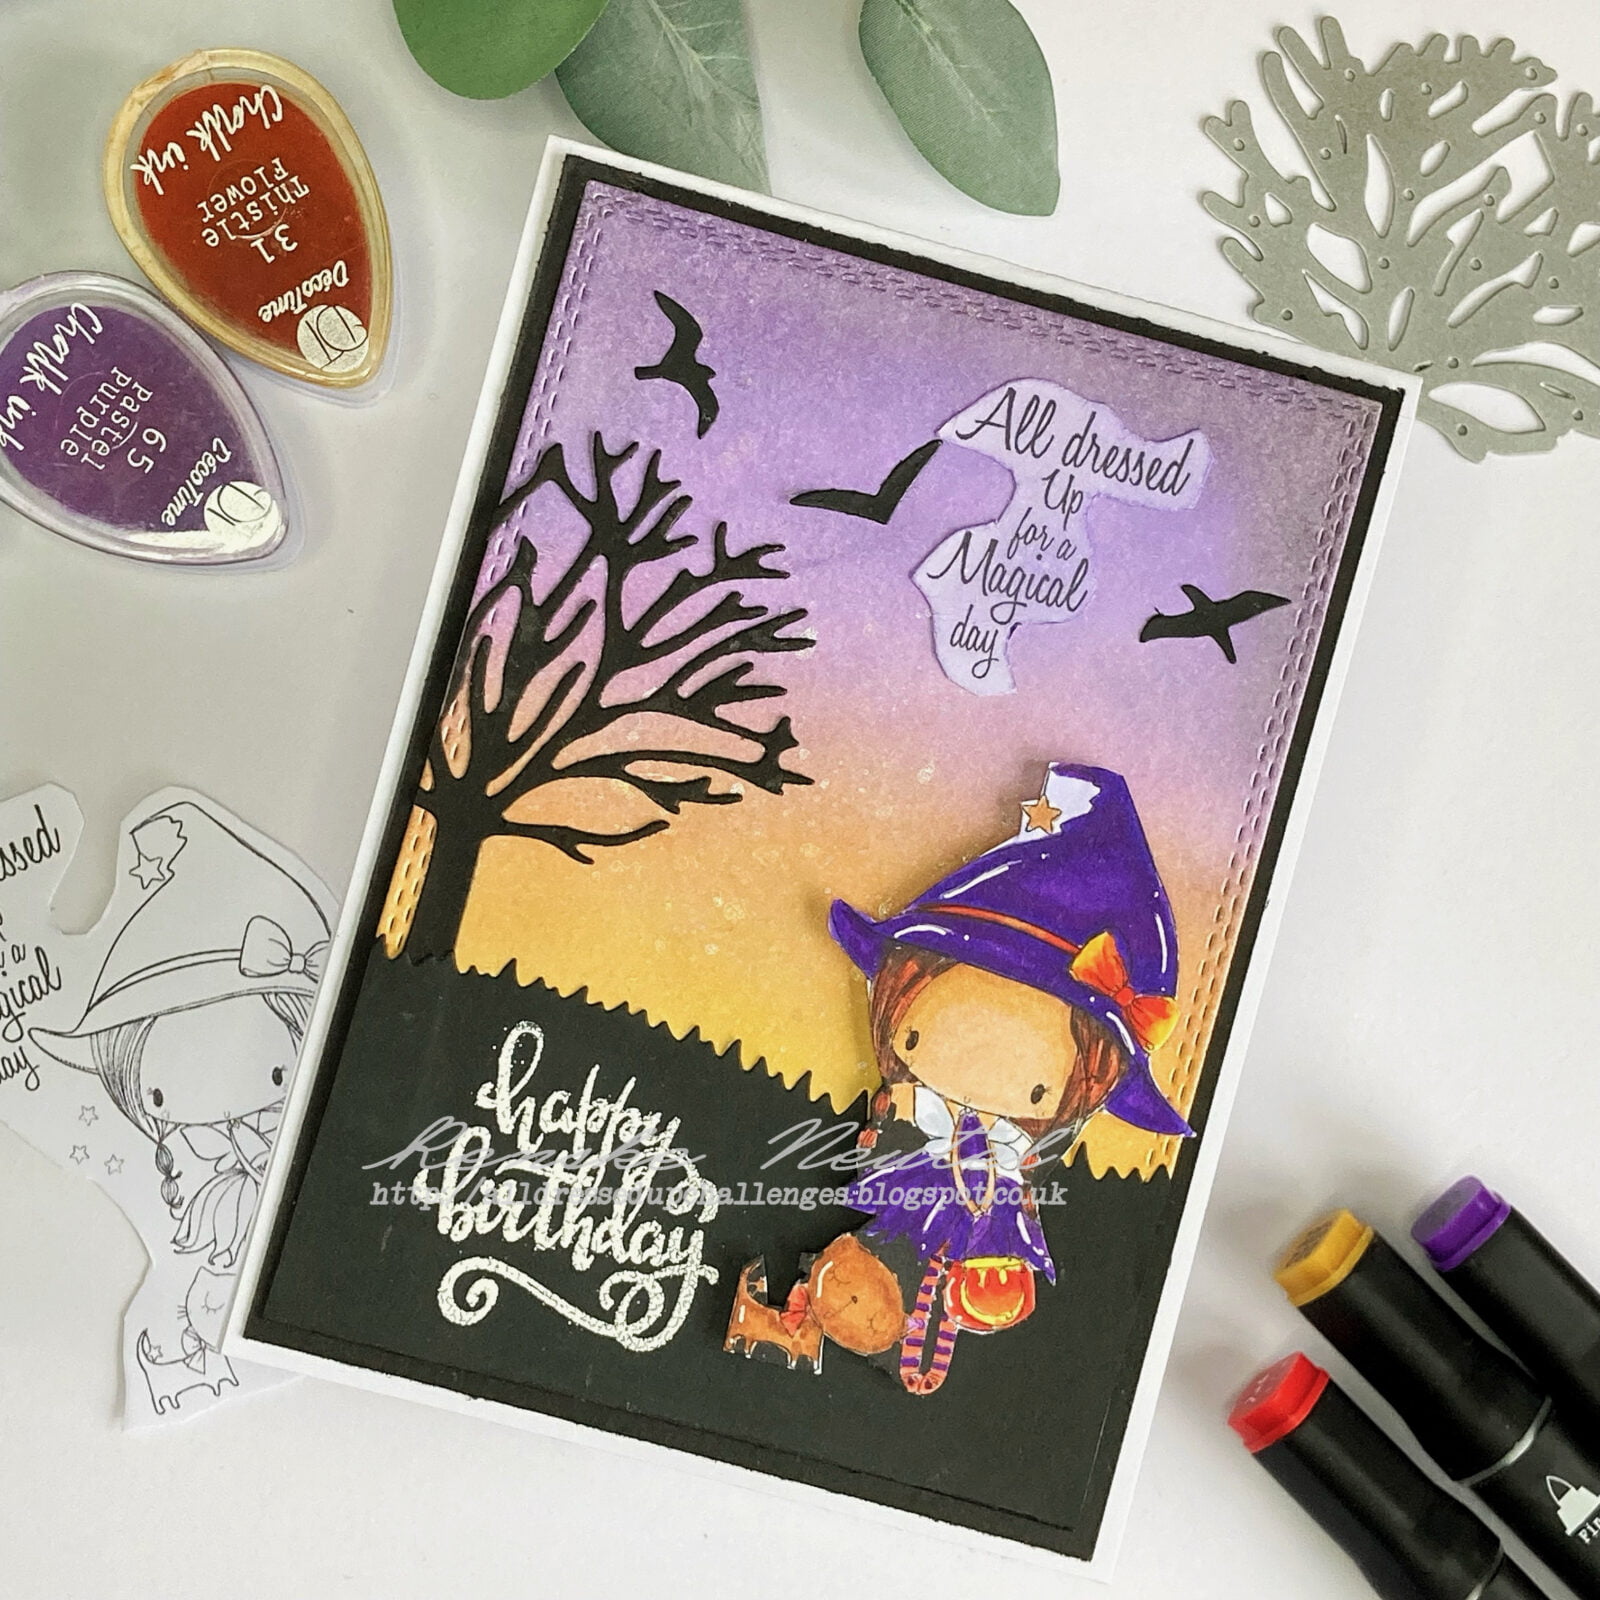
Today I am sharing this Halloween birthday card with you for the new challenge in the All Dressed Up Stamps Facebook group. The theme of this challenge is to use the colours orange and/or purple.
In this tutorial, I will guide you through the process of making this unique card, perfect for celebrating the magic of Halloween and the joy of a birthday. Get ready for a crafting adventure and let your creativity run wild.
Let’s get started!
Gathering your supplies
Before we start making the card, it is important to gather all the materials and tools you need to make your Halloween birthday card.
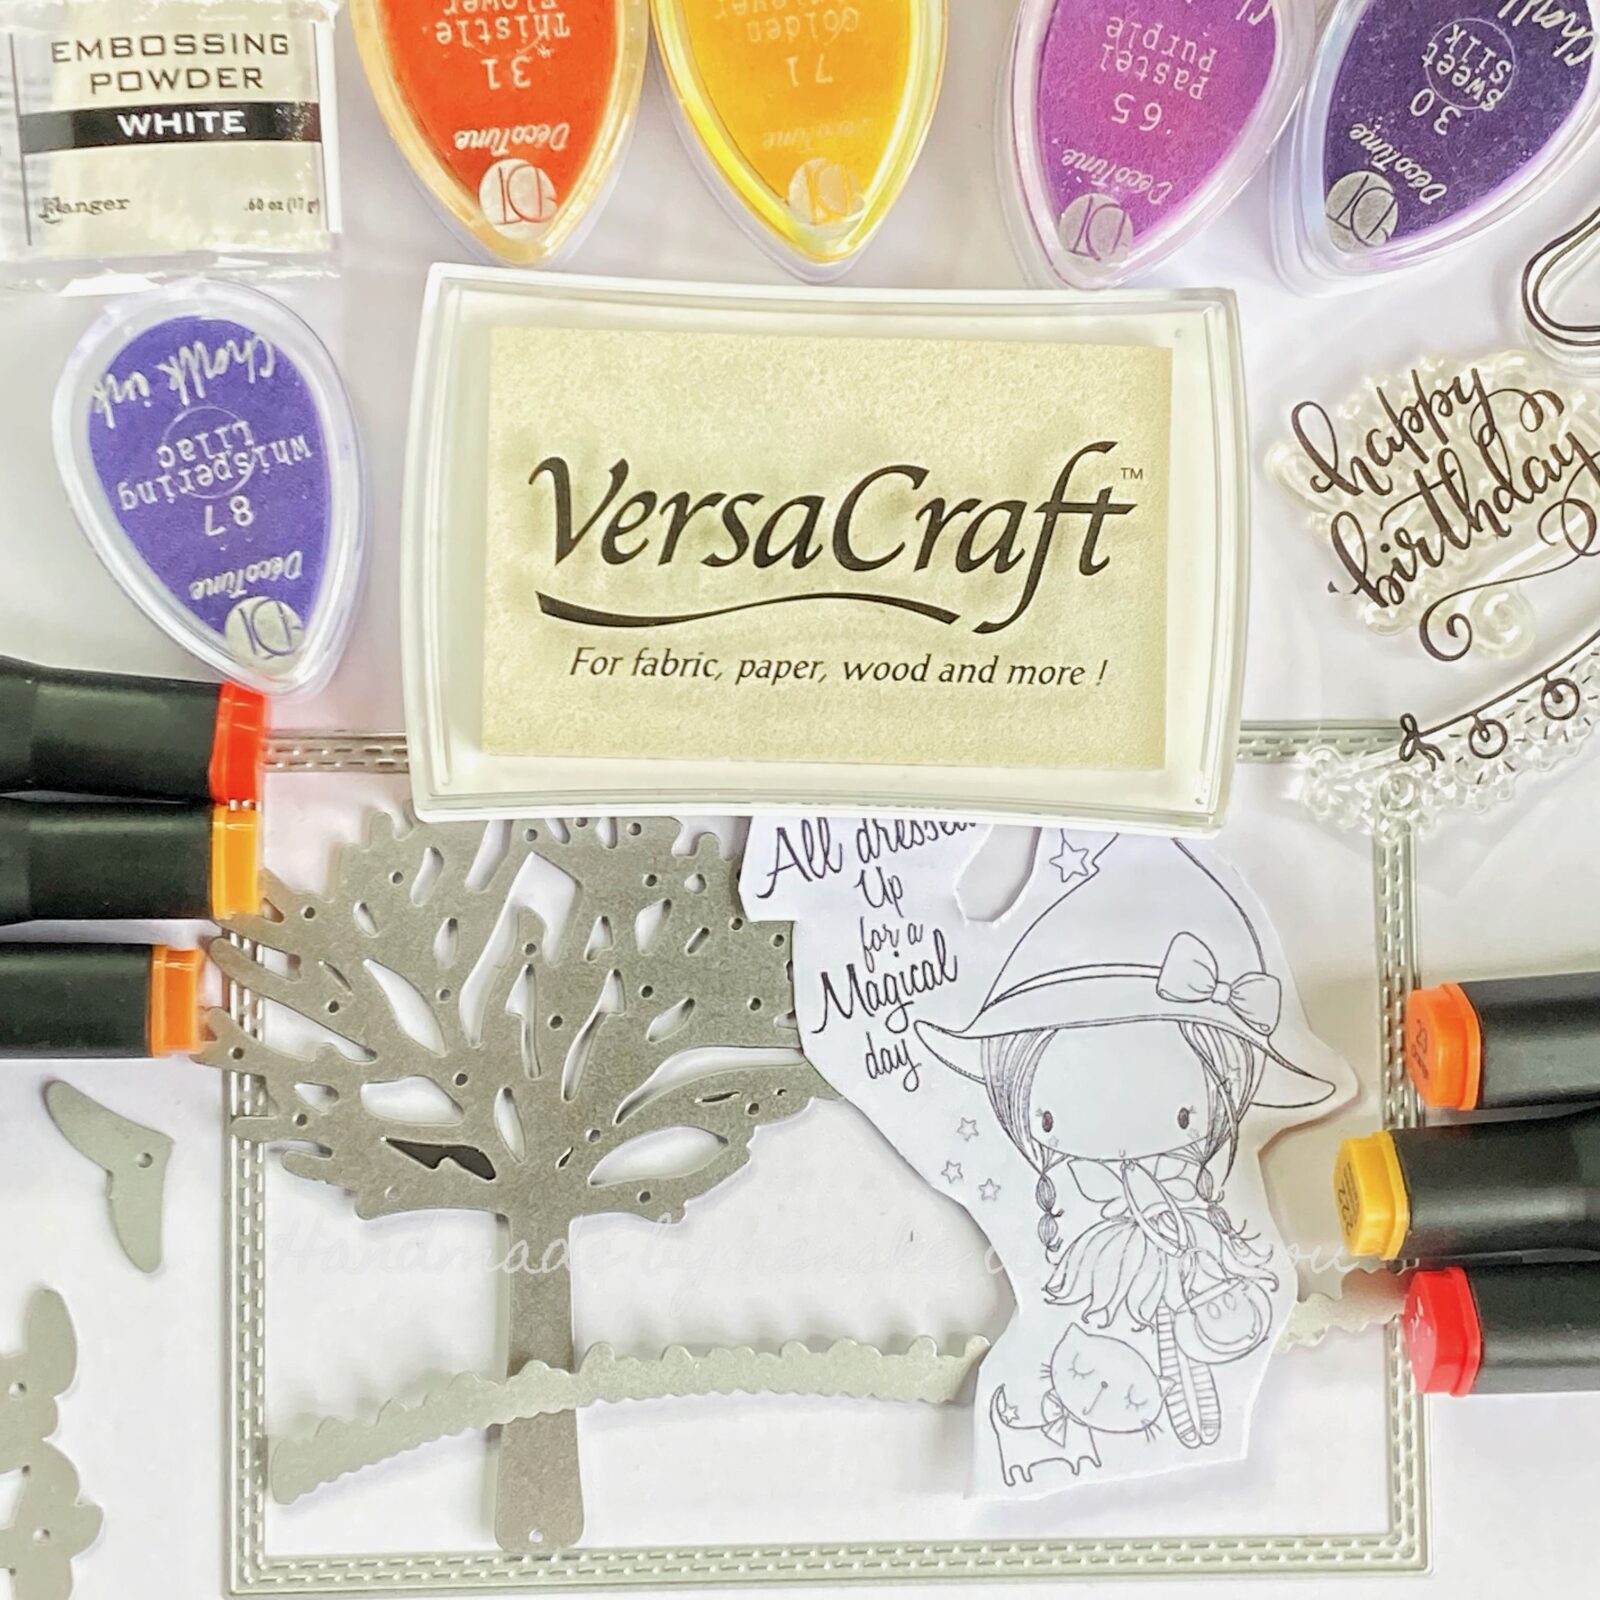
Materials you will need
- White cardstock for the card base (14.8 cm x 10.7 cm when folded).
- Black cardstock measuring 10,2 centimetres by 14,3 centimetres.
- Black card stock to die-cut element from.
- Chalk ink in the following colours: sweet silk, whispering lilac, pastel purple, thistle flower, carrot orange and golden retriever. (You can use any ink and colours you like)
- Metallic paint in white, gold, and purple.
- DCP paper for printing the digital stamp.
- Halloween Dress Up digital stamp from All Dressed Up. (You can use any image you like)
- Versa Craft white ink for heat embossing.
- White Embossing Powder for sentiment.
- Foam tape for dimension.
- Twin Markers from Decotime to colour in. You can use any colour medium you like.
Tools you will need
- A stitched rectangle to make the background panel (9.8 cm x 13.7 cm). You can also cut the rectangle with a crafting knife.
- A die-cutting machine to cut out different elements.
- Heat gun for embossing.
- A pair of scissors for cutting.
- A belly roll pen 08 to apply highlights.
All the products I use, I will link below.
Now that you have gathered all the materials, it’s time to get started on this step-by-step tutorial.
Crafting your Halloween Birthday card: Step-by-Step instructions.
Now that you have gathered all your crafting supplies and tools, it’s time to roll up your sleeves and start making your Halloween birthday card. I will guide you through every step of the process to ensure you get an enchanting result.
Creating the background.
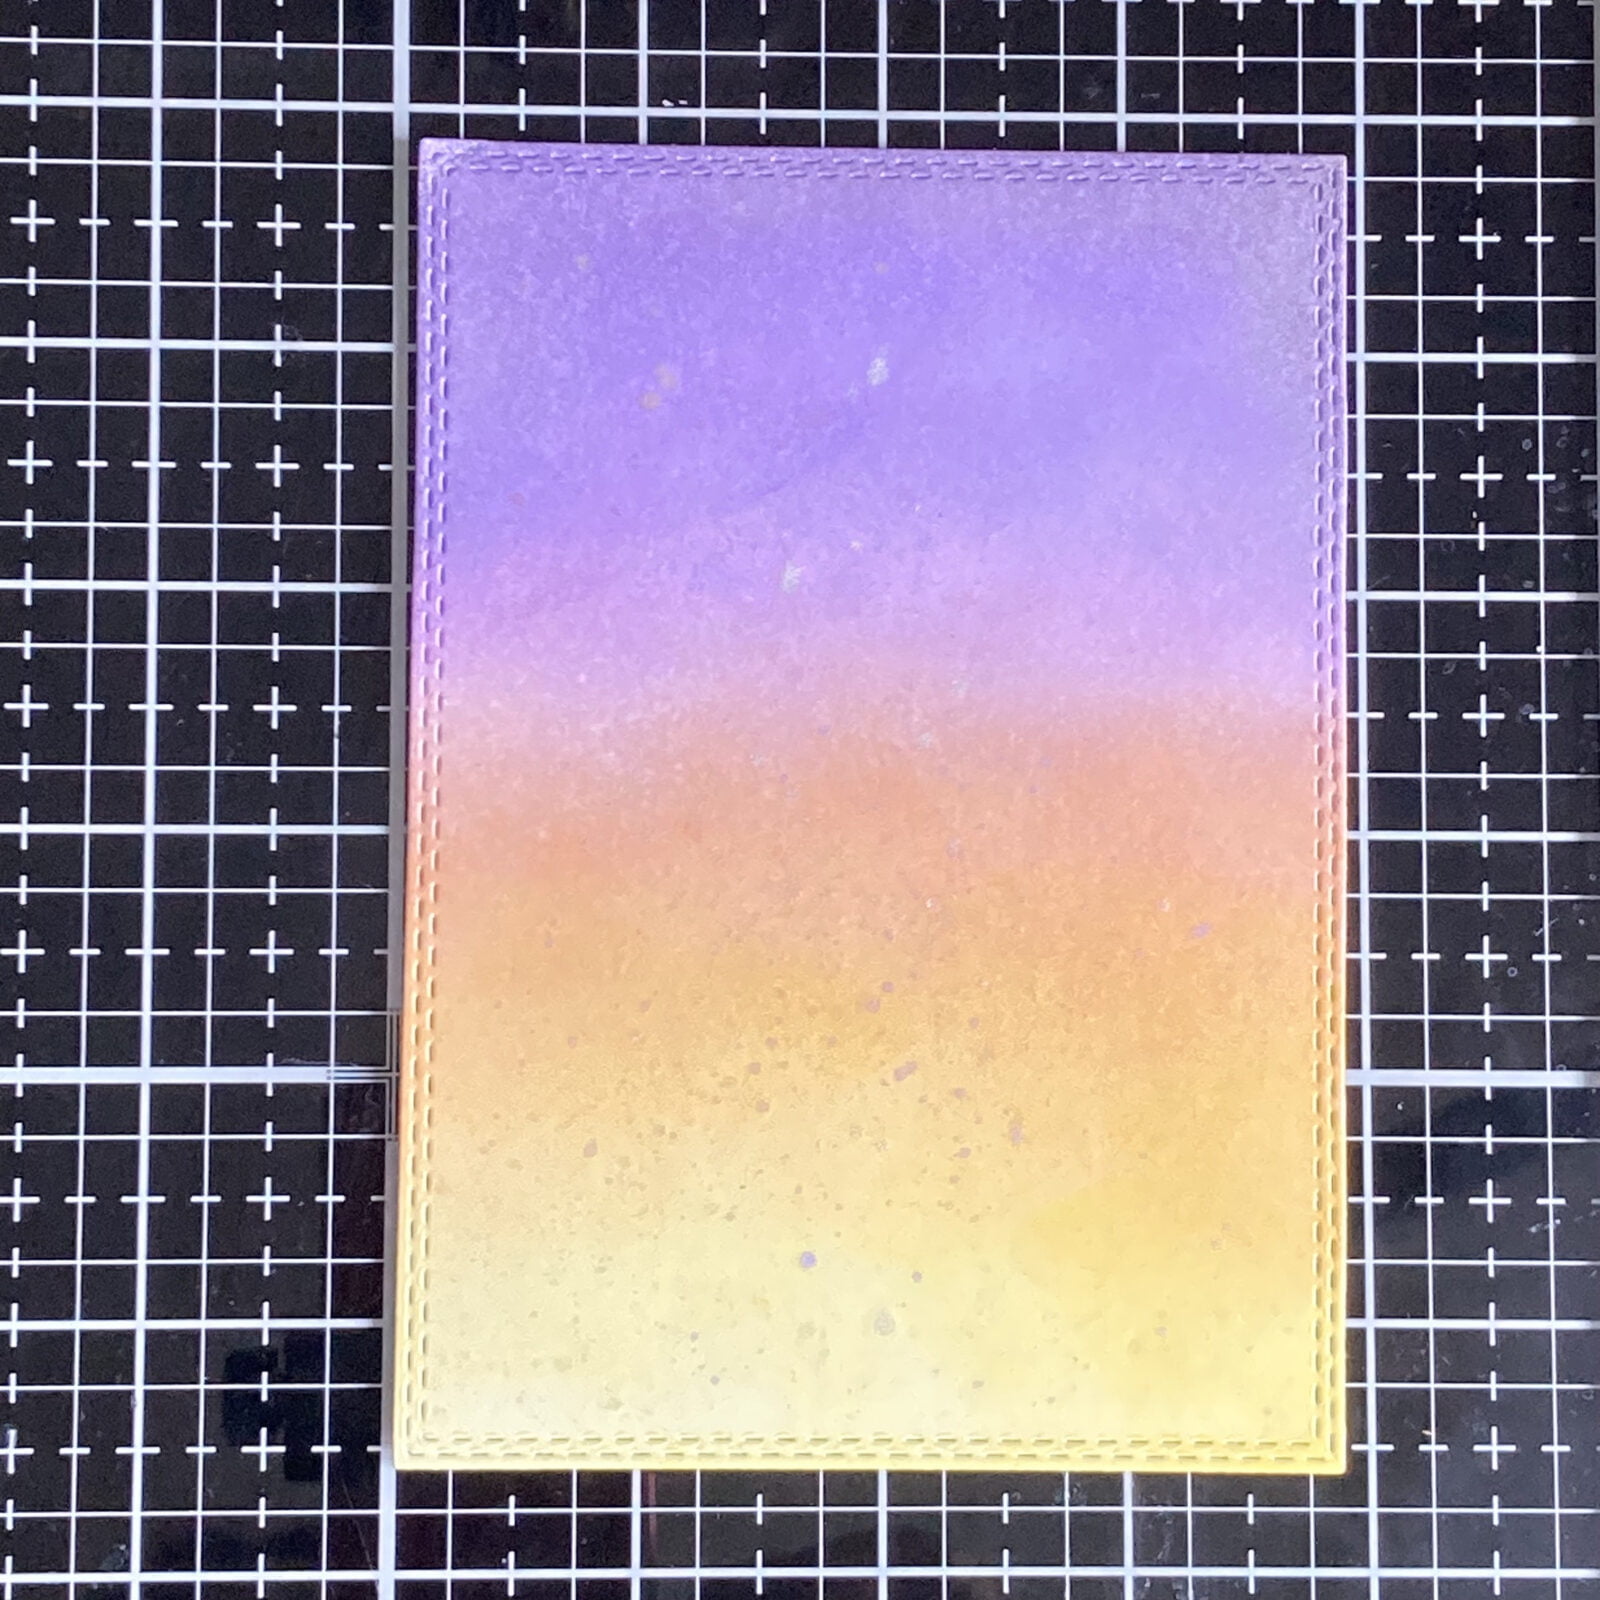
- Start by cutting a panel of white cardstock using the stitched rectangle. In my case, the size of the die cut is 9.8 cm x 13.7 cm.
- Now it is time to apply chalk ink to the background. Apply chalk ink to the background, starting with the darkest purple at the top and gradually moving to yellow at the bottom.
- Add magical flair by splashing metallic paint in white, gold and purple over the inked background. Leave it to dry.
Adding the elements
- Die-cut various elements from black cardstock, including a grass hill, a tree, and flying birds.
- Stamp the text “Happy Birthday” on the black grass hill with white Versa Craft ink. Sprinkle the white embossing powder on top and heat with your heat gun. This will make the sentiment stand out through the black background.
- Place the tree on your card, making sure it extends over the edge of the card. Cut off the part that falls over the card.
- Cover the bottom of the tree with the black grass mound, and glue it to the bottom of your background panel.
- Cut out the text “All dressed up for a magical day”. The white background is a bit too bright for this card, so I decided to edit the sentiment with purple ink. Now it blends nicely into the background. Around the sentiment, I place the black birds.
Colouring the digital stamp Halloween Dress Up
- Print the digital stamp Halloween Dress Up on DCP paper.
- Get creative with your Alcohol markers or another colour medium. I used my Twin Markers to colour this digital stamp. I used the following colour combinations:
- Skin: Tanned skin (260), peachy pink (259), salmon pink (25), beige (29).
- Hair (Hair): Bronze (99), Sienna burnt (95), Cardinal (244), Tiger Lily (211).
- Hat and Dress (Hat and Dress): Ultra Marine (74), Deep Violet (81).
- Wings: Light Sky (189).
- Pumpkin and Bow (Pumpkin and Bow): Pastel Lemon (39), Bittersweet (267), Orange (23), French Vermillion (22).
- Star (Star): Golden Yellow (222).
- Cat (Cat): Sand (107), Rose Beige (97), Barn Red (245).
- Bow of Cat (Bow on Cat): Cardinal (244).
- Leggings (Leggings): Ultra Navy (74), Orange (23).
- Add accents to the hat, dress, cat, and pumpkin with the belly roll pen 08.
With each step and colour choice, your Halloween birthday card comes to life. Let’s go ahead and create a card that reflects the magic of Halloween and the joy of birthdays!
Assembling Your Halloween Card: Bringing it All Together
Now that we have gone through the creative process step by step, it is time to put together your Halloween birthday card and put everything together. Follow these simple steps to complete your card:
Step 1: Preparing the Card Base
Take your white cardstock, which should measure 14.8 cm x 10.7 cm when folded. You can use a ready-made base or make your own card base. We will make a card base with a fold at the top. To make this, you’ll need an A4-sized paper. You cut the short side at 10.5 centimetres. Fold the card in half and you have your card base.
Step 2: Adding the Background Panel
Take the background panel you made earlier that measures 9.8 cm x 13.7 cm. Apply glue to the backing and carefully centre it on the card base, leaving a white border around the edges for a clean and polished look.
Step 3: Placing the Coloured Digital Stamp
Take the Halloween Dress Up digital stamp that you have previously carefully coloured and cut out. Use foam tape to add dimension and place it on the scene of your card.
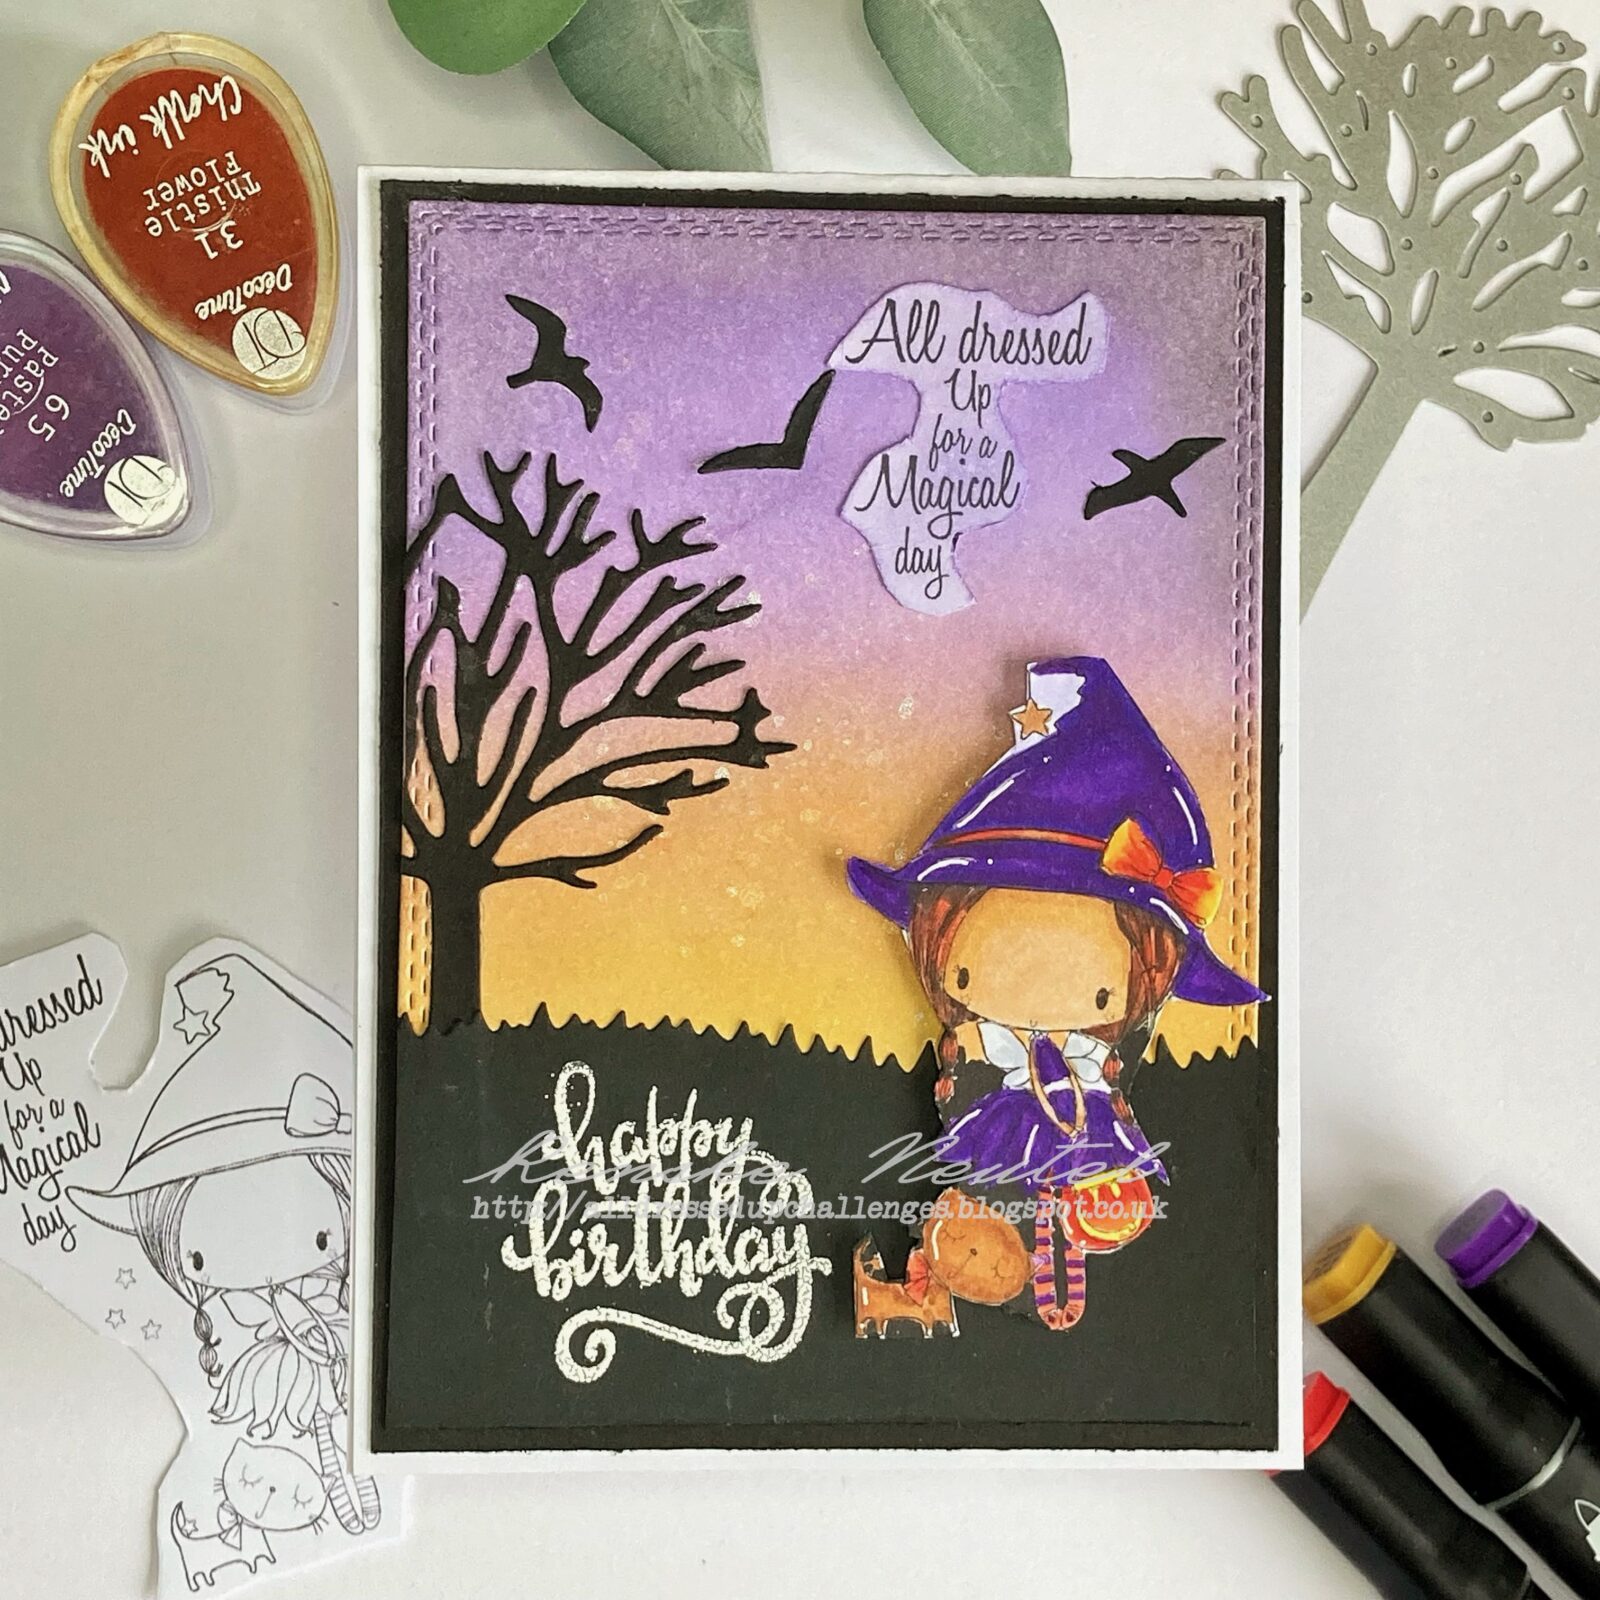
And there you have it! Your unique Halloween birthday card is complete and ready to be shared with someone special.
Conclusion: Join the Challenge and Stay Inspired
The card has been created, and now it’s time for you to have an enjoyable time.
Join the Challenge: Your Turn to Shine
I invite you to take up the challenge! Join the “Orange and purple colours” challenge from the All Dressed Up Facebook group. The only requirement is that you use a product from All Dressed Up Stamps, as we did in this project. It’s your chance to share your creative flair and become part of a thriving crafting community.
More Crafting Adventures Await
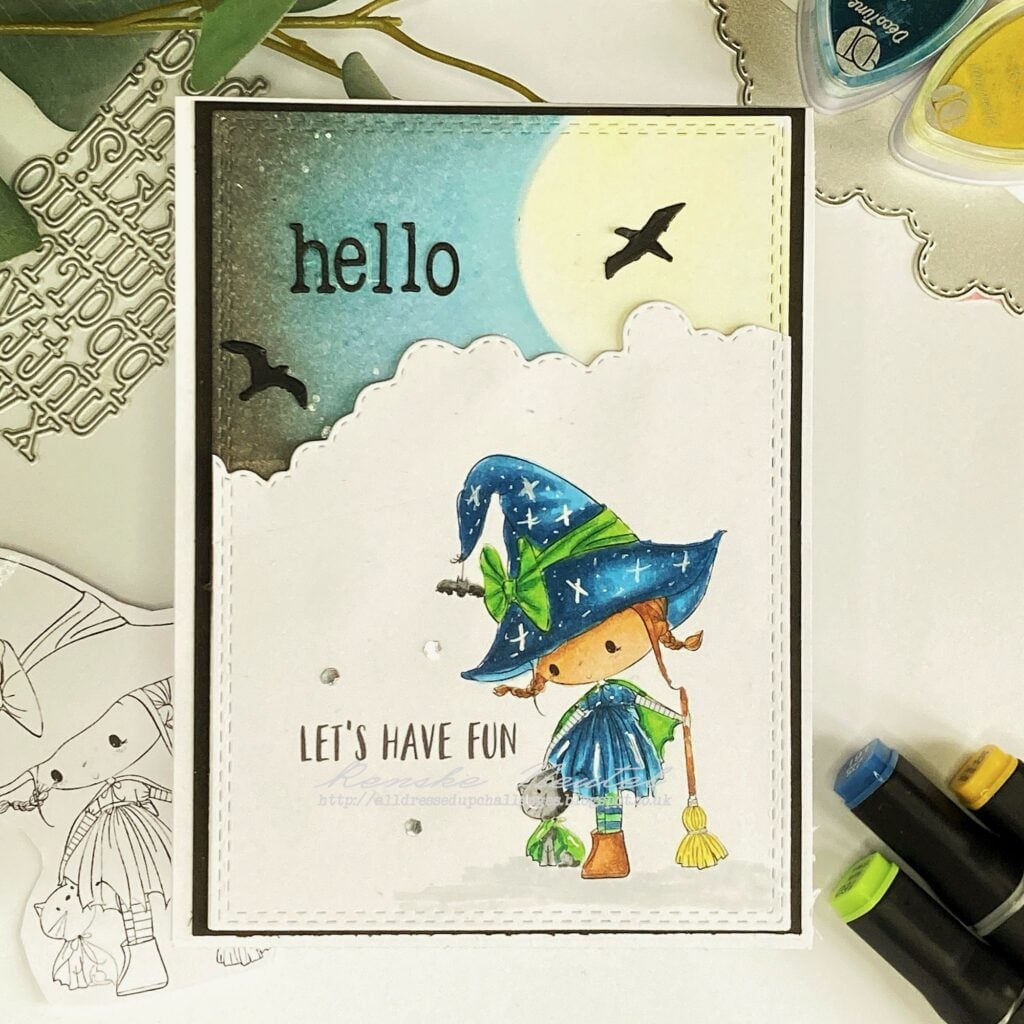
Looking for more crafting inspiration? Here are some more cards I’ve made. Be sure to look there too for even more inspiration.
Products used for this Halloween Birthday card
Affiliate Disclosure: This post contains affiliate links, which means I may earn a small commission at no extra cost if you purchase through these links. I only recommend products and services that I use and trust. Your support helps me continue to provide free tutorials and creative inspiration. Thank you for supporting my blog and helping me to keep sharing my passion for card making!
Affiliate products used
Magical Day Digital stamp All Dressed Up Stamps

White embossing powder from Ranger

White Gelly Roll Pen 08

Non-Affiliate Products Used
- Tree die form Scrapfever.
- Rectangle die from Craft & Deco.
- Grass die from Aveccreative.
- Birds die from Aveccreative
- Chalk ink from Decotime
- Twin markers (alcohol markers) from Decotime.
I would like to enter my card in the following challenges.
- Make My Monday Challenge Blog: Create your own background
- A Place To Start: Anything goes
- Krafty Chicks Challenge: All Occasions
- 613 Avenue Create: Anything goes + autumn colors
- We Love Stamping: Mood board with orange en purple colours.
- A Perfect Time To Craft Open Challenge: Anything goes
- Classic Design Challenge Blog: Anything goes
- Crafts Galore Encore Challenge Blog : Anything goes
- SheepSki Designs Challenges: Autumn or Halloween colours.
- Creatalicious Challenges: Anything goes + autumn colors
- Crafting Happiness Challenges: Halloween
- Most Magical Time of the Year!: Anything Christmas and Halloween goes
Great background and scene.
Thanks for joining us at A Place to Start.
Helen x
DT
Thanks
Sp Kingstown can be accelerated by new and wonderful luxury brands, technology, luxury apartment sustainability, and community luxury. The Sp Kingstown project, which morphed a sleepy neighborhood into a hive of economic activity, shows the importance of teamwork, vision, and the
https://shapoorjipallonji.ind.in/shapoorji-pallonji-wildernest/
Gorgeous background for this really cute Halloween card.
Love your inkwork and colouring!
We are always super happy to see every entry in our mailbox at 613 Avenue Create.
Please do come back again!
The very best of luck with your entry.
Jackie, DT member at 613 xx
Your background is very pretty as a foil for the rest of your elements. You also put up a great tutorial for others to follow. Lovely little card. Thanks for joining us at MMM, Johanna DT
Thank you so much ❤️
You have created a really sweet scene on your Birthday card, many thanks for being inspired by our mood board at We Love Stamping October challenge.
B x
What a great background for your little witch! I love these blended landscapes, so gorgeous! Love your spooky silhouette landscape, too! Thanks so much for playing at Make My Monday!
Je hebt er weer een mooi geheel van gemaakt!
Vooral die achtergrond is supermooi!
Sp Kingstown can be accelerated by new and wonderful luxury brands, technology, luxury apartment sustainability, and community luxury. The Sp Kingstown project, which morphed a sleepy neighborhood into a hive of economic activity, shows the importance of teamwork, vision, and the
https://shapoorjipallonji.ind.in/shapoorji-pallonji-wildernest/