
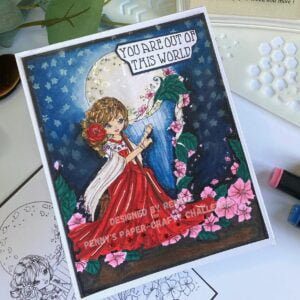
Hello everyone. Welcome to a new blog post for a new challenge on the Penny’s Paper-Crafty challenge blog. I created this dreamy magical card for the new challenge. In this article For this challenge, we have two sponsors again.
Colour of Love

Ching-Chou Kuik Digital Stamps
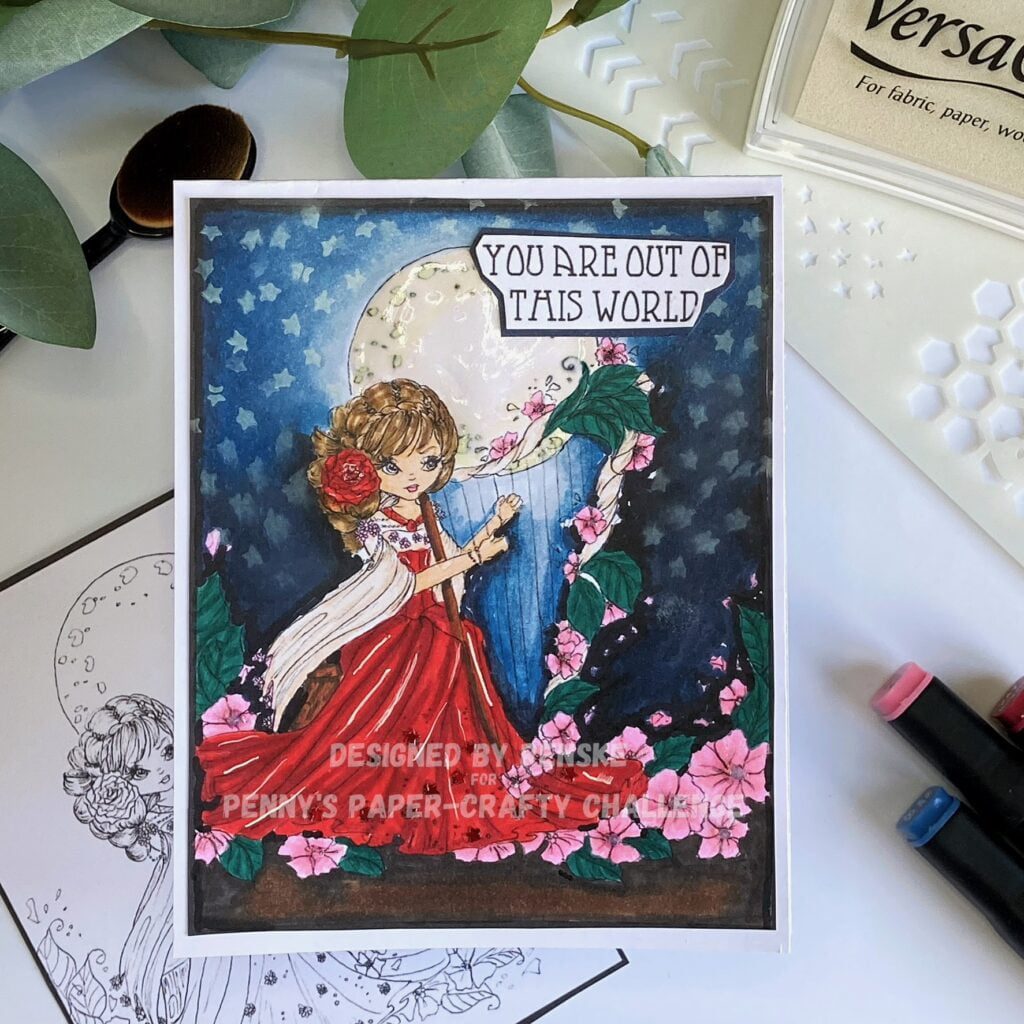
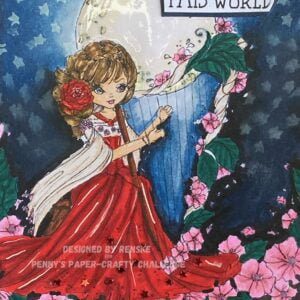
I got to work with the digital stamp “Harper’s Moon Melancholy Moppet“. There is something magical about this stamp, isn’t there?
This article focuses on how to get started with great digital stamps to create a beautiful handmade card. Let’s get into it.
Gathering What You Need: Materials and Tools
Before we get started, we need to gather our supplies. To make this card, you will need the following:
- Colouring medium: I used my alcohol markers, but you can use any colouring medium you like.
- A blending tool. I used a blending brush, but you can use any blending tool you have.
- A stencil with stars
- White pigment ink
- Shimmer pen.
- Paper glaze.
Okay, now that we have our tools we can begin.
Unleashing Creativity with Large Digital Stamps
We begin with some attention to our sponsor Colour of Love. I got to work with their digital stamp. You can find great digital stamps here. They are coloring pages. But you can also beautifully use these large digital stamps for your homemade cards. You already have a ready-made scene that you can use on your card. Of course, if you love colouring, these digital stamps are great to make. And let me just love colouring.

Having trouble editing or colouring digital stamps? Download my free guide for extra tips and tricks to help you perfect your digital stamps!
Crafting the Night Sky: A Symphony of Color and Stars
Creating the background of our enchanting card can be a challenge, especially if the design covers the entire card. It is then often difficult to get started with y ink. And these stamps are often tricky to mask.
So for this card, I had to get to work with my alcohol markers to create a night sky. For this sky, I used the following colour combination:
- Dark Denim Blue (195)
- Dark Sky (191)
- Midi Sky (190)
- Light Sky (189)
Around the moon, I use the lightest colour Light Sky. This way, you create the light around the moon. The further out I go, the darker the colour I use. Try to make the alcohol markers blend in nicely.
But what is a night sky without stars? To create a bit of magic, stars do belong. I recently bought a new stencil that has all sorts of different patterns on it. One of them is stars. I use this to create my starry sky. I use my blending brush to run my white pigment ink over the stencil. And this way, beautiful stars appear in the night sky. I like to create a bit of a dreamy effect. So after I have applied all the stars, I go over the stars with another swirling motion with my brush. The hard tone of the white then disappears a little more and the stars are smeared out a little.
The art of coloring: using different coloring combinations to create this magical card
Now comes the most important part of the card, the colouring. If the digital stamp is large, colouring will determine how your card will look. In this section, I will show you which color combinations I used.
- Background Sky: Light Sky (189), Midi Sky (190), Dark Sky (191), Dark Denim Blue (195), and Black (120)
- Moon: Pearl White (109), Buttercup Yellow (141), and Pale Yellow (38).
- Dress: Cardinal (244), English Red (249), and Burgundy (247).
- Scarf: Pearl White (109), and Barely Beige (29).
- Leaves: Forest Green (50), Deep Green (52), and Dark Green (51).
- Hair: Barely Beige (29), Walnut (100), Brown Grey (104), and Clay (116).
Each combination has been carefully chosen to give the card the look I want.
Adding the sparkling details
To make our creation a bit more interesting and magical, we are going to add some details.
- We use our white gel pen to apply white highlights to the dress. It just seems that the moon gives some shine to certain parts of the dress.
- Second, we add paper glaze on the moon. It gives the moon just like magic because when the light falls on it it gives a certain shine.
- Third, we add glitter to our pink flowers. It’s very subtle, but just enough to add some extra sparkle here.
- Finally, we use the glitter 3D drops to apply a 3D drop in the middle of the flowers.
I like it when my creations have a touch of sparkle.
Adding the sentiment
It’s time for the last part, namely the text for the card. This time the text is “You are out of this world”. I found this one among all kinds of texts that I thought was appropriate and decided to use it. I would like a blue border around the text. So I cut out the text. On a piece of white paper, I coloured with my alcohol marker Dark Denim blue just big enough that my text fit on it. I stick it on top and cut it with a small border around my text. Now I have the same color border that I used for the sky.
The power of a large digital stamp
Don’t be afraid of big digital stamps. It’s an ideal way to create a scene on your card and instantly gives you a setting to tell a story. I hope this article has given you ideas to use such digital stamps and let them shine. Be sure to let me know in the comments what you think of such large stamps and if you plan to use them.
Invitation to the challenge
I hereby cordially invite you to join our challenge on the Penny’s Paper-Crafty challenge blog. The theme is always Anything goes, so you can make whatever you want. Hope to see your creations there.
Happy Crafting!
Products Used with affiliate links
Affiliate Disclosure: This post contains affiliate links, which means I may earn a small commission at no extra cost if you purchase through these links. I only recommend products and services that I use and trust. Your support helps me continue to provide free tutorials and creative inspiration. Thank you for supporting my blog and helping me to keep sharing my passion for card making!
VersaCraft White ink pad

White Gelly Roll Pen 08

Nuvo Aqua Shimmer Pen

Products used without affiliate links
- Alcohol markers (Twinmarkers) from Decotimecrafts
- Stencil Dutch Doobadoo Mask Art Slimline Grunge patroon
- 3D drops
- Paperglaze
I would like to enter my card in the following challenges:
- Passion for Markers: Feminine
- Creative Knockouts: Anything goes
- Krafty Chicks Challenge: All occasions
- Lil Patch of Crafty Friends Challenge …: Anything goes
- The Cutie Pie Challenge Blog: Stamps and/or Stars
- Crafter’s Cafe: Colors of the garden
- Crafting Happiness Challenges: Anything goes
Wow! beautifully coloured. card. Thanks for joining us as The Crafter’s Café this month for our Colours of the Garden challenge.
Thanks
A really beautiful card Renske. The image is indeed magical and your colouring is perfect. I love the background you created too. Thanks for sharing with us at Passion for Markers this week. Hugs, Denise x
Beautiful feminine card and yes I agree – the image is very magical!
Thanks for sharing at PFM
Natx
Het is weer een prachtig kaartje!
Dank je wel
A beautiful card and colouring. Thanks for joining Passion for Markers. Elaine
Thank you ❤️