
As the school year approaches, there’s a special excitement—a fresh start, new adventures, and the joy of reconnecting with friends and teachers. What better way to celebrate this season of renewal than with a handcrafted card that truly captures the spirit of going back to school? Imagine the delight of receiving a card that’s not only filled with warm wishes but also lovingly crafted just for the occasion.
In this step-by-step tutorial, we will make a fun and charming handmade back-to-school card using the adorable “Student/School Little Dude” digital stamp set from Polkadoodles. I will walk you through each step with clear, easy-to-follow instructions. We’ll explore techniques for colouring, layering, and embellishing, and you feel confident and inspired throughout the process.
The goal is to make crafting this card an enjoyable and rewarding experience. By the end of this tutorial, you’ll not only have a beautiful card ready to brighten someone’s day but also new skills and ideas to fuel your creative journey. So, grab your supplies and let’s start on this delightful project together!
- Materials Needed
- Step-by-Step Tutorial of this back-to-school card
- Let’s Get Creative Together
- Polkadoodles product in the spotlight
- I would like to enter my card in the following challenges
Materials Needed
Crafting a stunning handmade back-to-school card involves gathering the right materials to bring your vision to life. Here’s a rundown of the essentials you’ll need for this project:
The Polkadoodles Product
- Student/School Little Dude digital stamp bundle set, including a digital image of a young student, coordinating pattern papers, and sentiments.
- Purchase the “Student/School Little Dude” digital stamp set [here](Affiliate Link).
Additional Supplies
Besides the Polkadoodles products, I did not use any other materials.
- Colouring medium: Alcohol markers were used for this project, but you can substitute them with any colouring medium you like.
- Dies: You’ll need a rectangle die, a scalloped circle die, and a banner die for die-cutting out shapes and adding details. If you don’t have dies, you can use a paper trimmer or scissors to cut shapes manually or use pre-cut embellishments or stickers.
- Foam Tape: This will add dimension to your card by raising certain elements above the surface. If you don’t have foam tape, you can use pieces of paper cut into small pieces or double-sided adhesive dots.
- Glue and Sticky Tape: To securely adhere papers and embellishments. You can use liquid glue, glue sticks, or other adhesive runners as alternatives to sticky tape.
- Rhinestones: Gold rhinestones will add sparkle to your card, but you can use any embellishments you prefer. If you don’t have rhinestones, consider using sequins, enamel dots, or metallic stickers for a similar decorative effect.
With these materials, you’ll be well-prepared to craft a visually appealing and thematically fitting handmade back-to-school card. Whether you use the exact products listed or explore alternatives, the goal is to create something that brings a smile and captures the excitement of the back-to-school season.
Step-by-Step Tutorial of this back-to-school card
This step-by-step guide will show you how to create a charming handmade back-to-school card from start to finish. We will cover every aspect of the card-making process, providing detailed instructions to help you achieve a polished final product.
By following this tutorial, you will gain the skills to craft a fun and visually appealing card that is perfect for the back-to-school season. Let’s get started and make something special!
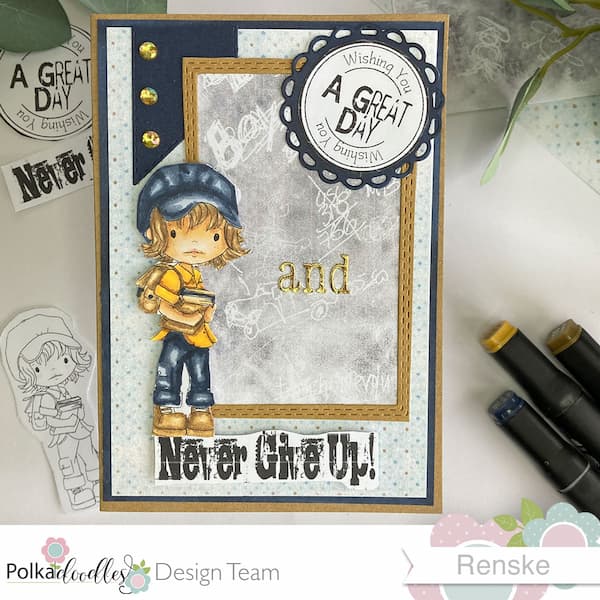
Step 1: Printing and Coloring the Digital Stamp
In this first step, we’ll prepare the digital stamp Student/School Little Dude for colouring. This involves printing the image onto suitable paper and bringing it to life with vibrant colours. Follow these detailed instructions to ensure your digital stamp is perfectly printed and coloured for your card.
Print the Digital Stamp
Start by printing your chosen digital stamp at a height of 8 cm on DCP paper. DCP paper is ideal for this process because it works well with alcohol markers, ensuring smooth colour application and minimizing bleeding.
Tip: For optimal results, use high-quality settings on your printer to achieve a crisp image. If you’re using other colouring mediums, such as watercolours or coloured pencils, consider selecting paper specifically suited for those mediums to avoid issues with smudging or absorption.
Colour the Image
Use alcohol markers to bring your digital stamp to life. Here are the specific colour combinations and techniques for different parts of the image:
- Skin: Tanned Skin, Peachy Blush, Salmon Pink, and Pale Cream. Blend these shades to achieve a natural and smooth skin tone.
- Hair: Pale Cream, Brown Grey, Walnut, and Clay. Use the darker shades for roots and highlights to create depth and dimension in the hair.
- Shirt: Pastel Lemon, Lemon Yellow, and Golden Yellow. Layer these colours to add vibrancy and texture to the shirt.
- Pants and Hat: Light Sky, Light Denim Blue, and Dark Denim Blue. Apply these colours to create a gradient effect, giving the appearance of shaded fabric.
- Shoes, Bag, and Books: Pale Cream and Barn Red. Combine these colours to differentiate the items and add contrast.
Cut the Image
After colouring, carefully cut out the image without leaving a white border around the edges. This approach will help the coloured image blend seamlessly with your card’s design.
Tip For clean cutting, use sharp, precision scissors or a craft knife. Take your time with intricate details to ensure a smooth finish. If cutting around small details is challenging, consider using a fine-tip craft knife for better control.

Step 2: Creating the Card Base and Layers
In this step, you’ll create the foundation for your card by preparing the card base and adding layers. This process will help give your card a polished look and provide a strong backdrop for your embellishments.
Prepare the Card Base
Begin with a kraft card base measuring 10.5 cm x 14.8 cm. Kraft paper is an excellent option for a card targeted towards a boy or a man, as it adds a rugged, masculine touch. You can use a pre-cut kraft card base or make your own by cutting a piece of kraft paper to 21 cm x 14.8 cm, scoring at 10.5 cm along the longer side, and folding it in half.
Tips: To achieve a crisp fold, employ a bone folder or scoring tool for a smooth and even fold. The natural texture of kraft paper complements the back-to-school theme and adds durability and style.
Create and Attach the Layers
Add two layers to your card: a blue layer and a pattern paper layer.
- Creating the blue layer: If you don’t have suitable blue paper, you can cut the first layer out of white paper with the measurements 10 cm by 14.3 cm, and then colour the edges with a Dark Denim Blue alcohol marker to match the digital stamp perfectly. That is what I did, but you can also use a blue card stock.
- Cut the pattern paper: Cut the pattern paper to 9.5 centimetres by 13.8 centimetres.
- Layer the papers together: Once both papers are cut to size, you can attach the pattern paper to the blue paper.
Now that the base is ready and the layers have been created, you can proceed to the next step where we will make the chalkboard.
Step 3: Assembling the Frame and Chalkboard Paper
In this step, you will create a charming frame to highlight the chalkboard paper, adding a fun and thematic element to your card. This will help emphasize the back-to-school theme even more.
Create the Frame
Begin by using a rectangle die to cut a frame from kraft paper. The die will produce a rectangle with a stitched edge, but you need to manually cut out the centre. Carefully cut out the inner part of the rectangle using scissors to form the frame.
Tips: For a clean and precise cut, use a sharp pair of scissors and work slowly. Alternatively, you can use a craft knife and a cutting mat for more control. Ensure that your frame is evenly cut to achieve a professional look.
Attach the Chalkboard Paper
Place the chalkboard pattern paper behind the frame. This will create the impression of a chalkboard surrounded by a rustic frame, perfect for the back-to-school theme.
Tips: Before adhering, ensure the chalkboard paper is cut to fit snugly behind the frame. Use a clear-drying adhesive or double-sided tape to securely attach the paper. Align the edges carefully to avoid any gaps or unevenness.
Step 4: Adding Text
Now that your card base and main elements are assembled, it’s time to add the finishing touches. This step will guide you through adding text and embellishments to enhance your card’s visual appeal and reinforce the back-to-school theme.
Prepare the Text
For this card, you’ll use two sentiments from the digital stamp set: “Wishing you a great day” and “Never Give Up.” The first text is circular, and the second is rectangular.
- Print both texts and cut them out accordingly.
- For the circular text, use a scalloped circle die to create a decorative blue circle to place behind the text. You can use blue card stock or die-cut it from white paper and colour it with the Dark Denim Blue alcohol marker to get a matching colour.
- Align the scalloped circle text in the centre of the die-cut decorative circle.
Make the Golden Letters
To complete the card, add the word “and” in gold letters on the chalkboard area. Use an alphabet die to cut out the letters from gold paper.
Now that we have our text elements ready, it’s time to start putting the card together.
Step 5: Assembling the Card
In this final step, you’ll bring all the elements of your card together, ensuring that everything is securely attached and that your design looks cohesive and polished.
Making the banner
Start by making a banner using a banner die or by cutting it manually from blue card stock.
Assembling the components
- Start by positioning the blue banner in the upper left corner of the card base.
- Place the chalkboard frame slightly off-centre towards the right side of the card base, ensuring that it overlaps a bit with the banner.
- Position the circular sentiment with the text “Wishing you a great day” in the upper right corner, making sure it aligns well with the chalkboard frame. Below the chalkboard frame, attach the “Never Give Up” sentiment using foam tape for added dimension.
- Place the coloured digital stamp image on top of the “Never Give Up” text, using foam tape to give it a raised effect.
- Finally, adhere the golden letters spelling “and” onto the chalkboard area to complete the message.
Placing the embellishments
To complete the card, we place 3 more gold rhinestones. Place this vertically on the banner.
Now that we have placed all the elements on the card, the card is ready to be sent to its recipient.

Let’s Get Creative Together
Crafting a handmade back-to-school card is a journey filled with creativity and joy. It’s not just about the final result, but about the process of bringing your unique vision to life and adding a personal touch to your project.
Join the Polkadoodles Challenge
Ready to show off your creativity? Join the Polkadoodles challenge and share your own back-to-school card creations! Follow these simple rules:
- Create a Card or any papercraft: Of course, we are happy if you use Polkadoodles products, but that is certainly not a requirement to participate in the challenge.
- Share Your Creation: Post a photo of your card or papercraft on the Polkadoodles challenge blog.
We can’t wait to see your unique and inspiring creations!
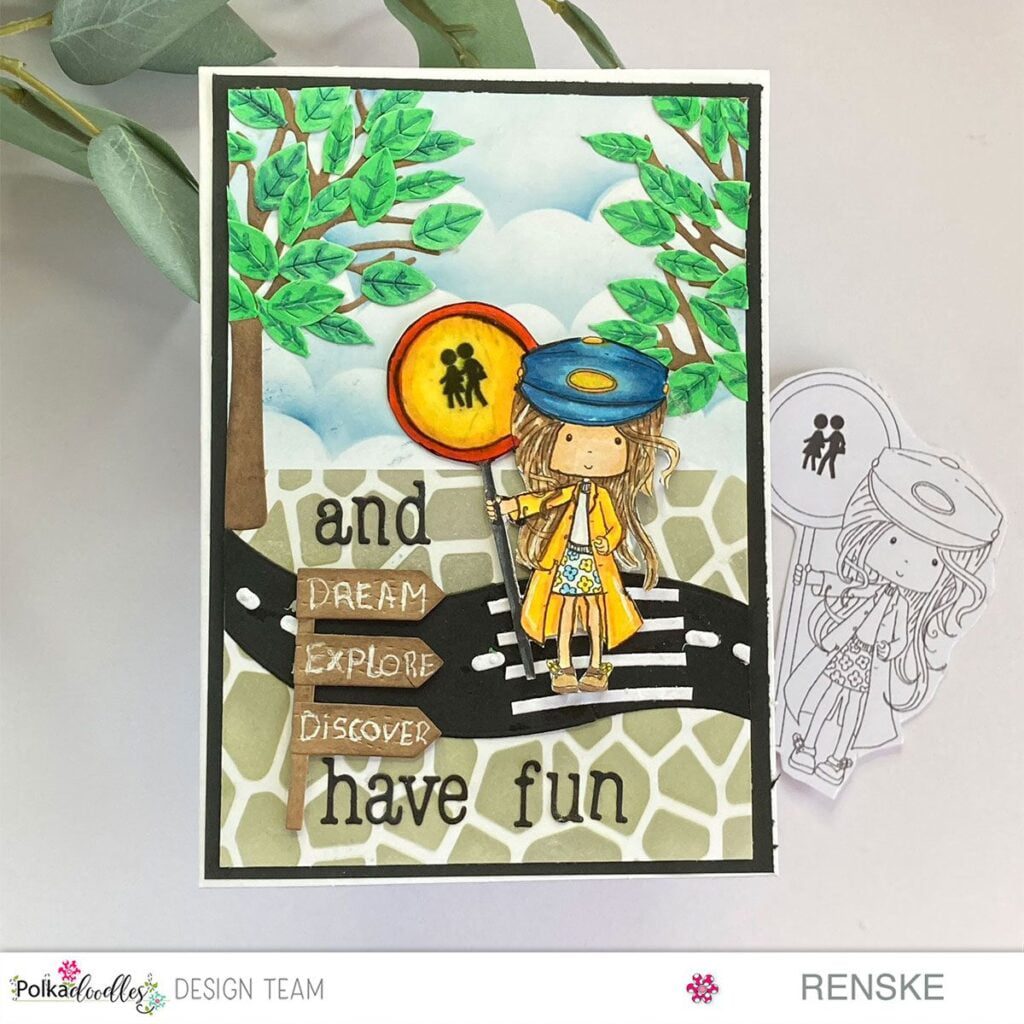
More Handmade Back-to-School Card Inspiration
Looking for additional ideas? Check out these related blog posts for more back-to-school card inspiration:
Polkadoodles product in the spotlight
This time I used a product from Polkadoodles. This is a bundle of a digital stamp and matching pattern papers and sentiments.
Student/School Little Dude digital stamp bundle set

I would like to enter my card in the following challenges
- Make My Monday Challenge Blog: Colouring mediums (I used alcohol markers)
- Krafty Chicks Challenge: Stamps
- A Perfect Time To Craft Open Challenge: Anything goes
- Carlin’s Kaartenparadijs: Anything goes
- Crafts Galore Encore Challenge Blog: Anything goes
- The Cutie Pie Challenge Blog: Beginning with a B (back to school)
Great card – wonderfully coloured.
Thanks for joining us at the Crafts Galore Encore Challenge.
Helen x
DT
Thanks so much
Fabulous card – so beautifully coloured. I love the encouraging sentiment too. Thanks for joining us at Make my Monday. Love Dawn x
Thanks a lot
Gorgeous card & great sentiment! Thank you for sharing with us @ Make My Monday.
Thank you