
Some links in this post are affiliate links. This means I may earn a small commission if you make a purchase, at no extra cost to you. I only recommend products I use and genuinely enjoy in my own cardmaking. Read more here.
Finding the perfect card for a boy can be tough, especially one that truly reflects his personality.. Whether for a birthday, a back-to-school card, or to celebrate his love for football, a handmade card is always a thoughtful and unique choice. With its versatile design, this football-themed card fits a range of occasions.
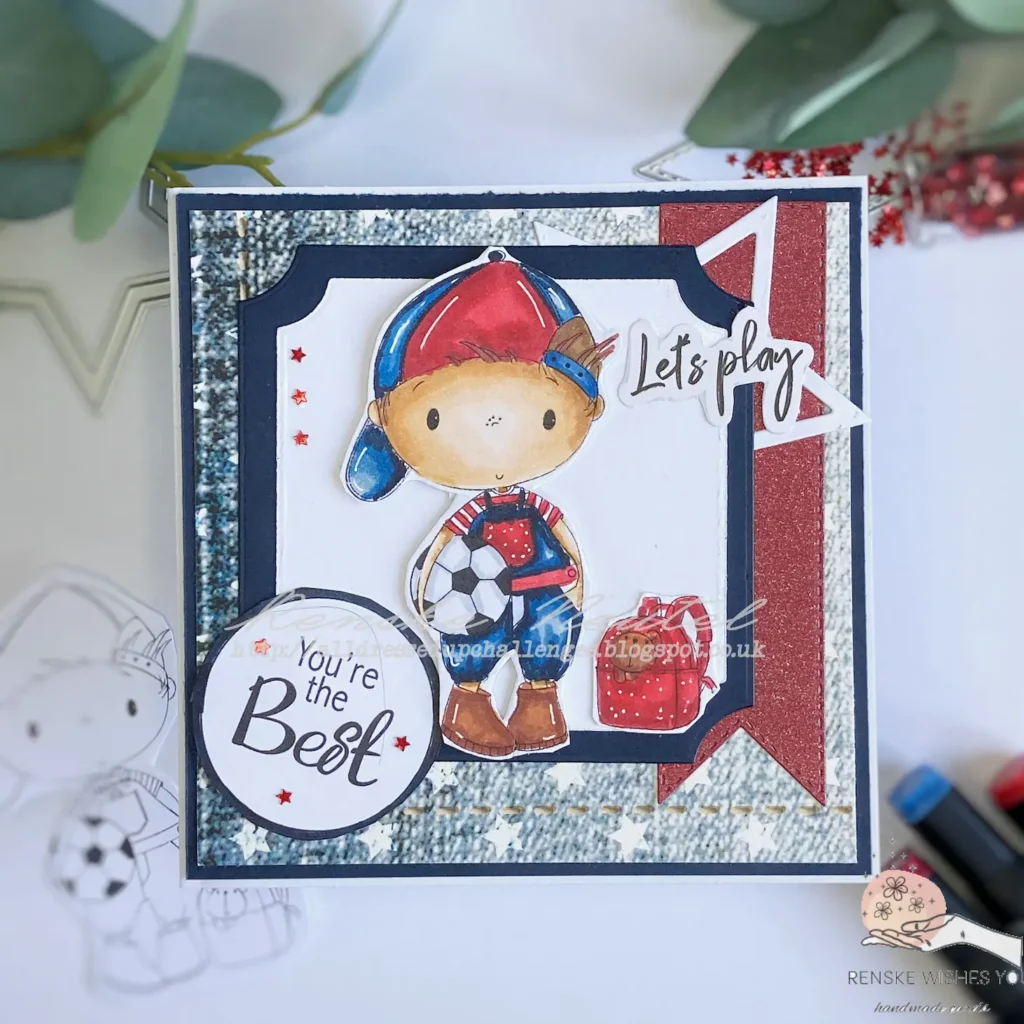
I used one of the new digital stamps from All Dressed Up Stamps’ latest release. The collection includes Back to School Girl, Autumn Fairy, and the one I used for this card: Back to School Boy. This stamp works perfectly for creating a sporty, fun card that any football fan will love.


In this article, I’ll guide you through creating this card and share tips that you can easily adapt to different designs and materials you have at hand.
Why a Football-Themed Card Is Perfect for Any Boy’s Celebration
Football captures the hearts of many boys, making it an ideal theme for cards celebrating all kinds of special occasions. Whether it’s a birthday, a school achievement, or simply celebrating their love for the game, a football-themed card brings a personal touch that resonates with their interests.
Why Choose a Football Theme?
The beauty of a football theme is its versatility. It’s perfect for boys of all ages, from younger kids just starting to play to teens who live and breathe the sport. Plus, the sporty design can be customized to suit any occasion, making this card a go-to option for different celebrations. A football theme also allows you to add a personal touch, like using their favourite team colours or including a football-themed sentiment that feels unique.
Who Is This Card For?
When creating cards, imagine who they’re for and how to reflect their personality. By incorporating their love for football into the card, you create something that reflects their interests and shows how much thought went into making it.
Have you ever added a personal touch to your cards by incorporating a theme like football? Let me know in the comments.
Materials Needed for Your Football-Themed Card
o create your football-themed card, gather various materials and tools. This section provides a comprehensive list of essential supplies, with some optional enhancements to help elevate your design. I’ve also included alternatives to ensure you can craft this card using what you have on hand.
Essential Supplies
- Digital Stamp: Back to School Boy from All Dressed Up Stamps: Used for the main image on the card. You can shop the image here: All Dressed Up Stamps Back to School Boy (affiliate link).
- Cardstock (White, Blue, Red): for the card base, layering, and die-cut shapes. You can substitute it with any heavyweight paper in similar colours.
- Patterned Paper: Used for the decorative background. Feel free to choose any patterned paper that suits your design.
- Alcohol markers: Used to colour the digital stamp. You can use any colouring medium you prefer.
- Banner Die: Used to cut the red banner element behind the layered squares. You can use any banner die or hand-cut a banner shape.
- Star Dies: Used to cut out the larger white star for decoration. Any star die or punch will work as an alternative.
- Adhesives: To assemble all layers and attach elements to the card. You can use glue or double-sided tape for this.
Optional Enhancements
- Red Stars: Used to embellish the card. You can also opt for stickers, die-cut stars, or enamel dots in matching colours.
- White Gelly Roll Pen 08: Used to add highlights to the coloured image. Any white gel pen or Posca paint pen will do.
- Quotes and Sentiments Digital Stamps from Polkadoodles: Used for the “You’re the best” sentiment. You can substitute with any sentiment stamp or sticker you like.
This comprehensive list ensures you have all the essentials to create the football-themed card, with suggestions for substitutions so you can work with the materials you have on hand.
Step-by-Step Guide to Creating Your Football-Themed Card
Creating a football-themed card is a fun and rewarding process that allows you to showcase your creativity while celebrating a boy’s love for the game. In this guide, I will walk you through each step of the card-making process, providing detailed instructions to help you create a visually appealing and meaningful card.
Let’s get started and bring your football card idea to life!
Step 1: Printing and Coloring Your Digital Stamp “Back to School Boy”
The first step in making your football-themed card is preparing the digital stamp. I printed the “Back to School Boy” digital stamp on DCP paper to ensure a clean and crisp image. The stamp was printed at a height of 9.5 centimetres, allowing the width to adjust automatically for the best fit.
Once printed, it’s time to colour the digital stamp “Back to school Boy”. I used alcohol markers to bring the image to life, selecting a range of colours for different elements:
- Skin Tone: Tanned Skin (260), Peachy Blush (259), Salmon Pink (25) and Pale Cream (142)/
- Hair: Brown Grey (104), and Clay (116)
- Dungarees and Blue Parts of the Cap: Dark Indigo (188), Dark Sky (190), Midi Sky (191), and Light Sky (189).
- Bag, Cap, Shirt, and Pocket: Cardinal (244), English Red (249), and Burgundy (247).
- Shoes and Bear: Rose Beige (97), Burnt Sienna (95), and Natural Oak (91).
- Ball: Cool Grey 3, and Cool Grey 1
After colouring, I added white highlights using a white gel pen for extra detail, including white dots on the bag. Next, I carefully cut out the image, separating the boy and his bag for greater flexibility in positioning it on the card.

This meticulous preparation sets the stage for a dynamic and engaging card, allowing the football-themed design to shine.

Having trouble editing or colouring digital stamps? Download my free guide for extra tips and tricks to help you perfect your digital stamps!
Step 2: Crafting the Card Base and Initial Layers for Your Handmade Football Card
In this step, you will create the foundation of your football-themed card, ensuring it has a sturdy base and attractive layers. Follow these straightforward instructions to build a visually appealing backdrop for your design.
- Make the Card Base: Cut a piece of white paper measuring 26 centimetres by 13 centimetres. Score it at 13 centimetres and fold it in half to create a square card base measuring 13 centimetres by 13 centimetres.
- Cut the First Layer: Cut a layer from dark blue cardstock measuring 12.5 centimetres by 12.5 centimetres. This will serve as the first layer of your card.
- Add Patterned Paper: On top of this, add a patterned paper featuring blue with white stars, cut to 12 centimetres by 12 centimetres. Adhere the patterned paper to the dark blue layer to create a lovely dark blue border around it.
- Assemble the Layers: Finally, attach this layered combination to your card base.

This layered design enhances the card’s visual appeal but also sets the stage for the fun details you’ll add next. Let’s keep crafting and make this football card shine!
Step 3: Die-Cutting Unique Shapes for Your Football Card Background
In this step, we will create various die-cut layers to serve as the background for your image. Using dies adds interesting shapes that enhance your card’s visual impact. Follow these steps to create your backgrounds!
- Die-cut two background layers: Begin by die-cutting two layers to serve as the background for your image. I used a square die with rounded corners. Use two dies: one larger than the other.
- Cut the Larger Layer: Cut the larger die from blue paper the same colour as the first layer of the card base.
- Cut the Smaller Layer: Cut the smaller die from white paper. Place the white layer on top of the blue layer for a beautiful contrast.
- Create a Banner: Cut a long banner from red paper that will go behind the background layers for the stamp.
- Add Decoration: Finally, die-cut a large star from white paper with a star die. This will serve as a decorative element on the card.

With these die-cut shapes, you have laid the foundation for a vibrant and playful background that perfectly matches the football theme of your card. Let’s keep going with the next steps to bring your creation to life!
Step 4: Preparing the Sentiments
Now it’s time to prepare the sentiments for your football-themed card. I’ve chosen two phrases that perfectly capture the spirit of the game and the occasion.
First, I’ll use the sentiment “Let’s Play,” sourced from an old paper block by Decotimecrafts. This playful phrase fits perfectly with the football theme.
Next, I’ll incorporate the phrase “You’re the Best” from the Quotes Digital Stamp Set by Polkadoodles. This sentiment features a circular border, which adds a nice touch to the design. I’ll print it out and colour the circular border with my Dark Indigo alcohol marker to match the dark blue paper used in the card
With these sentiments prepared, you’re one step closer to creating a heartfelt message for your football card. Let’s move on to the final touches that will bring your card to life!
Step 5: Assembling Your Football Card for Maximum Impact
It’s time to bring all your hard work together and assemble your football-themed card! Follow these steps to create a visually stunning final product that showcases your creativity.
- S Start by placing the red banner on the right side of the card. Position it at the top edge of the patterned paper, allowing some of the paper to show on the side for added visual interest.
- Place the white star on the banner to create a striking focal point.
- Add the two background layers you created earlier, letting them overlap the star for a cohesive look. In the bottom left corner, position the sentiment “You’re the Best” to draw attention.
- Use foam tape to attach the coloured image to the card, giving it dimension. Next, glue the bag next to the boy, ensuring everything looks balanced. Just under the brim of his cap, place the sentiment “Let’s Play” to tie it all together.
- To finish off your card, add three red stars around the sentiment “You’re the Best” and place them vertically beside the boy’s head for a fun touch.
")
And there you have it, your football-themed card is complete! With every layer and detail thoughtfully placed, you have crafted a card that will impress.
Let’s Get Creative Together
It’s been a joy to see each element come together as we’ve crafted this football-themed card. From choosing vibrant colours to thoughtfully placing the sentiments, every detail is crucial in creating a heartfelt and visually stunning card. I hope you’ve enjoyed this creative process as much as I have. Crafting isn’t just about the final product; it’s about the moments spent bringing your ideas to life.
Follow for More Card-Making Inspiration
For more card-making inspiration, consider subscribing to my blog. By filling out the form below, you’ll receive the latest tutorials, tips, and tricks in your inbox.
More Inspiration for handmade cards for boys
If you’re looking for more handmade boy card ideas, check out these related blog posts for creative designs and techniques:
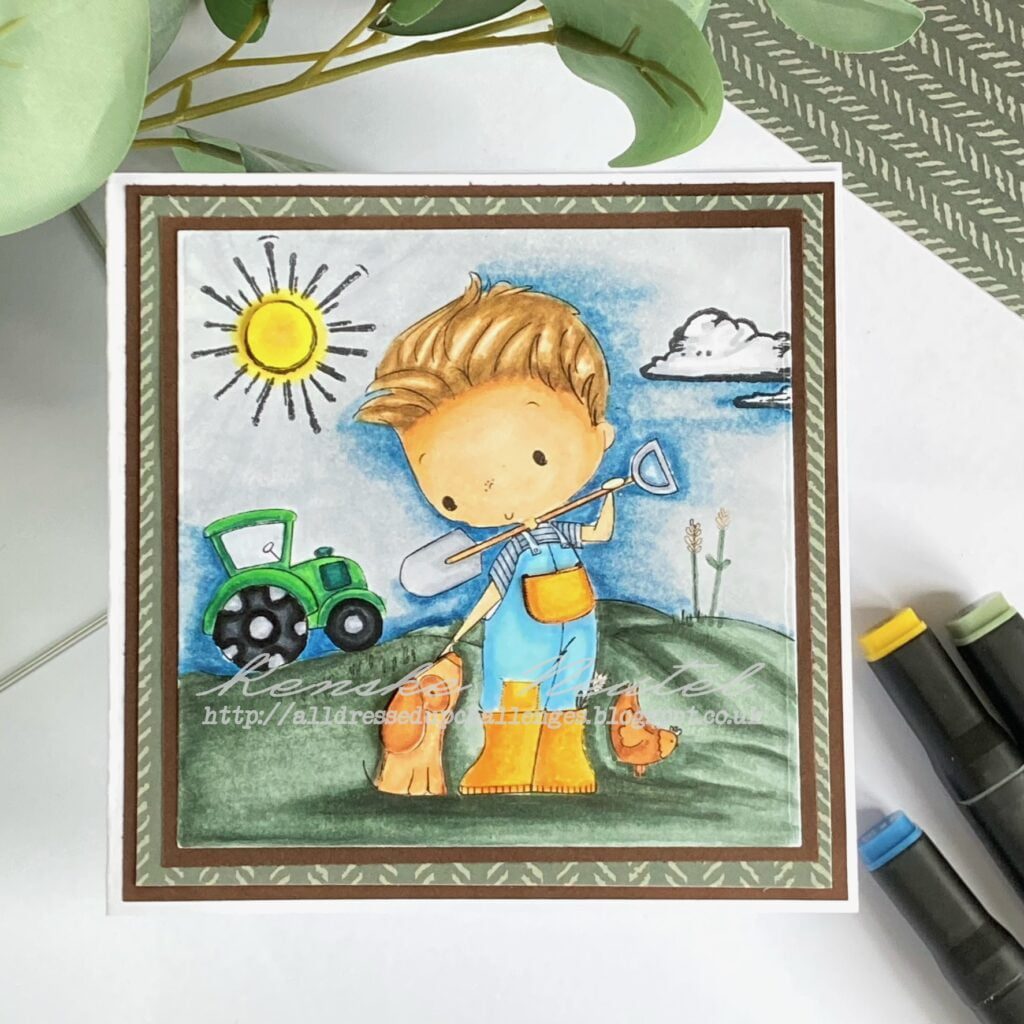
Crafting a Homemade Card for a Boy with All Dressed Up Stamps
Another DIY boy card with a digital stamp from All Dressed Up Stamps
Let’s continue crafting together and inspire one another to create beautiful memories through our handmade cards!
Products used for this football-themed card
Affiliate Disclosure: This blog post may contain affiliate links. If you choose to make a purchase through these links, I may earn a small commission at no additional cost to you. I only recommend products that I truly believe in and have personally used. Your support helps me continue to share creative content and tutorials. Thank you for supporting my blog!
Affiliate products used
Back-to-School Boy digital stamp from All Dressed Up Stamps

Quotes and Sentiments Digital Stamps from Polkadoodles

White gelly Roll Pen 08

Non-Affiliate products used
- Banner Dies from Scrapfever (is unfortunately no longer for sale.).
- Card Stock brand unknown
- Patterned paper from Authentique (is unfortunately no longer for sale)
- Alcohol markers from Decotimecrafts (bought at ActionNL)
- Star Dies from Aveccreative
- Glue from ActionNL
- Foam tape (brand unknown)
- Red star embellishments (brand unknown).
I would like to enter my card in the following challenges:
- Passion for Markers: For a Child
- Krafty Chicks Challenge: All Occasions
- Alphabet Challenge Blog: M is for Masculine
- Allsorts challenge blog: Anything goes
- Lil Patch of Crafty Friends Challenge …: Anything goes
- A Perfect Time To Craft Open Challenge: Anything goes
- Crafts Galore Encore Challenge Blog: Anything goes
Hi Renske, just popping by with my Passion for Markers Design Team hat on to say thanks for joining in with us with this fabulous card! Wonderful colouring as always and such a great layout! Thanks for joining in with us at Passion for Markers this week, Sarah – DT.
Thank you so much.
A great Boys card. Thank you for sharing with us at Passion for Markers. Marlene
Thank you.
Fabulous masculine card! Thanks for joining in my challenge at PFM
Natx
Thank you Natalie.
So cute. Thanks for sharing with us at Allsorts.
Thank you Lynn.
This is really cute! Thanks so much for sharing at Allsorts challenge!
Thank you so much Ellie.
A perfect boy’s birthday card. Thank you for sharing your project with us at the Crafts Galore Encore “Anything Goes” October Challenge. Good Luck and hope to see you again soon!
Carole x DT Craftilicious Creations
Thank you.
A cute and colourful card for a little lad, many thanks for sharing and joining us at Allsorts for our 800th challenge.
B x
Thank you so much Brenda.