
Hello crafty friends! Today, I’m excited to share a delightful easel card tutorial with you. In this tutorial, we will explore the art of easel cards and discover their endless possibilities.
Easel cards are more than just folded paper – they’re miniature works of art that can be used to create captivating scenes that come to life on a card.
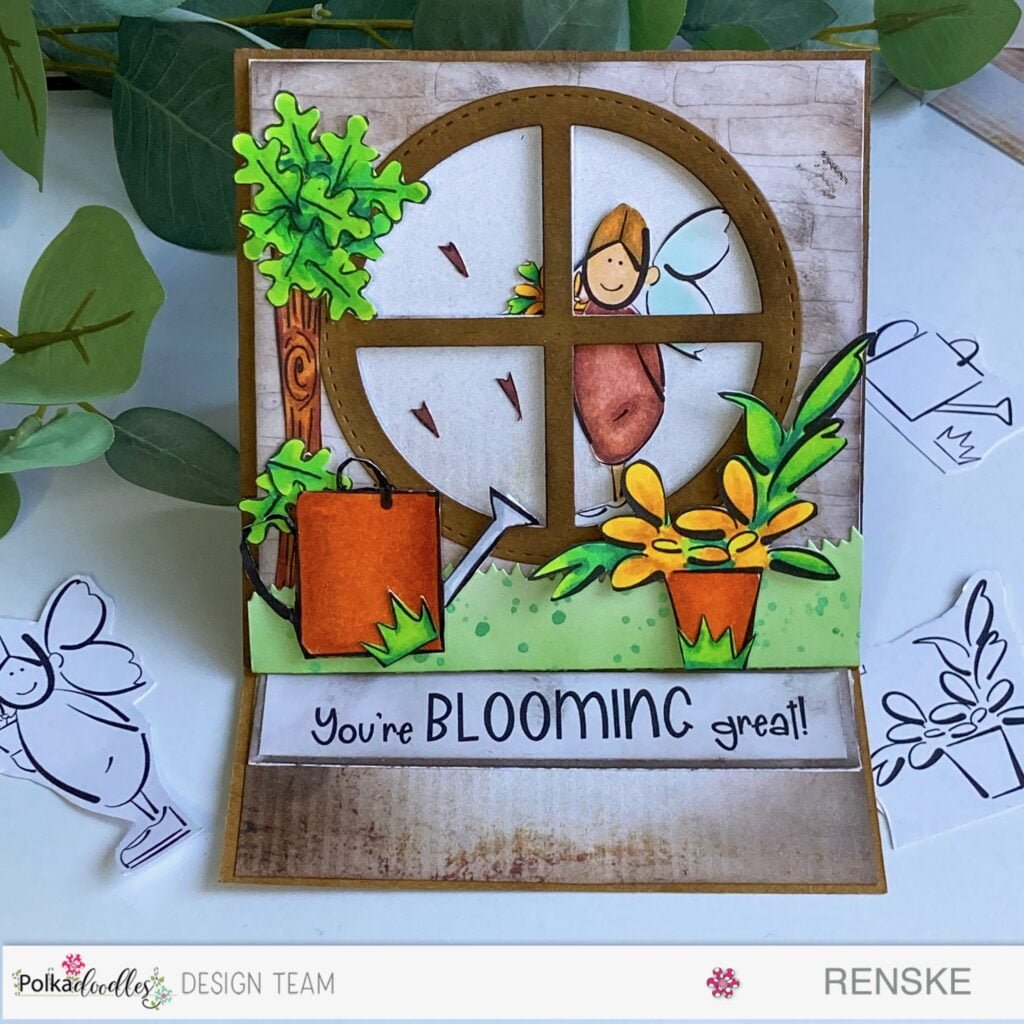
I created this card as inspiration for the latest challenge at Polkadoodles, which began today. I set out to craft a beautiful scene using their delightful digital stamps, papers, and sentiments. Our design team was tasked with creating an easel card, a challenge that I thoroughly enjoyed. There’s something special about crafting these cards, and I savoured every moment of it.
So, let’s gather our craft supplies, unleash our creativity, and have a blast with Polkadoodles!
Materials needed for this Easel card tutorial
Before we start creating a handmade easel card, let’s gather all the materials we will need to bring this project to life.
Polkadoodles Products used
- Digital Stamps: Choose your favourite digital stamps from Polkadoodles’ delightful collection. For this tutorial, we’ll use two charming digital stamps:
- “Garden Flowers/Watering Can” by Lucy Monkman (shop here)
- “Cute Girl with Flowers and Bow/Angel” by Lucy Monkman (shop here).
- Clear stamps: To complete the scene, we’ll also use the clear stamp set “Nuts about you”. We’ll use the tree trunk and leaves from this set (you can shop here).
- Pattern Papers: I’ll use digital papers from the “Helga Hippo Paper Heaven 4” set (you can shop here).
- Sentiments: Find the perfect sentiments from the Polkadoodles’ sentiment set to add heartfelt messages to your card. We’ll use a sentiment from the “Spring Gnome Fun Puns, Quotes, and Sentiments” set to complement our design (you can shop here).
Other Materials
In addition to our Polkadoodles products, we will need a few other materials to complete our easel card. Here’s what you’ll need:
- Cardstock: Choose sturdy craft cardstock to serve as the base of our easel card. Opt for high-quality cardstock to ensure stability and durability
- Adhesive: Use double-sided tape or glue to securely adhere the various elements of our easel card together.
- Colouring Tools: Select your preferred colouring medium to bring your digital stamps to life. We’ll use alcohol markers to colour our digital stamps, but feel free to use coloured pencils or watercolours if you prefer.
- Scissors: Use scissors or a craft knife to carefully cut out our digital stamps and patterned papers, ensuring clean edges and precise shapes.
- Window die: Use this die to create a window in the brick wall. You can also cut it yourself.
- Grass die: to make the grass, we’ll use a grass die.
- Brick Stencil: Choose a brick stencil to add texture and dimension to our background. We will use this stencil for the technique of dry embossing.
- Ink: Use chalk ink or dye ink to add depth and dimension to your card design. We’ll use ink to distress the edges of our patterned papers and add shading to our stamped images.
Now that we have all the materials gathered, we’re ready to start crafting our beautiful easel card! Let’s dive in and unleash our creativity.
Step-by-Step Easel Card Tutorial
Welcome to the step-by-step easel card tutorial! In this section, I’ll guide you through each stage of crafting a beautiful easel card. From assembling the card base to adding intricate details and embellishments, you’ll learn everything you need to know to create a stunning easel card. Let’s start crafting.
Step 1: Crafting the easel card base
To start our easel card tutorial, we’ll start by constructing the base of our card. This sturdy base provides support for the front panel and ensures our card stays upright when on display. Follow these steps to assemble the card base and layers:
- Determining Dimensions: Decide on the desired size of your easel card base and cut a piece of craft paper accordingly. In our example, we’ll cut our craft paper to measure 26 centimetres by 13 centimetres.
- Scoring: Using a scoring tool, score the craft paper horizontally at the halfway point (13 centimetres) to create a fold line for the card base. This fold will divide the paper into two halves, forming the base and front panel of the easel card.
- Creating the Easel Mechanism: Score the top half of the card at 6.5 centimetres to create a fold line. This fold will allow the front panel of the card to stand upright when displayed, creating the easel effect.
- Preparing the Backdrop: Cut a square piece of kraft paper measuring 13 centimetres by 13 centimetres, which will serve as the backdrop for our scene. This piece will be attached to the front panel of the card base.
Now that the base for our card is ready, we can start printing and colouring the digital stamps.
Step 2: Printing and Colouring the Digital Stamps
Let’s bring our easel card to life by printing and colouring our chosen digital stamps. For this project, we’ll be using two delightful digital stamps by Lucy Monkman:
- Garden Flowers/Watering Can
- Cute Girl with Flowers and Bow/Angel
Printing the Digital Stamp
Start by resizing the digital stamp to fit your card design. You can easily do this using Microsoft Word or any other image editing software. Print the digital stamp onto white cardstock using a high-quality printer to ensure crisp, clear lines. I recommend using DCP paper for its suitability with alcohol marker colouring.
Colouring the images
For the Cute Girl with Flowers and Bow/Angel digital stamp:
- Skin: Barely Beige, Salmon Pink, Peachy Blush
- Hair: Brown Grey, Walnut
- Dress: Midi Old Rose, Old Rose, and Dark Old Rose
- Leaves: Yellow Green, Grass Green, and Forest Green
- Flower: Pastel Lemon, Lemon Yellow, Dark Yellow, Orange Ochre
- Wings: Cool Shadow, Colorless Blender
For the Garden Flowers/Watering Can digital stamp:
- Watering Can and Flowerpot: Terra Stone, Terra Cotta, Terra
- Grass and Leaves: Yellow Green, Grass Green, and Forest Green
- Flower: Pastel Lemon, Lemon Yellow, Dark Yellow, and Orange Ochre
- Watering Can Handle: Cool Grey 3 and Cool Grey 1
Once the digital stamps are beautifully coloured, carefully cut them out using scissors.
With our gorgeously coloured digital stamps ready, we’re one step closer to completing our stunning easel card. Let’s move on to the next step, where we’ll create the background for our card.

Step 3: Creating the Background with Window
Let’s create the background wall with a window by using a stencil featuring stone textures and dry embossing to achieve the desired effect.
Materials Needed
- White paper measuring 12.5 centimetres by 12.5 centimetres
- Embossing machine and embossing mat
- Stone texture stencil
- Two shades of brown ink
- Blending brush
Steps to follow:
- Prepare the Paper: Dampen the white paper on both sides. Place the embossing mat on the embossing machine’s platform, followed by the damp paper and the stone texture stencil on top. Cover the stencil with another piece of paper and sandwich it all with the transparent embossing plate. Pass it through the embossing machine to create a textured paper with stone patterns.
- Applying Ink: Ink the edges of the embossed paper using a darker shade of brown ink. Then, gently blend the lighter shade of brown ink over the stone patterns using a blending brush. Avoid pressing too hard to maintain the texture of the paper.
- Creating the Window: Use a window die with two circles – one for the inner part of the round window and one for the frame. Start by die-cutting the window from the embossed background panel using the smaller circle die. Position it where desired on the panel, considering the composition. Once decided, pass it through the die-cutting machine to create the window frame on the background panel.
- Die-cutting the Frame: To create the window frame, use both the larger circle die with the stitched edge and the smaller circle die simultaneously. Place them on craft paper to cut out a beautiful brown frame. Ink the frame with the same brown ink used for the stone wall to add shadows and dimension. Attach the frame to the die-cut window in the background panel.
With the background panel now complete, we’re ready to move on to the next step. Stay tuned as we add more elements to our easel card!

Step 4: Preparing Various Elements to Complete the Scene
Let’s move on to the next stage of our project, which involves preparing various elements to complete the scene. Firstly, we will place the watering can and plant beneath the window, along with a tree on the left side, partially blocking the view of the window. Our first step will be to create the grass.
Creating the Grass
To create the grass, we will use a grass die to cut out a strip of grass from white paper. Then, we will add depth and realism to the grass strip by inking it with various shades of green. We will also add some green splatters using metallic paint to give it extra texture.
Adding Tree and Leaves
Next, we will add the tree and leaves to complete the scene. For this, we will use the “Nut’s About You” stamp set. Firstly, we will stamp the tree trunk onto white card stock and then stamp several leaves around it. We will then use alcohol markers to colour the leaves with the following colour combinations:
- Leaves: Yellow Green, Grass Green, and Forest Green
- Tree Trunk: Sand, Burnt Sienna, and Natural Oak
Once we’re done stamping, we will carefully cut out all these elements. With these components ready, our scene will start to take shape. We will now proceed to the next step to print and trim the digital paper.
Step 5: Printing and Trimming the Digital Patterned Paper
In this step, we will print and customize the digital patterned paper from Polkadoodles to add depth and texture to our card design. Follow the steps below to print and trim the digital patterned paper:
Printing the Patterned Paper
Print your chosen digital patterned paper onto high-quality cardstock. For this tutorial, we’re using the same patterned paper for both the background behind the window and the lower portion of the card. The paper features dark brown tones at the bottom and sides, gradually transitioning to a cream colour in the middle. Print two copies of the patterned paper to cover both sections of the card.
Trimming the Paper
Use a paper trimmer to cut both printed patterned papers to measure 12.5 centimetres by 12.5 centimetres. Make sure to cut precisely to fit the dimensions of our easel card base perfectly.
With the digital patterned paper printed and trimmed, we’re now ready to assemble the layers onto our easel card base. Let’s move on to the next step and bring our card to life!
Step 6: Printing the Text and Creating the Stopper
In this step, we will add a heartfelt message to our easel card by printing the sentiment “You’re blooming great”. Follow the steps below to print the text and create the stopper:
Printing the Text
- Use Microsoft Word to print the sentiment “You’re blooming great” across the width of the card.
- Ensure that the text covers the majority of the width of the bottom layer of the card.
- Print the sentiment and then trim it to a width of 12 centimetres.
Creating the Stopper
- After printing and trimming the sentiment, ink the edges with the same brown ink used for other elements of the card.
- Cut a strip of white paper to frame the sentiment, ensuring a cohesive look with the rest of the card.
- Ink the edges of the white strip with the same brown ink to match the overall aesthetic.
The white strip will serve as the stopper to hold the easel card upright. With the sentiment and stopper ready, we are one step closer to completing our beautiful easel card.
Let’s proceed to the next step and assemble all the elements!
Step 7: Assembling the Card
Now that we have all the elements ready, it’s time to assemble the card.
- Place the square panel upright against the hill.
- Adhere the patterned paper to the panel, and then affix the digital stamp “Cute Girl with Flowers and Bow/Angel” onto the patterned paper.
- Position her so that she will be visible from the right side behind the window.
- Attach the panel to the wall and the window. Use foam tape to elevate it, creating depth behind the window. Apply the foam tape to the back of the panel.
- Arrange the various elements. Place the tree on the left side of the window, ensuring that the strip of grass runs in front of it. Add the leaves to the top of the tree and some scattered towards the bottom.
- Position the grass at the bottom of the panel. Half in front of the tree, place the watering can, elevated with foam tape. Beneath the watering can, add a small piece of grass. Position the pot with the plant on the other side of the window, also elevated with foam tape and with a piece of grass in front.
- Place the other piece of patterned paper on the bottom of the card.
- Attach the stopper with the sentiment “You’re blooming great” to the desired position. Experiment with the placement to ensure it complements the panel with the scene.
Once everything is in place, your card is complete and ready to be displayed!

Inspiration Hub: Let’s Get Creative Together
As we wrap up this tutorial, let’s take a moment to reflect on the wonderful handmade easel card we’ve created together. From colouring the digital stamp to assembling all the charming elements, we’ve embarked on a creative journey filled with joy and creativity. Now, it’s time for you, our readers, to unleash your creativity and craft your beautiful cards!
Join the Polkadoodle Challenge
Ready to take your creativity to the next level? Join the Polkadoodle Challenge and showcase your artistic skills! Whether you’re a beginner or an experienced crafter, there’s a challenge for everyone. Don’t miss out on the opportunity to win fabulous prizes and connect with fellow crafters from around the world.
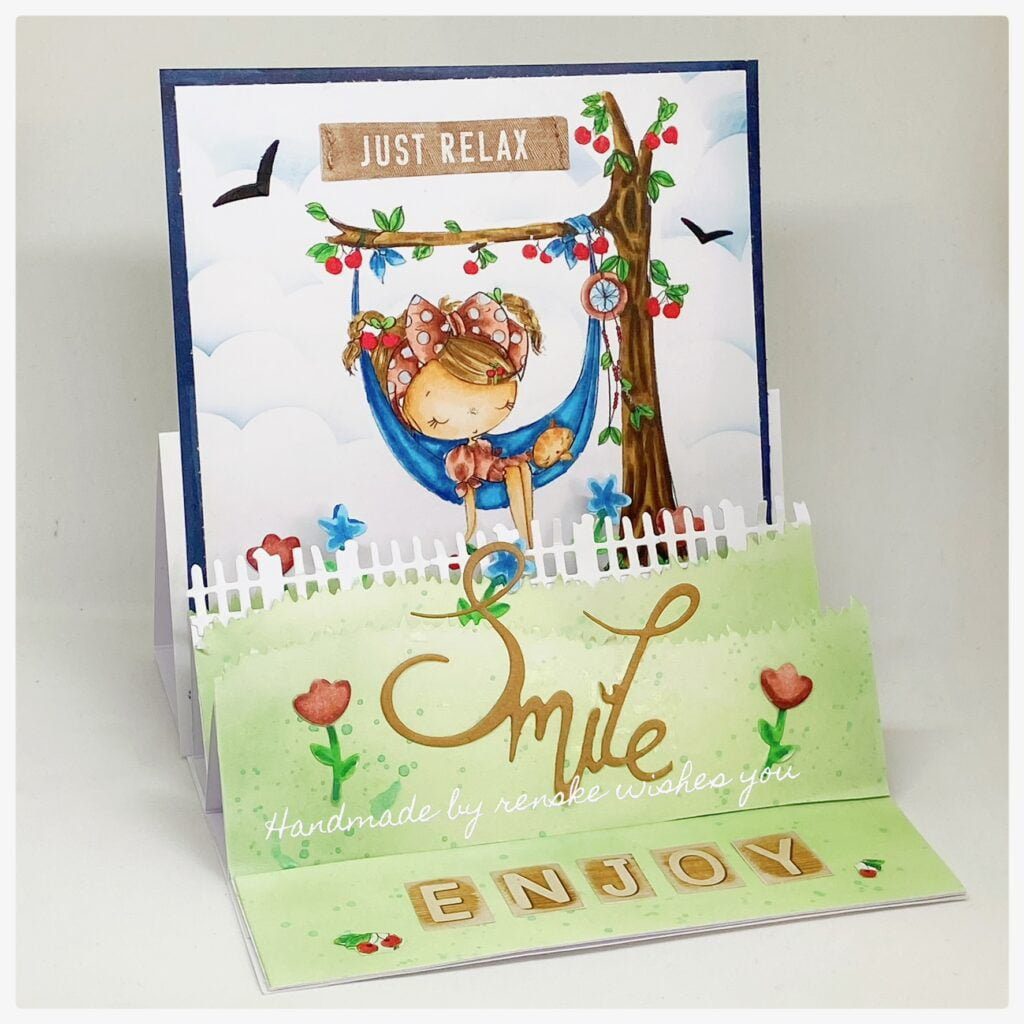
More Easel Card Inspiration
Looking for more easel card inspiration? Check out our previous articles for more creative ideas and projects. Whether you’re into floral designs, scenic landscapes, or whimsical characters, there’s something for everyone to explore and create.

Polkadoodles Products in the Spotlight
Affiliate Disclosure: Please note that some of the links in this section are affiliate links. This means that we may earn a commission if you purchase through those links. However, this comes at no additional cost to you. We only recommend products that we trust and believe will add value to our readers. Your support through these links helps us continue to provide quality content and inspiration. Thank you for your support!
Explore the world of Polkadoodles and unleash your creativity with their fantastic range of products. From charming digital stamps to versatile stencils and patterned papers, Polkadoodles has everything you need to bring your artistic visions to life.
Cute girl with flowers and bow/angel – Lucy Monkman

Garden flowers/watering can – Lucy Monkman

Nut’s about you clear stamp set

Helga Hippo Paper Heaven 4 download bundle

Spring Gnomes Digital Paper set

Discover endless possibilities with Polkadoodles and let your imagination soar!
I would like to enter my card in the following challenges:
- A Place To Start: Anything goes + add one or more flowers
- Unicorn Challenge Blog: Use dies
- Passion for Markers: Use a die
- Crafty Gals Corner: Anything goes
- Fab ‘n’ Funky Challenges: Add a sentiment
- Through The Purple Haze Challenges: Anything goes
- Lil Patch of Crafty Friends Challenge …: Anything goes
- Stamping Sensations: Anything goes
- Dragonfly Dreams: Use a die
- A Perfect Time To Craft Open Challenge: Anything goes
- Crafts Galore Encore Challenge Blog: Anything goes
Cute card and scene. So glad you shared over at Crafty Gals Corner
Thank you
A lovely card, it’s a great design using those sweet images.
Thanks for sharing with us at Stamping Sensations. Avril x
Thank you
Great card, loving the easel folding and elements you have combined. Thank you for joining us at the Crafts Galore Encore Challenge.
Thank you so much
This is a fabulous easel card and great elements used. Thanks so very much for joining us this time at the Dragonfly Dreams Challeng
Thank you so much for your lovely comment
Really nice this card and the facilities that stand alone are my favorite! 😍😍😍
Thanks for stopping by A Place To Start !
Hugz, Bettascrap DT
Thank you so much
Fabulous easel card, wondefully inspiring.
Thank you for joining in with us at Fab’n’Funky challenges
Buffy (DT) x
Thank you so much
Great easel card and design love the cute image.Thank you for joining us at Stamping Sensations and Dragonfly Dreams.
Carol DT x
Thank you so much
A super card. Thanks for joining Passion for Markers. Elaine
Thank you