
Some links in this post are affiliate links. This means I may earn a small commission if you make a purchase, at no extra cost to you. I only recommend products I use and genuinely enjoy in my own cardmaking. Read more here.
Hello Everyone!
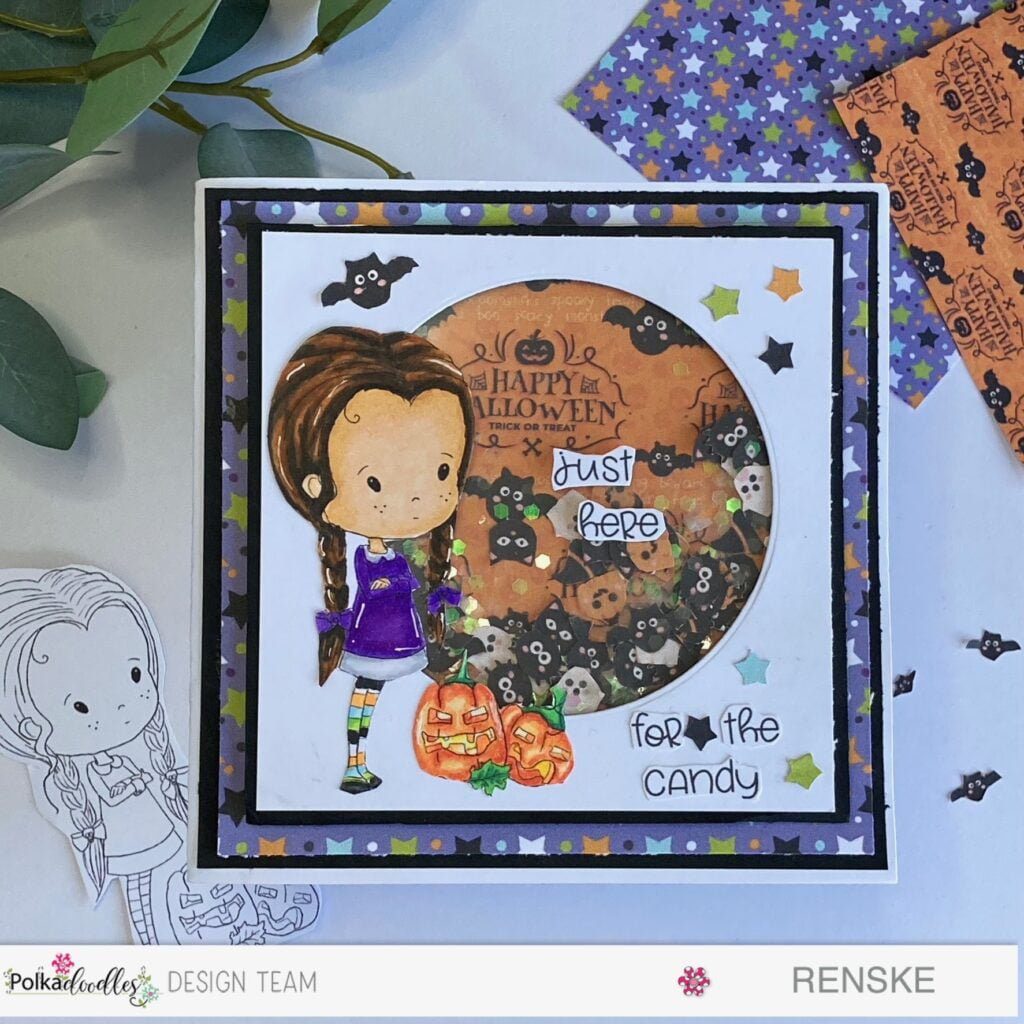
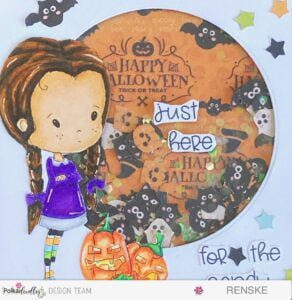
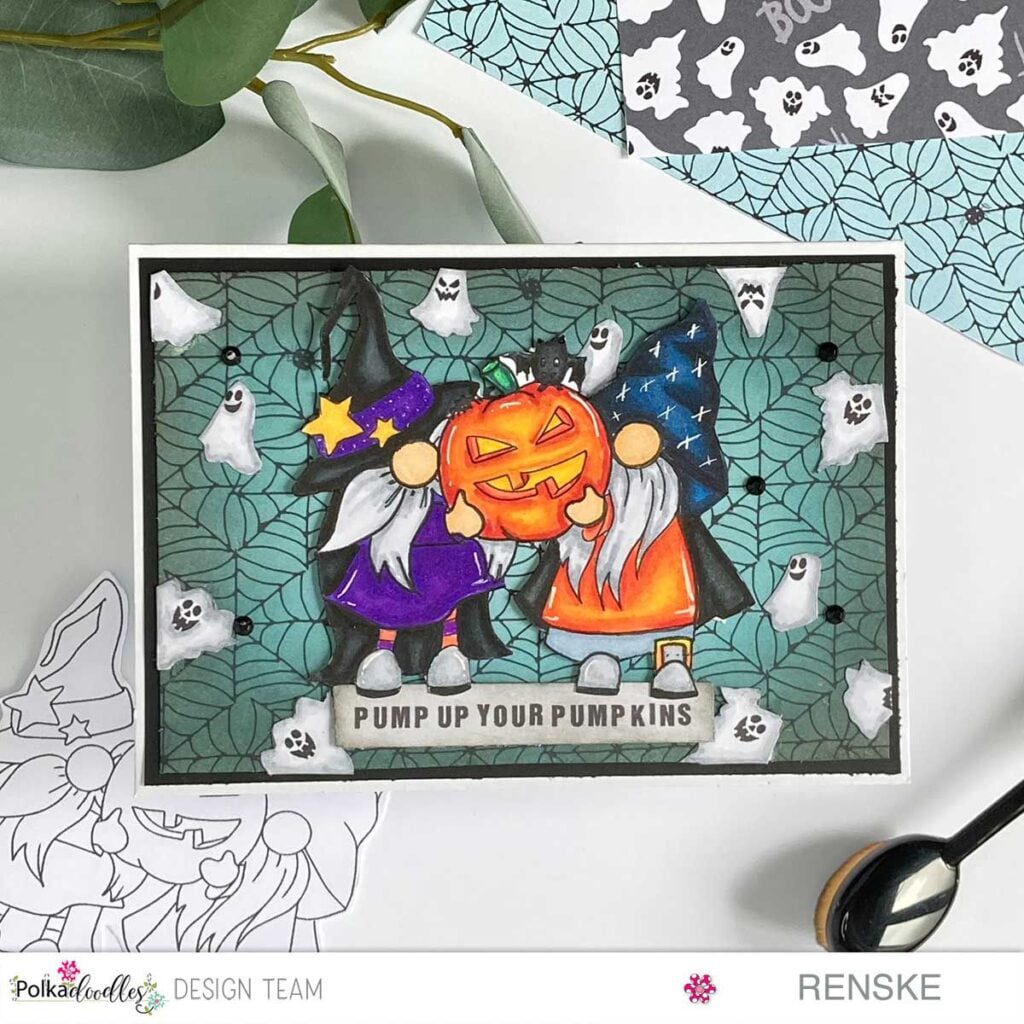
Let’s take our Halloween creativity to new heights with a unique Halloween shaker card. Follow along as we explore the crafting process.
I must confess that I have never made a Halloween card before. Here in the Netherlands, we don’t celebrate it. The question is how do you capture the spirit of the holiday in a visually captivating and interactive card?
As a member of the Polkadoodles design team, I am thrilled to help you create a Halloween shaker card using the “Winnie Wednesday Pumpkin” digital stamp. I will guide you through the detailed steps of this process, which involves using patterned paper for the shaker elements. This will help turn your ordinary materials into a spectacular Halloween creativity and magic.
During this article, you will learn how to make a circle shaker card but also experience the fun of combining different elements and interactive features.
Let’s work together to create an unforgettable Halloween Shaker card with magic, colour and creativity. Whether you have been making cartoons for years or are just starting, let’s make something awesome together.
Preparation and materials
Let’s start our card by making sure we have all the necessary items. This way, you’ll have everything ready to go and enjoy getting started.
Materials and Measurements You’ll Need
- Card base: To make a sturdy card base, start with 26 centimetres x 13 centimetres white paper. Just fold it in half in the middle after creasing it.
- Patterned paper: Select patterned papers from Boo Halloween bundle for background and shaker elements or use any patterned paper you like. The pattern paper on the base of the card is 12 centimetres by 12 centimetres. The pattern paper used on the back of the shaker panel is 10,5 centimetres by 10,5 centimetres.
- 2 Pieces of Black card stock: measuring 11 centimetres by 11 centimetres and 12,5 centimetres by 12,5 centimetres.
- Piece of white card stock: measuring 10,5 centimetres by 10,5 centimetres.
- Digital Stamp – “Winnie Wednesday Pumpkin”: This digital stamp is the centrepiece of your design. But you can use any image you like.
- Acetate Sheet: Acetate will be the window for your shaker elements.
- Foam Tape: Use foam tape to raise the window of your shaker to allow your shaker elements to move freely.
- Adhesive: Have a trusty adhesive on hand to secure your layers and assemble your elements with precision.
- Colouring Mediums: Choose your preferred colouring medium to bring “Winnie Wednesday Pumpkin” to life. Whether markers, coloured pencils, or watercolours, your creativity will add magic to the design.
- Die-cutting Machine (Optional): If you wish to incorporate die-cut shapes, a die-cutting machine will simplify the process.
- Crafting Tools: Essential tools such as scissors, a paper trimmer, and a bone folder are necessary for neat cuts and professional finishes.
With these materials at your disposal, you’re ready to venture into the delightful world of crafting a Halloween Shaker Card that melds creativity, colour, and charm into a bewitching creation.
Exploring the Polkadoodles Digital Stamp: Bringing Winnie Wednesday Pumpkin to Life
Now it’s time to get started with the “Winnie Wednesday Pumpkin” digital stamp. I printed out this stamp on DCP paper and coloured it with my alcohol markers.
I used the following colour combinations:
- Skin: Barely Beige, Salmon Pink, Peachy Blush
- Hair: Dark Wood, Clay, Natural Oak, Barn Red, Sand
- Dress and Bows: Violet Dark, Violet, Deep Violet
- Dress Edges: Cool Grey 1, Cool Grey 4
- Leggings: Black, Orange, Baby Boy, Apple Green
- Pumpkins: Orange, Yellow, Bittersweet, French Vermillion
- Leaves: Apple Green, Weeds Green, Forest Green
I chose the colours I used to colour the digital stamp so that the colours match the patterned papers. This way, you ensure unity on the card.
Constructing the Mesmerizing Shaker Panel
Now that we have coloured the digital stamp, we can start making our shaker panel.
Creating the Shaker Panel
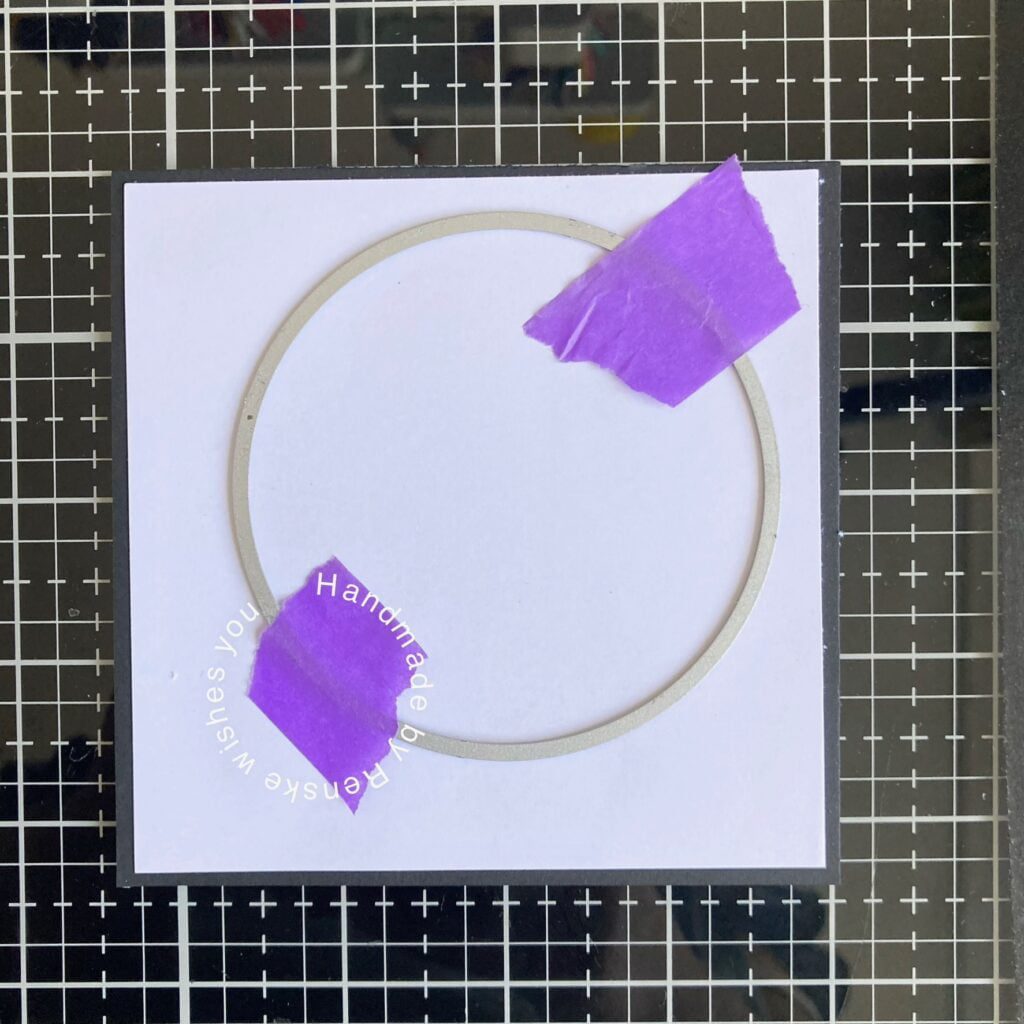
- Creating the base for the shaker panel: First, you need white card stock measuring 10,5 centimetres by 10,5 centimetres. Stick this on the black card stock measuring 11 centimetres by 11 centimetres.
- Create the Circular Opening: Now we have to cut a circle out of this panel. You can do this with a circular die or cut by hand. This will be the window for your shaker. You can of course also use another shape for your window.
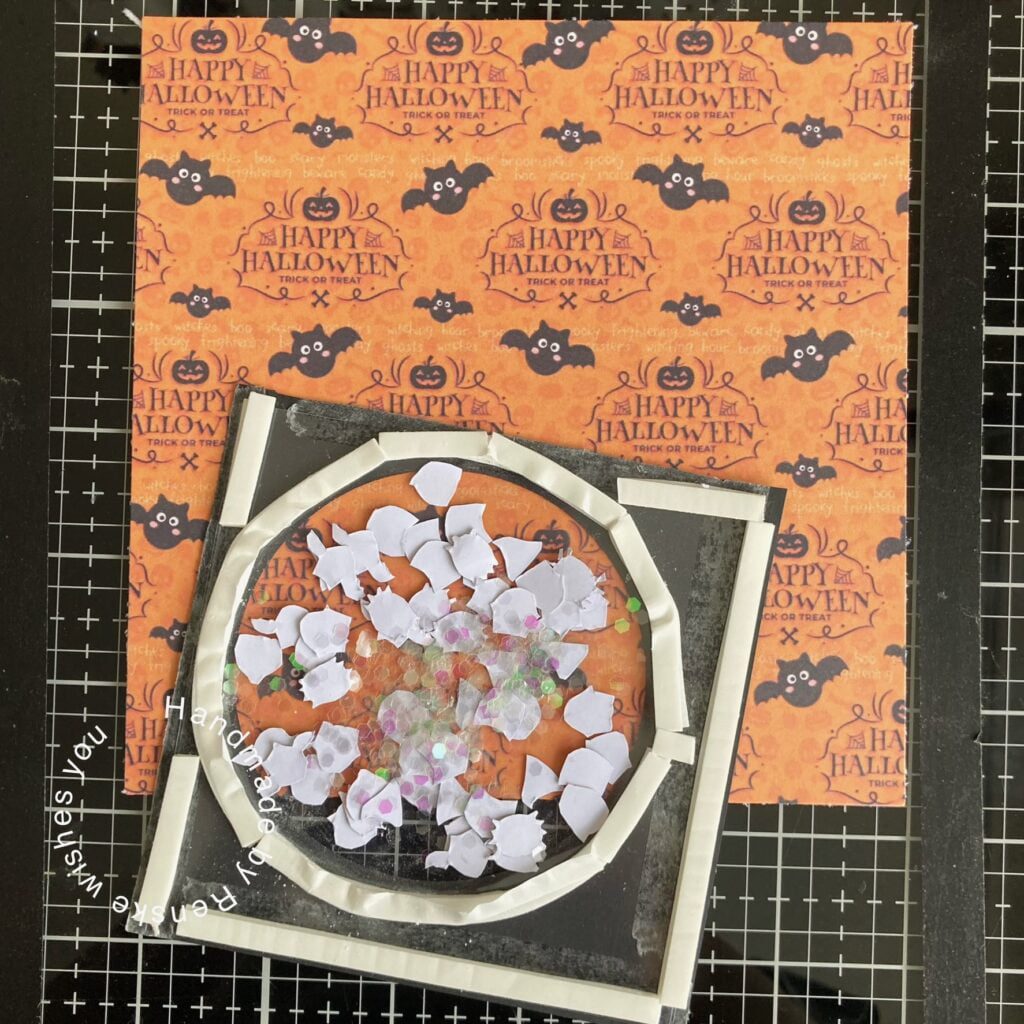
- Prepare the Acetate Window: Cut a slightly larger piece of acetate than the size of the circular opening. Attach it to the inside of the card front, aligning it with the circular window. Secure the acetate in place using double-sided tape.
- Apply Foam Tape: Apply foam tape around the circumference of the round window. Make sure the foam tape is snug against each other and that there is no space in between. Now you can also apply foam tape to the edges of the square panel.
- Add Shaker Elements: What makes this Halloween Shaker card different is that I have cut out elements from patterned paper to use as shaker elements. The captivating Boo Halloween pattern bundle provided the perfect inspiration. I cut out different elements, including black cats, ghosts, and bats. The perfect elements for a Halloween card.
- Seal the Shaker: To close the shaker I used another pattern paper from the digital paper set. Now you see through the window the orange paper with the wishes Happy Halloween.
By following these steps, you can make a shaker card for any occasion that everyone will love.
Assembling the Halloween Shaker Card
Now that the shaker panel is ready, it is time to put all the parts together and assemble your Halloween card
- Adding the papers to the card base: First, it’s time to glue the pattern paper (12 by 12 centimetres) onto the black card stock (12.5 by 12.5 centimetres). Then stick it onto your card base.
- Adhering the Shaker Panel: Align the shaker panel to the middle of the card. Glue this on your card base.
- Place the coloured digital stamp: I placed my digital stamp on the left of the shaker panel.
- Adding Final Embellishments: On the front of the shaker panel, I add some final embellishments. I kept a bat separate and I placed it above the girl. From the background paper I used on the base card, I cut some different stars. I place these on the top right and bottom right of the shaker
- Personalizing Your Card: To give the card a personal touch I added the sentiment “just here for the candy”. I thought this suited this girl while she is standing with her hands crossed. I cut all the words separately and placed them on the card.
Join the Polkadoodles Halloween Challenge!
Ready to take your crafting to the next level? Share your creation on the Polkadoodles challenge. The theme is like always “Anything goes. You don’t need to use a Polkadoodles image, but we love to see them of course.
More Halloween card-making inspiration
Happy crafting
Polkadoodles products used (affiliate links)
Affiliate Disclosure: This post contains affiliate links, which means I may earn a small commission at no extra cost if you purchase through these links. I only recommend products and services that I use and trust. Your support helps me continue to provide free tutorials and creative inspiration. Thank you for supporting my blog and helping me to keep sharing my passion for card making!
Winnie Wednesday Pumpkin Digital Stamp

Boo Halloween Printable background paper

Boo Halloween Sentiment Bundle

I would like to enter my in card in the following challenges:
- Creative Knockouts: Anything goes
- Krafty Chicks Challenge: Anything goes
- Lil Patch of Crafty Friends Challenge: Anything goes
- A perfect time to craft: Anything goes
- Classic design challenge blog: Anything goes
- Crafts Galore Encore Challenge: Anything goes
Cute card. Thank you for joining us at the Crafts Galore Encore Challenge.
Hugs
Danka
Twórcze pasje Danki {My Blog}
Thank you
Wow! Amazing card and tutorial! Turned out so, especially considering you have not made a Halloween card before. Thanks for joining us at Krafty Chicks.