
Hello everyone!
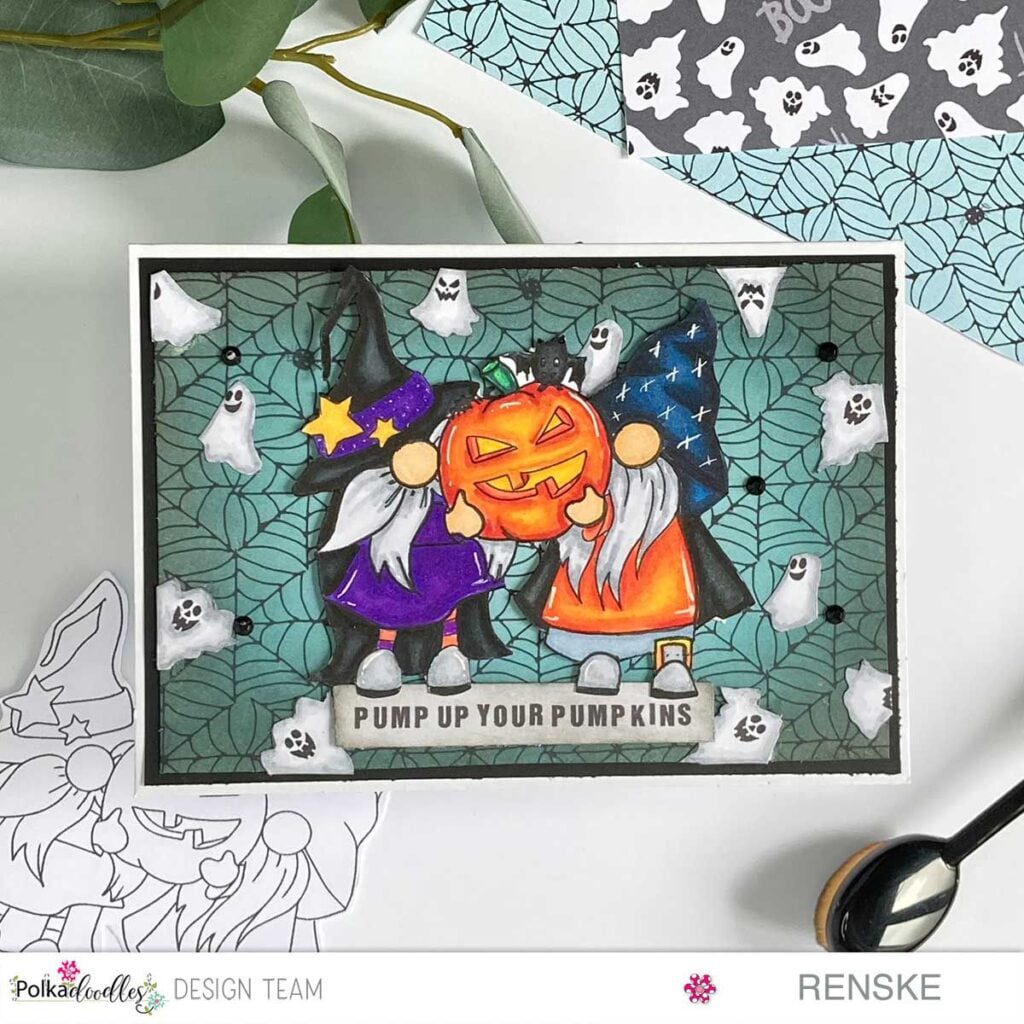
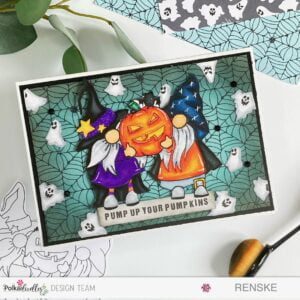
It is that time again for a new challenge on the Polkadoodles challenge blog. As an inspiration, I created this Unique Halloween gnome card.
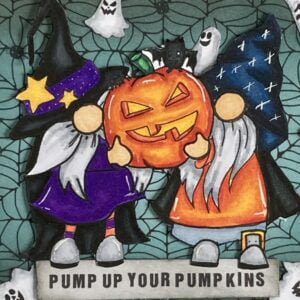
For this challenge, I chose to work with the beautiful digital stamp ‘Pumpkins Halloween Gnome’. In this article, I will take you on a creative journey as we create the unique Halloween gnome card together.
Discover step-by-step instructions. I tell you how to pimp your patterned paper with ink and elements from another patterned paper, about colouring and more. So, let’s start with the creative process.
Materials and Supplies
Before diving into the creative process, we need to make sure we have all the materials and supplies on hand for this project:
- Base card: 10,5 centimetres by 15 centimetres.
- Black card stock: 10 centimetres by 14,5 centimetres.
- ‘Pumpkins Halloween Gnome’ digital stamp from Polkadoodles (I will link it below). You can use any picture you like.
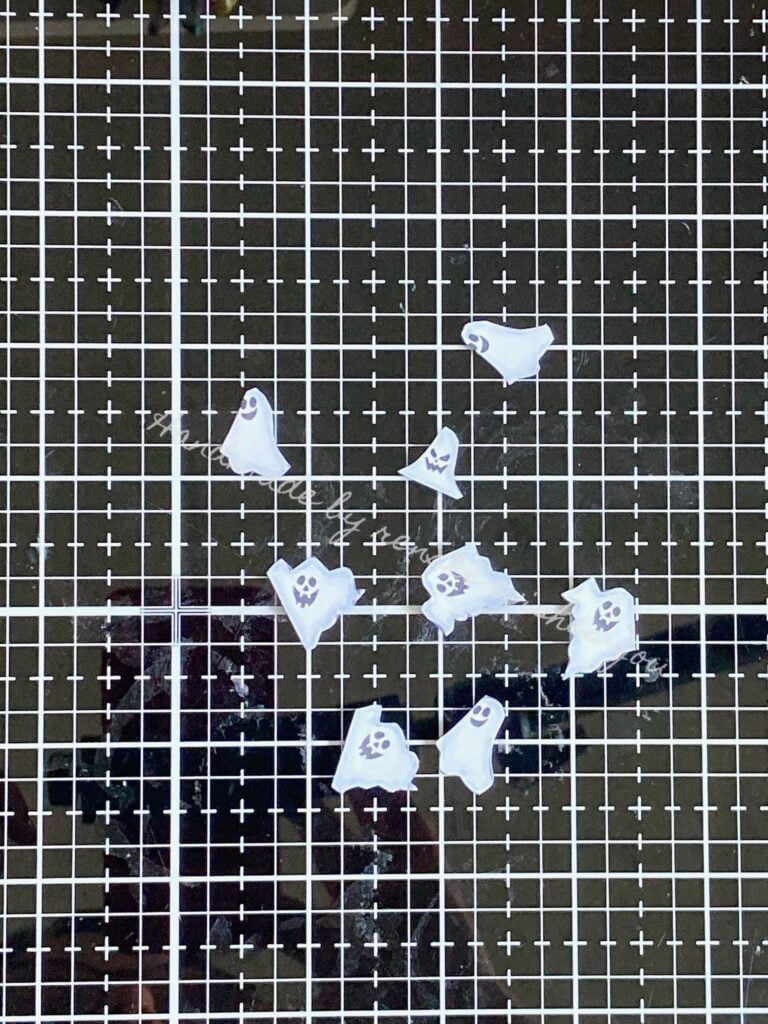
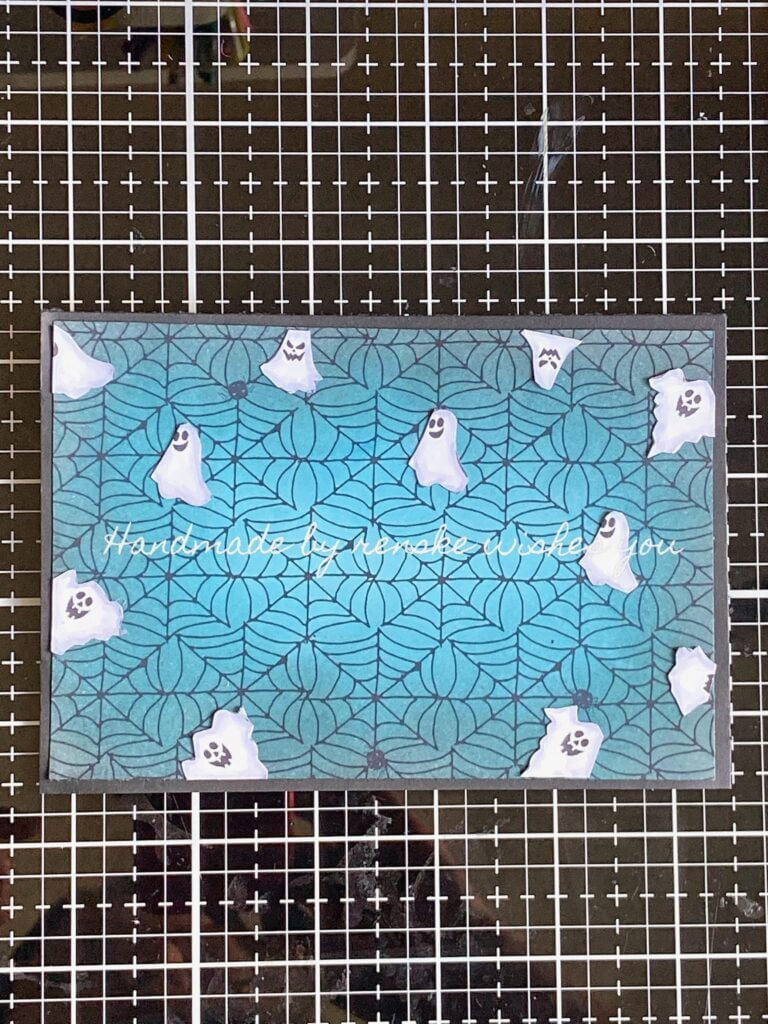
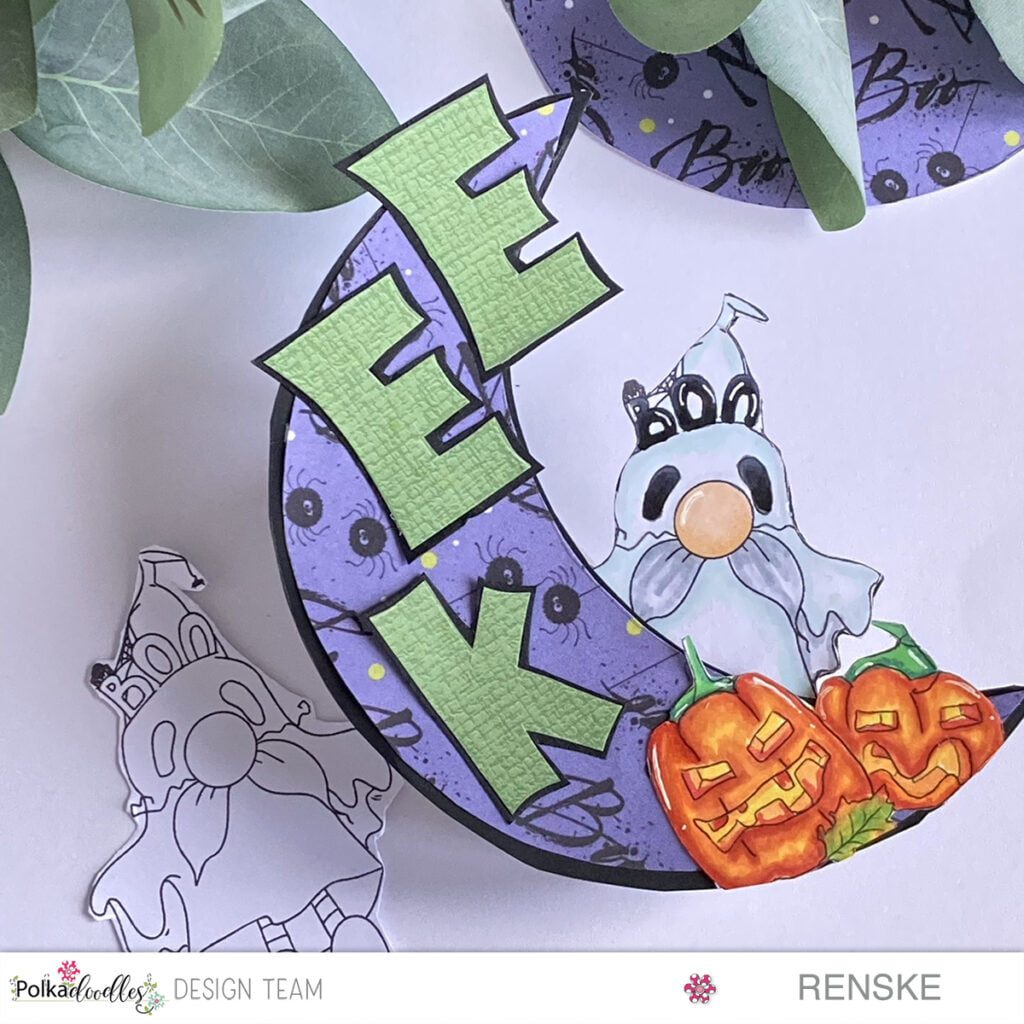
- Boo, Halloween printable background paper from Polkadoodles. I used the pattern paper with the spider webs measuring 9,5 centimetres by 14 centimetres. I also used the pattern paper with the ghosts on it. (I will link this below).
- Halloween printable Greetings (I will link this below). I used the sentiment “Pump Up Your Pumpkins”. You can use any sentiment you like.
- Chalk ink in various shades, including black and blue. You can use any kind of ink you like.
- Alcohol markers to colour the digital stamp. You can use any colour medium you like.
- A white gel pen for those magical highlights.
- A sprinkle of glitter to add shimmer and shine.
- Black pearls.
Step-by-Step tutorial for this Unique Halloween Gnome Card
Step 1. Create the card base.
First, we need a base card that we can work with. You can buy ready-made base cards from the shop, or make your card base from white card stock. I chose the latter. We are going to make the card in landscape style, so with the fold upwards.
To make this card, you will need a piece of white paper measuring 21 centimetres by 15 centimetres. On the long side, score the paper at 10.5 centimetres. Fold it in half and you have your basic card.
Step 2. Bringing ‘Pumpkins Halloween Gnome’ to Life Using Alcohol Markers
Now is the time to bring the ‘Pumpkins Halloween Gnome’ digital stamp to life. These charming gnomes with their creepy pumpkin in hand are the centrepiece of the card.
I coloured them with my alcohol markers, but you can of course use pencils or any other colour medium. I used the following colour combinations:
First Gnome:
- Beard: Cool Grey 5, Cool Grey 4, Cool Grey 1, Colorless blender 0
- Hat: Black, Cool Grey 9, Cool Grey 7 and Cool Grey 5
- Band on hat: Ultra Marine, Deep Violet and Violet,
- Coat: Black (120), Cool Grey 9, Cool Grey 7, Cool Grey 5
- Dress: Ultra Marine, Deep Violet and Violet.
- Stars on the hat: Golden Yellow (222), Lemon Yellow (35), Pastel Lemon (39)
- Shoes: Black, Cool Grey 5, Cool Grey 4 and Cool Grey 1.
Second Gnome:
- Hat: Dark Indigo, Dark Denim Blue, Dark Sky and Midi Sky
- Beard: Cool Grey 5, Cool Grey 4
- Dress: Oranje tinten (vergelijkbaar met de pompoen)
- Slip dress: BG1 en BG3
- Shoes: Zwart (120), Cool Grey 1, Cool Grey 4, Cool Grey 5
- Buckle: Orange (23), Pastel Lemon (35)
- Legging: Deep Violet (81), Orange (23)
Pumpkin and Bat
- Pumpkin: Cardinal, Orange, Bitter Sweet, Pastel Lemon.
- Stem of pumpkin: Grass, Forest, Deep Green
- Bat: Black, Cool Grey 9 and Cool Grey 7.
Now it’s time to make the background.
Step 3. Pimp your patterned paper for an awesome background.
Halloween is not complete without a touch of spookiness. This is where we use our background. From the digital paper set, I chose the paper with the cobwebs in the background. We are going to edit these with ink. For this, I used black colour ink and 2 colours of blue.
Start by inking the edges with darker shades and let the colours fade gently towards the centre. This technique creates an enchanting halo effect around your gnomes, making them stand out beautifully against the background.
In the digital paper set, there is also a paper on which all kinds of ghosts are finished. I will use this paper to cut out the ghosts. I coloured the ghosts with my alcohol markers. I will place these on the background with spider webs so that all kinds of ghosts fly around the gnomes.

Step 4. Highlights and Glitters for a Bewitching Finish
Use a white gel pen to apply highlights for an extra touch of enchantment. I made white stars on the blue hat and white dots on the purple band. I applied also highlights on their clothes and shoes.
As a final addition, I applied some glitter to the stars on the hat of one of the gnomes.
To give the background some extra shine, I stuck black pearls in the middle of some spider webs.
Step 5. Adding the Sentiment and Assembling the Card
Now, let’s add the finishing touches. Choose a “Happy Halloween” sentiment and place your gnomes on it.
I chose the sentiment “Pump Up Your Pumpkins”. I printed it out on white paper, but I thought that was too white for this card. So, I decided to apply grey ink on the sentiment strip.
We now have all the elements ready and can assemble the card. First, I glued the patterned paper we made onto black paper. First, I use foam tape to stick the sentiment in place. Then stick the gnome with foam tape so it looks like they are standing on the sentiment.
A Happy Halloween Card: Get Creative
As we put the finishing touches on our unique Halloween gnome card, it’s time for you to get started. Whether you are a seasoned crafter or a newbie, this is the perfect time to get creative and design your own Halloween card.
Choose your favourite Halloween-themed digital stamps, experiment with different colouring techniques and let your imagination run wild.
More Halloween Card Inspiration
And if you’re looking for more handmade Halloween card ideas, why not check out my other Halloween card made with Polkadoodles products? You’ll find even more creative ideas and techniques to spark your imagination.
So, what are you waiting for? Grab your crafting supplies, let the Halloween magic guide you, and create a card that will delight and enchant anyone who receives it.
Happy crafting and a spooktacular Halloween to you all!
Affiliate Polkadoodles Products used
Please note that this blog post contains affiliate links to Polkadoodles products. This means that if you purchase through these links, I may earn a small commission at no additional cost to you. I only recommend products that I use and love, and your support through these affiliate links helps me continue to bring you creative inspiration and tutorials. Thank you for supporting my crafting journey!
Pumpkins Halloween Gnomes

Boo Halloween Background Paper

Halloween Trick or Treat Printable greetings

I will enter my card in the following challenges
- Creative Knockouts: Anything goes
- 613 Avenue Create: Anything goes
- A Perfect Time To Craft Open Challenge: Anything goes
- Classic Design Challenge Blog: Anything goes
- The Creative Crafters: Anything goes
- Crafting Happiness Challenges: Anything goes
Het is een lekker spooky kaartje, mooie kleuren en details!
Dank je wel
Just beautiful Thanks for sharing over at 613 Avenue Create this month, hope to see you in future challenges.
Elaine DT
KraftiKards (my blog)
613 Avenue Create DT
AAA Birthday DT
Peace on Earth Christmas DT
Simply Clean and Simple DT
Love to Scrap DT
Love to Craft DT
Mix it up DT
Merry Little Christmas DT
Great Halloween card and love the ghost and spider web background.Thank you for joining us at The Crafty Addicts
Carol DT x