

Welcome everyone!
Today, we’re diving into the world of die-cut cards. Recently, I got my hands on a fantastic die set from Aveccreative, specifically designed to create a delightful Christmas stall.
I will guide you through the process of infusing colour into your die-cut elements using various techniques. We will also learn how to incorporate these elements into a card and craft a coherent and charming scene.
So, let’s get started!
Materials for Your Christmas Market Card
To create a beautiful Christmas market card, you will need the following materials and tools:
Materials
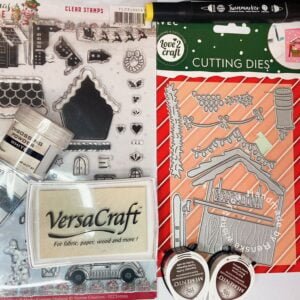
- Die-Cut Set: Aveccreative’s Christmas market die set.
- Cardstock: Different shades of coloured cardstock, including brown for the stall, white for snow, and assorted colours for decorations.
- Ink Pads: Brown and green ink pads for shading and detailing.
- Embossing Powder: White embossing powder for snowy effects
- Deco Snow: For a realistic snow finish.
- Sentiment on Vellum: For the sentiment on the card.
- Markers or other colouring mediums: For colouring the die-cut.
- Adhesives: Double-sided tape, foam tape for dimension and glue.
- Christmas stamp set: Stamps to add details and texture to the scene
Tools
- Die-Cutting Machine: Essential for cutting out intricate designs.
- Scissors: For cutting elements.
- Blending Tools: Brushes or sponges for ink blending.
- Heat Tool: For setting embossing powder.
- Stamping Platform: For precise stamping (optional).
Now that we have all the required materials and tools, let’s get started with making our Christmas market card.
Step-by-Step Tutorial: Crafting Your Christmas Market Card
In this section, I will guide you through creating a card step by step. We will explore different parts and techniques used.
Step 1. Preparing Your Die-Cut Elements
To begin with, select the coloured or white paper of your choice to die-cut the parts with. Deciding on the paper beforehand will speed up the die-cutting process since you can continue in one go.
Die-Cut Elements Overview:
- Christmas Stall: Craft the stall structure using kraft paper for authenticity.
- Countertop: Use vibrant red paper to create an appealing stall countertop.
- Roofing: Construct the stall’s roof with red paper and add snowy white paper for a wintry effect.
- Hot Cocoa Sign: Cut a piece of dark brown paper into the shape of the ‘Hot Cocoa’ signboard.
- Garland: Use green paper to create a festive garland to adorn the stall.
- String with Bows: Utilize red paper to fashion a string embellished with charming bows.
- String of Lights: Cut the string hosting decorative lights from black paper.
- Individual Lights: Create individual lights using white paper. In the following step, we will colour them with alcohol markers.
- Mugs: Cut out mugs in various colours such as pink, yellow, and blue to adorn the countertop.
- Hot Chocolate Tap: Prepare the tap using white paper, ensuring it complements the scene. We will colour it with alcohol markers in the following step.
- Skis: Craft the skis from red paper for a wintry touch.
- Ski Poles: Use black paper to form the ski poles, adding a touch of authenticity.
- Fire Pit: Cut the fire pit from black paper and craft logs from brown paper.
- Fire: Shape the fire using white paper. We will Colour it in the following step.
- Heart: Die-cut the heart from red paper.
- Candy cane: die-cut it from red paper.
- Christmas sok: Craft this out of green paper.
Now that we have die-cut all the elements, we can start editing them with ink and alcohol markers.
Step 2. Colouring Techniques for Die-Cut Elements
To create a realistic scene, you can apply colour and shadows to the die-cut elements. There are two methods you can use to achieve this. Let’s explore them below.
Ink Blending
Ink blending allows you to add subtle tones and shadows to your die-cuts. You can apply ink to the elements using a finger dauber or a blending tool. For instance, you can apply a dark colour ink on the edge and a slightly lighter one further inwards. Additionally, you should consider the colour of the paper to get the desired effect.
I used the following colours and parts for this technique:
- Christmas stall: memento-rich cacao and espresso truffle.
- Garland: olive ripe and spring walk
- String with bows: memento ladybug
- Heart: memento ladybug.
By treating the die-cut parts with ink, you can create shadows and make them more visually appealing.
Alcohol Markers
If you don’t have the right paper colour, you can die-cut the different parts from white paper. Here are the different colour combinations I used for the following parts:
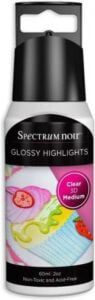
- Individual Lights: Begin by colouring the lights with alcohol markers, applying Cardinal (244) to red lights, Lemon Yellow (35) to yellow lights, Weeds Green (162) to green lights, Midi Sky (190) to blue lights, and Rose Pink (08) to pink lights. Afterwards, apply glossy highlights for a vibrant glow.
- Hot Chocolate Tap: For the tap and lid, layer Cardinal (244), English Red (249), and Burgundy (247) alcohol marker shades. Color the hot chocolate within the tap using Clay (116), Chocolate (118), and Dark Wood (119). For the vat, blend Cool Shadow (178) with Colorless Blender (0). Finally, add a touch of realism to the tap handle by applying silver 3D pearl paint.
Using ink blending to create depth and alcohol markers to add vibrant colours, you can ensure that each element stands out with realistic detail.

Step 3. Creating the Background Scene
Crafting an enchanting background for your Christmas market stall can elevate the overall charm of your card. Follow these steps to create a captivating backdrop:
- Preparation: Start by selecting a dark blue paper with subtle snowflake designs as the base for your snowy backdrop. Cut the pattern paper to 12.5 centimetres by 12.5 centimetres to achieve the desired size.
- Heat emboss elements: Use white ink to stamp various Christmas-themed images, such as trees, a house, a church, and Santa with reindeer on the visible portion of the blue paper. Apply white embossing powder over the stamped images and heat set them until the embossing powder melts, creating a snowy embossed effect.
- Positioning the Elements: Arrange and place the die-cut snow hills on the bottom part of the blue paper, creating a layered snowy effect.
- Highlighting the Scene: Stamp three stars in the top left corner and bottom right corner using white ink, similar to distant twinkling stars in the sky.
By following these steps, you can create a captivating winter backdrop that perfectly complements the festive Christmas market scene.
Step 4. Assembling the Christmas Market Stall
To assemble the charming Christmas market stall, follow these meticulous steps for precise assembly:
Steps for Assembling the Stall:
- 1. Base Structure: Arrange the die-cut elements to form the base structure of the market stall without attaching them to the card base yet. Start by layering the kraft paper structure on a separate surface.
- Element Placement: Carefully position the various elements, such as the kraft stall structure, vibrant red countertop, red roofing piece and white snowy roof section, creating a visually appealing arrangement.
- Snowy Effect: Apply deco snow onto the white paper cut that represents snow on the roof, giving a realistic snowy appearance. Create depth by layering the elements strategically.
- Decorative Additions: Adorn the stall with the green garland, attaching it neatly to the structure. Attach the red paper string adorned with bows onto the garland for added festivity. Add the candy cane and green Christmas socks to the red string.
- Illuminating Details: Place the meticulously coloured string lights around the stall’s edge, ensuring a vibrant and inviting ambience.
- Signboard Placement: Position the dark brown paper cutout resembling the ‘Hot Cocoa’ signboard onto the stall’s sloped roof, enhancing the inviting allure.
- Charming Additions: Affix the chocolate milk tap to the right side of the stall’s countertop, creating a focal point. Place the intricately crafted mugs (pink, yellow, blue and rose) neatly onto the countertop, enhancing the cosy, inviting atmosphere.
- Final Touches: Attach the red heart cutout onto the front of the stall, adding an endearing touch. Use a white gel pen for subtle highlights to enhance the stall’s detail
By following these steps you can assemble a charming Christmas market stall.
Here is a short form video on how I made the Hot cocoa stall.
Step 5. Assembling the Christmas Market Card
Now it’s time to bring all the elements together and assemble the card.
Steps for Assembling the Card
- 1. Snowy Background: Begin by adhering to the snowy background panel onto the card base. The card base measures 13 centimetres by 13 centimetres.
- Creating Depth: Layer the snowdrift elements, placing one directly on the background and stacking the others using foam tape for a three-dimensional effect.
- Market Stall Positioning: Carefully place the assembled Christmas market stall between the layered snowdrifts, ensuring it sits slightly to the right, creating a balanced visual composition.
- Adding Accessories: Position the skis and ski poles against the stall, leaning as though placed by a festive visitor enjoying a cup of hot cocoa.
- Fireside Charm: Set the meticulously crafted fire pit and logs in front of the snowdrifts, contributing to the cosy ambience of the scene.
- Nature’s Touch: Tuck the green paper cutout branches behind the snowdrifts on either side, suggesting natural greenery peeking through the snow.
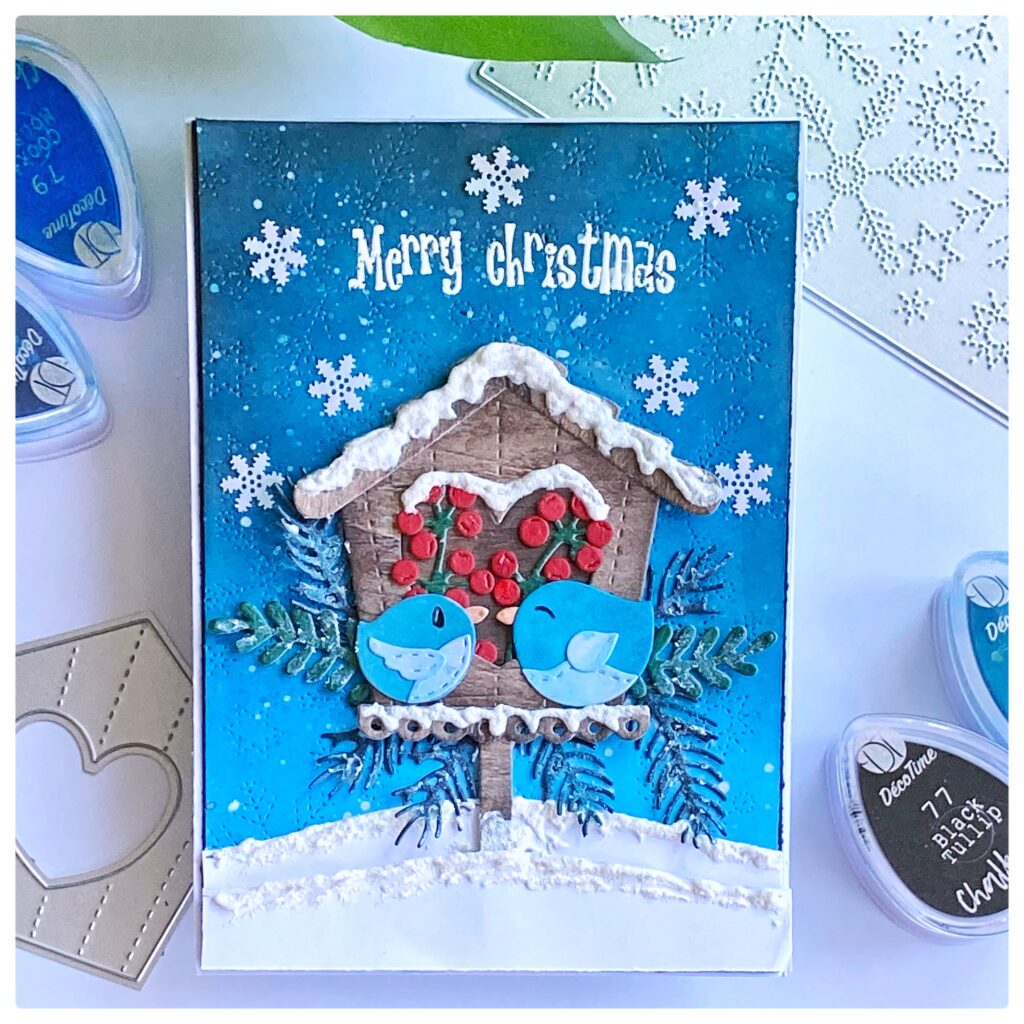
- Additional Embellishments: Place the vellum with ‘Merry Christmas’ text atop the snowy drift, centrally in front of the market stall, bringing a heartwarming message to the scene.
- Final Accents: Add tiny red berries atop the green branches for a pop of colour and detail. Ensure all elements are securely adhered to complete the charming Christmas market scene.
By following these steps you will create cohesion on this card and the Christmas scene will come to life. Now the card is ready to go to the recipient!

Inspire, Create, Share, and More!
Thank you for joining me on this creative journey to make a Christmas market card. In this article, you have seen how to create a card scene with die-cuts, to give the elements colours with ink and alcohol markers. You can apply these techniques to all types of cards.
More card-making inspiration
If you’re looking for more handmade card inspirations, check out these related blog posts for additional techniques, ideas, and card-making inspiration:
Products and Tools I have used for this card
Affiliate Disclosure: This post contains affiliate links. As an affiliate, I may earn a commission on qualifying purchases made through these links, at no extra cost to you. It supports me, to make more content like this. I appreciate your support.
Products with affiliate links

Embossing Powder White from Ranger

White Gelly Roll Pen 08
Products without affiliate links
These are all products that I bought at ActionNl. Unfortunately, there are no links for this.
- Christmas Market die set from Aveccreative.
- Background paper from Craftsensations
- Twin markers (alcohol markers) from Decotimecrafts
- Vellum with sentiment Merry Christmas from a luxe paper block from Decotimecrafts.
I would like to enter my card in the following challenges
- Crafty Gals Corner: Tis the season
- CREATIVE INSPIRATIONS: Happy Christmas and Happy New Year
- My Time To Craft!: Holidays around the world.
- Lil Patch of Crafty Friends Challenge …: Anything goes
- 613 Avenue Create: Anything goes + Winter Holiday
- Dragonfly Dreams: Christmas
- Classic Design Challenge Blog: Anything goes
- The Creative Crafters: Anything goes
- Creatalicious Challenges: Anything goes + Last minute Christmas
Such a warm and inviting Christmas scene. Lovely work. (fantastic tutorial). Thank you for joining us over at Crafty Gals. Best of luck, Jana DT
Thank you
Adorable Christmas Card. Thank you for joining the challenge at Crafty Gals Corner.
Thanks
Hi Renske, a stunning wintry Christmas scene, love the scene you created and love the sleigh flying through the sky, thank you for joining us at Lil Patch of Crafty Friends, good luck in the prize draw… Wishing you a Happy and Crafty New Year, look forward to seeing your entries again in 2024… Megan DT LPoCF
Thank you so much for your lovely comment, A happy and crafty year to you too,
Adorable card!!! Thanks so much for participating in our DRAGONFLY DREAMS challenge!!! I appreciate that you play along and I enjoy visiting your blog!! Have a happy crafty day!! Deanne at A Little Bit O’ Paper
Thank you so much