
Hello, fellow crafters!
Today, I have a fun and festive project to share with you. As a member of the Polkadoodles Design Team, we were recently given a creative challenge – to make some Christmas magic with the theme “Christmas presents”. And I can tell you that my creativity took off immediately.
The challenge is great, but there is a little twist. After all, for the Polkadoodles Challenge Blog, “Anything Goes” applies. That means you can make whatever you want, whether it’s within the Christmas presents theme or a project you choose all by yourself.
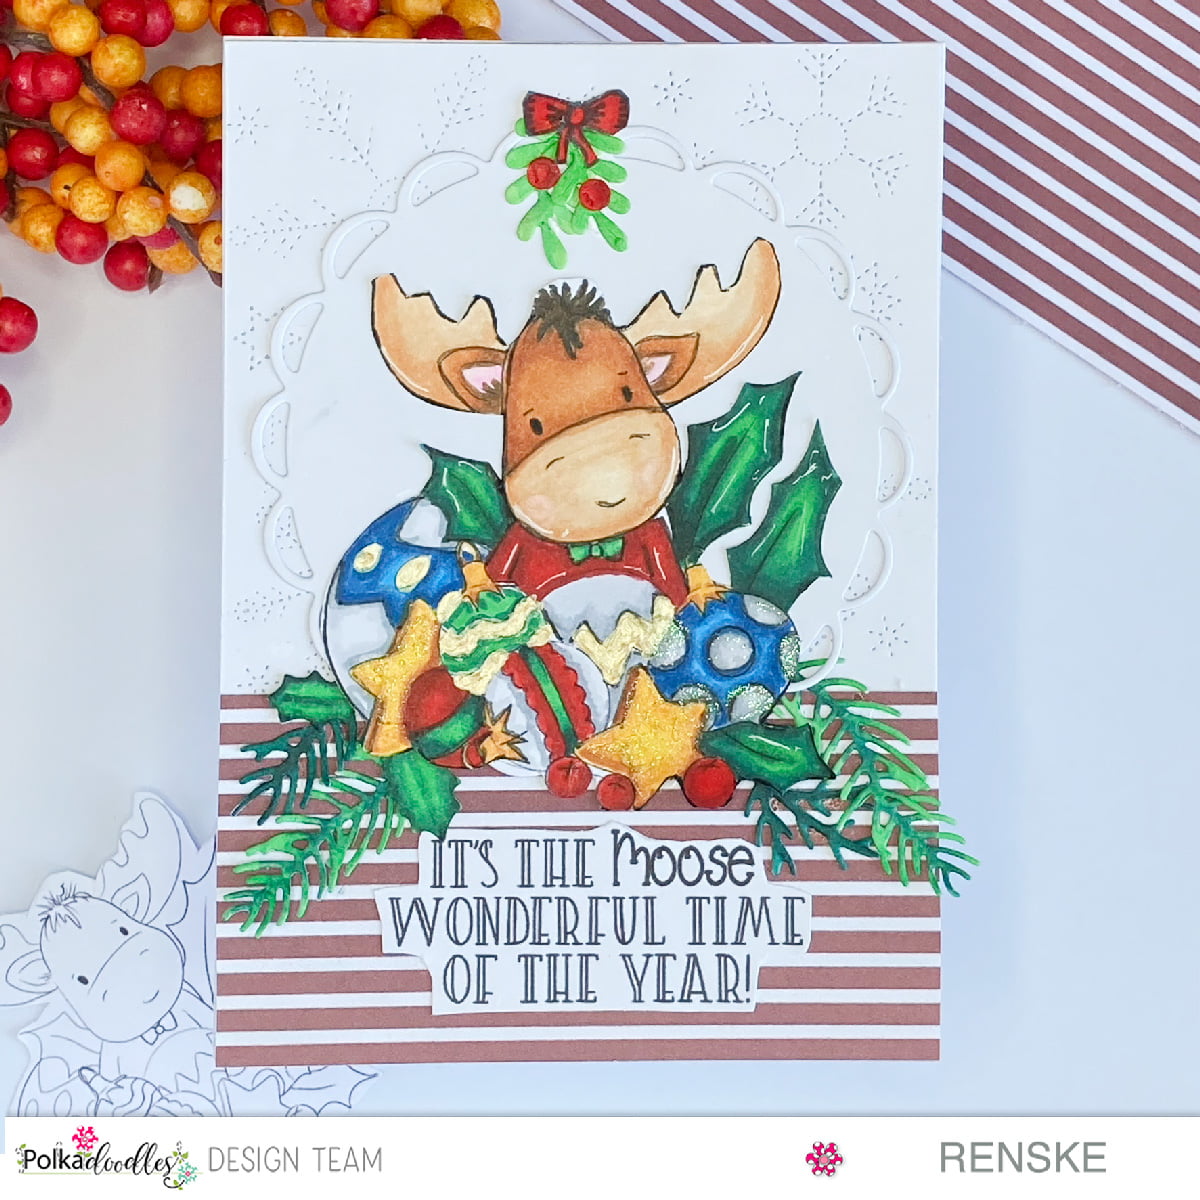
But back to my latest creation. I thought, “Why not make the card itself look like a present?” And that’s exactly what I did. In this post, I’ll walk you through the steps to make your own Christmas Present card. We’ll cover the materials, the design process and the little tips and tricks I used to bring the card to life.
Oh, and don’t forget the fun part – you’ll have the chance to win amazing prizes if you take part in the challenge. And of course, I have some great Polkadoodles products up for grabs, so keep an eye out for those.
Let’s get crafty and spread some holiday cheer. So grab your favourite crafting gear and dive into the wonderful world of card making!
Materials and Supplies
Before we dive into the nitty-gritty of creating our Christmas Present Card, let’s make sure we have everything we need. Here’s a quick rundown of the materials and supplies that will help you bring this project to life:
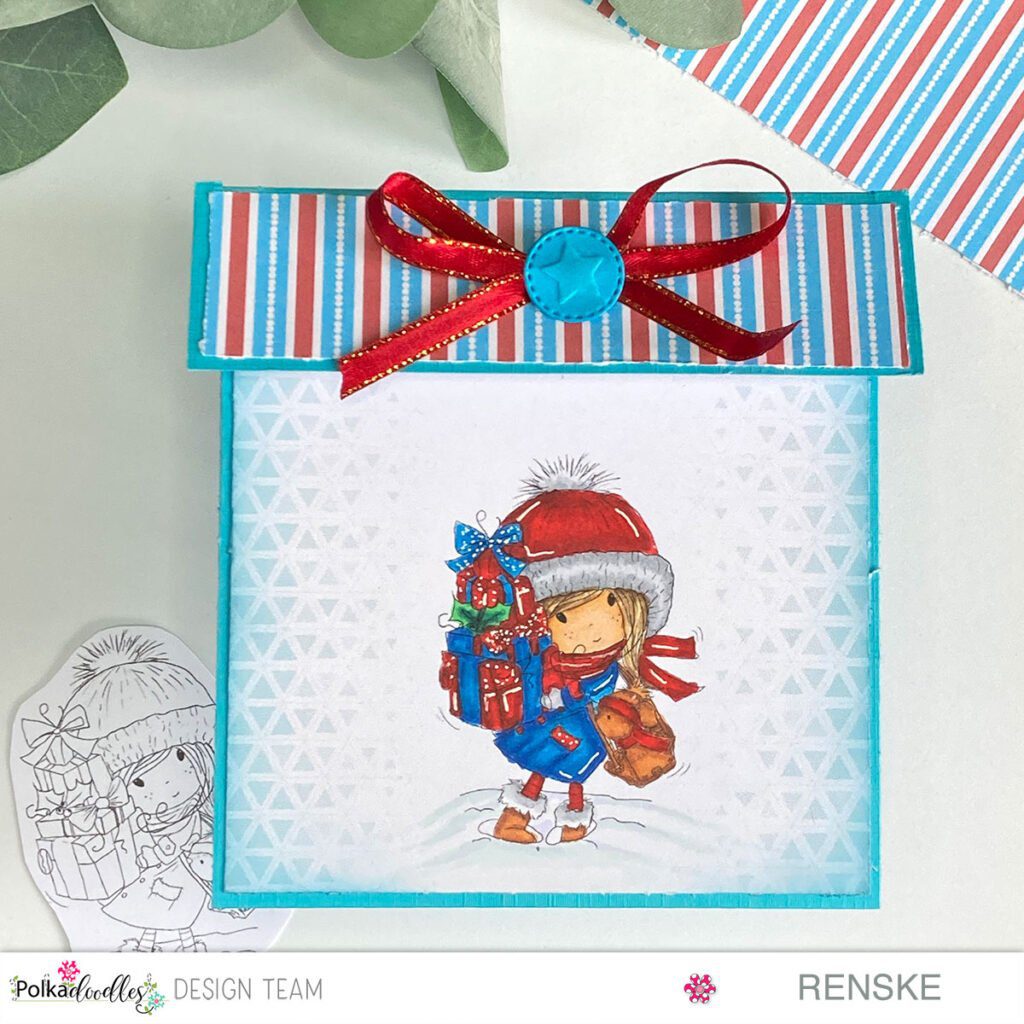
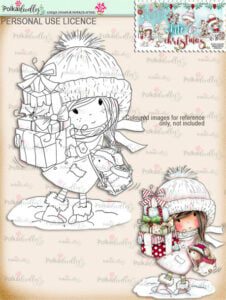
- Polkadoodles digital stamp for Christmas shopping: This beautiful digital stamp shows a charming scene of a girl with a pile of Christmas presents and a mouse friend. It’s the heart of our card and it’s brimming with holiday spirit.
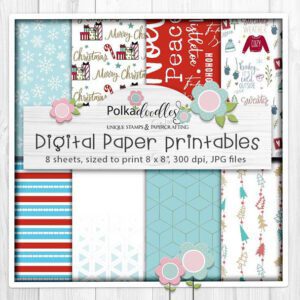
- Theo Penguin Paper Collection: For this project, I used a selection of patterns from this collection. The patterns are so festive and versatile that they give your card that extra something.
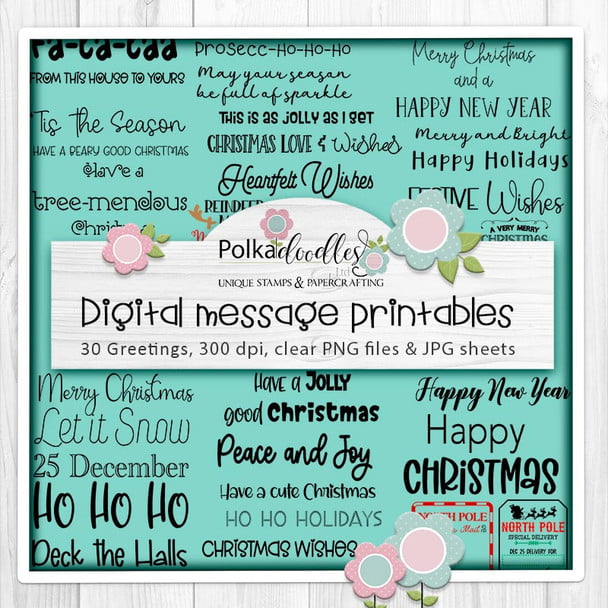
- Christmas greetings sentiment set: To spread some Christmas cheer, use sentiments from this set. A “Merry Christmas” or a “Joyful Holiday” message is always heart-warming.
- Alcohol Markers: You’ll need your favourite alcohol markers, or any colour medium you prefer, to colour in the digital stamp. I’m sharing the colour combinations I used, but feel free to be creative and choose your palette. There is also a pre-coloured digital stamp when you don’t love to colour. I will also link that one below.
- White gel pen: This trusty pen is perfect for adding bright highlights and details to your coloured image. It’s like magic to make your design pop!
- Glue: Get good quality glue to put everything together. Glue or double-sided tape will do.
- Paper cutter and marking tool: A paper cutter allows you to cut precisely and a marking pen allows you to make the card base.
Make sure to have these supplies at the ready, and let’s get ready to craft a card that’s going to spread smiles this holiday season!
Step-by-Step Tutorial of this Christmas Present card
Alright, time to roll up our sleeves and create some holiday crafting magic! In this section, I’ll walk you through the step-by-step process of making your very own Christmas Present Card. Don’t worry if you’re new to card making – I’ll guide you through each stage with easy-to-follow instructions and plenty of visuals.
Step 1: Crafting the Present Shape Card Base
Let’s start creating our card by making the foundation. Making the card in the shape of a present adds to its Christmas theme. You need an A4 piece of card stock. I cut the paper on the short side at 13 centimetres. Then, I made scoring lines on the longer side at 12.8 centimetres and 26 centimetres, which will create the fold lines for the card.
To give the card the shape of a gift, the short flap that will fold over the card needs to be slightly wider than the rest of the card. To achieve this, I took off 0.5 centimetres on both sides of the paper, up to the scoring line of 26 centimetres. Once you have done that, fold the card, and your gift-shaped base is ready. For this card, I used blue paper as it complements the other elements of the card.
Step 2: Printing the Patterned Paper with the Digital Stamp
Let’s move on to step 2, where we’ll be printing the patterned paper with the digital stamp. For this project, I used the Theo Penguin Paper Bundle and selected the desired patterned paper for my card.
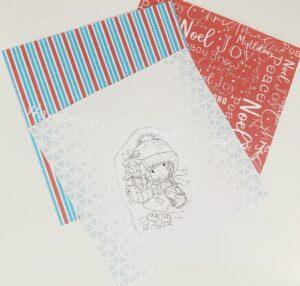
I printed several pattern papers on DCP paper, and used the following patterns:
- Red and white striped pattern on the front of the top flap
- Red paper with white text for the inside.
- White with a blue pattern on the outside will be on the front of the card.
The front of the card
For the front of the card, I used red, white, and blue patterned paper on the flap that serves as the lid of the gift. The size of this is 12.5 centimetres by 3.5 centimetres. I used the same patterned paper with the same dimensions for both sides of this flap
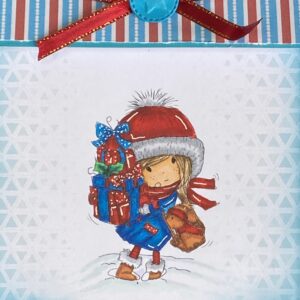
For the size section on the front, I used a piece of patterned paper measuring 12.3 centimetres by 11.5 centimetres. To print the digital stamp on this paper, I turned the pattern horizontally and placed the digital stamp in the right position before printing it out. This way, everything is in the right place, and you can colour in the digital stamp.
The inside of the card
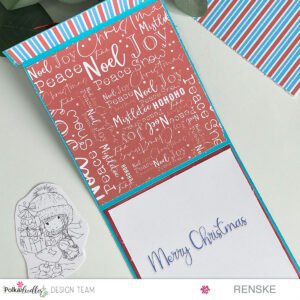
Moving on to the inside of the card, I used the same patterned paper on the back of the small flap as I did on the front.
In the middle section, I used red paper with white text on it, with the words “Noel, Joy, Peace Snow”. This measures 12.3 centimetres by 11.5 centimetres.
On the lower part, I placed two layers of paper. First, a layer measuring 12.5 centimetres by 11.5 centimetres, and on top of that, a layer with the sentiment “Merry Christmas”. I printed this sentiment from the sentiment set, pasted it in Word, changed the colour to blue, and added a slight red shadow. Make sure you place it on the document with enough space around it to cut it to size. The paper will be 12 centimeters by 11 centimeters.
That’s it for the inside. In the next step, I’ll describe the colouring process.
Step 3: Coloring the Image with Alcohol Markers
Time to bring our Christmas Shopping scene to life! I used my trusty Alcohol Markers for this part. Here are the colour combinations I used for different elements of the image:
- Skin: Tanned Skin, Peachy Blush, Salmon Pink, and Barely Beige for the skin.
- Hair: Clay, Walnut, Brown Grey, and Leather
- Red colours: Cardinal, English Red, and Burgundy.
- Blue colours: Royal Blue, Indian Blue, and Cerulean Blue
- Shoes and Little Mouse: Sand, Rose Beige, and Burnt Sienna.
- Shoes and the hat: Cool Grey markers for the bonding of the shoes and the hat.
- Snowy Ground: Mauve Shadow, and Cool Shadow for a chilly, wintery effect.
Feel free to play around with your markers and get creative with the colours. Add depth and dimension to your image, and don’t forget to add some highlights using that trusty white gel pen. I added highlights to the presents, the hat, the scarf, and even some cute little dots on the bows. It’s all about those extra touches.
Step 4: Decorative Elements
With our main image all coloured in and looking fantastic, it’s time to put the finishing touches on our Christmas Present Card. I created a gorgeous red bow with golden accents to adorn the card’s flap – because you can never have too many bows during the holidays, right?
Additionally, I crafted a charming blue button with embossed stars for that extra touch of magic. This button sits right in the centre of the bow, making the card feel like a real gift.
The result? A festive masterpiece ready to spread holiday cheer! The best part is, that you can create this Christmas Present Card in the comfort of your home, with the satisfaction of saying, “I made this!”
Now that we’ve walked through the crafting process, it’s time to introduce you to the Polkadoodles challenge.
Entering the Challenge
Alright, crafters, this is where things get exciting! As part of the Polkadoodles Design Team, we’ve embraced the theme of “Christmas Presents” for our projects. But here’s the fun part – on the Polkadoodles Challenge Blog, it’s all about “Anything Goes.” This means you have the creative freedom to design whatever your heart desires.
Here’s how it works:
Challenge Theme: If you’d like to create a project within the “Christmas Presents” theme, you’re welcome to join us. This could be a card, a scrapbook page, a tag, or any other crafting idea that fits the theme. It’s the perfect opportunity to showcase your unique take on the holiday season.
Anything Goes: On the other hand, if the “Christmas Presents” theme isn’t your cup of tea this time around, that’s perfectly fine. You can still participate in the challenge with your project. The “Anything Goes” theme means there are no constraints. You have the freedom to let your creativity shine in any crafty direction you choose.
Prizes and Recognition: The Polkadoodles Challenge Blog is all about celebrating your creativity. When you enter the challenge, you have a chance to win fantastic prizes and gain recognition for your work. Plus, it’s a wonderful way to connect with a community of crafters who share your passion.
So, whether you’re feeling the holiday vibes and want to create something related to “Christmas Presents” or if you’ve got a unique project in mind, don’t hesitate to join the challenge. It’s a fantastic opportunity to showcase your talent, get inspired by others, and possibly walk away with some fantastic prizes. Be sure to check out the challenge details on the Polkadoodles Challenge Blog and see how you can enter.
You can enter the challenge here.
But, of course, there’s one more aspect to this project that I can’t wait to share with you. And that’s shining a spotlight on the fabulous products from Polkadoodles. I’ll spill the beans on that in the next section, so keep reading!
Polkadoodles Products in the Spotlight
Now, let’s talk about the creative arsenal that made this project possible – the fantastic products from Polkadoodles. As a member of the Polkadoodles Design Team, I had the pleasure of working with some incredible items, and I’d like to give them the spotlight they deserve.
Christmas Shopping Digital Stamp: The heart of this project is the charming “Christmas Shopping” digital stamp. It’s filled with holiday spirit, featuring a girl with a stack of Christmas presents and a little mouse friend. The level of detail and the delightful scene make it a perfect centrepiece for a Christmas card.
Theo Penguin Paper Bundle: To add that extra layer of festivity, I turned to the Theo Penguin Paper Bundle. This bundle is a treasure trove of patterned papers that are perfect for holiday crafting. The patterns are colourful, cheerful, and versatile, giving your project that extra pop.
Christmas Greetings Sentiment Set: A Christmas card is never complete without heartfelt sentiments. The “Christmas Greetings” Sentiment Set was the cherry on top of this project. With messages like “Merry Christmas” and “Joyful Holidays,” it’s the perfect way to send warm wishes to your loved ones.
And here’s the exciting part – if you’d like to explore these products and create your holiday masterpieces, I’ve got an affiliate link ready for you. By using the link, you not only get your hands on some fantastic crafting supplies, but you also support me. This way I can keep on making this free inspiration cards for you.
So, as you dive into your creative projects, don’t forget to check out the Polkadoodles website for these and more incredible crafting goodies. After all, the right tools can turn your ideas into works of art. You can find the affiliate links below.
Now, we’re reaching the end of our creative journey, but there’s one more thing I’d like to share in the next section. So, keep reading to wrap things up with a flourish.
Thanks for being a part of our creative community, and until next time, happy crafting!
More Christmas Card Ideas
Affiliate Polkadoodles Products Used:
I would like to enter my card in the following challenges:
- Unicorn Challenge Blog: Christmas
- Crafty Gals Corner: Dots and/or Stripes
- Through The Purple Haze Challenges: Anything goes
- Lil Patch of Crafty Friends Challenge …: Anything goes
- Stamping Sensations: Get Ready for Christmas
- A Perfect Time To Craft Open Challenge: Anything goes
- Crafts Galore Encore Challenge Blog: Anything goes
- Daisy Chain Challenges: Christmas/Winter
- Pearly Sparkles Challenge Blog: Christmas/Winter
- SheepSki Designs Challenges: Get Ready For Christmas
- Most Magical Time of the Year!: Anything Christmas or Halloween Goes
Great design and lovely image with beautiful coloring, always nice to see “how to” tutorial. Thank you for sharing with us over here at Sheepski Designs and best of luck with your entry.
Granne DT for https://sheepski-designs-challenges.blogspot.com/
Thank you
This is so sweet and cute and great tutorial too! Thanks for joining us at Stamping Sensations this month.
Pinky
Thank you
At first I thought you used a stencil (I love stencils…), but it is nice to read how you made this sweet and winter card. Thank you for joining us at Stamping Sensations!
Thank you. I love stencils too, but some times it nice there is digital paper 😉
A prettily designed Christmas card, many thanks for sharing with us at Stamping Sensations challenge.
B x
Thank you ❤️
Great design and love the beautifully coloured gorgeous image.Thank you for joining us at Pearly Sparkles
The Crafty Addicts
Stamping Sensations
Carol DT x
Thank you so much ❤️