

How to dry emboss with stencils?
Hello everyone!
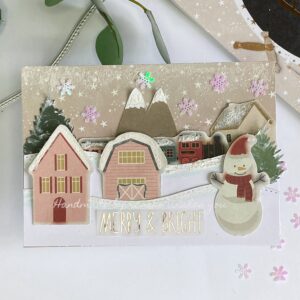
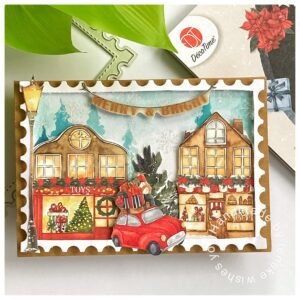
Today I have this Christmas door card for you made with the technique of dry embossing with stencils. In this article, you will find out how to do that. I used the images from the Luxe Paperblock from Decotimecrafts. I love these blocks. There are all kinds of die-cuts in it and patterned paper. I love getting some of those die-cuts together to start making a card with it. Then I decide what I want to use from my stash.
So let’s talk about how I made this card.
Measurements you need for this Christmas door card
- Make a card base from white cardstock measuring 15 centimetres by 30 centimetres. You score on the long side at 15 centimetres.
- The first red layer measures 14,5 centimeters by 14,5 centimeters.
- I used patterned paper to make my wall. You can use any paper you have.
- Black cardstock to die-cut the fences.
- Some white paper to tear, to make some snow hills.
- Some green card stock to die-cut the branches on top.
- A piece of wooden patterned paper.
Dry embossing with a stencil.
I found some beautiful, patterned paper, that looked like a concrete wall. I wanted to give the paper some texture. So, I decided to use my brick stencil and dry emboss with it.
For this technique you will need a die-cutting machine. You spray your paper wet advance, on the front and the back. You will get more texture if you do this. Then you take the plates from your die-cutting machine. Place the paper you want to emboss on here. You lay your stencil over it and on top of that a piece of paper. Pass this through your die-cutting machine. Now you will have this nice dry embossed effect on your paper.
Now we have our perfect background for our Christmas door card. Let’s go on with designing the card.
Making the design on the card.
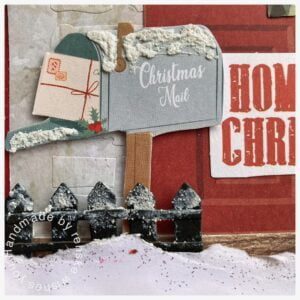
When my background is finished, I can start with the design of the card. The door, wreath, mailbox and tree are coming from the Luxe paper block.
I had in my head that the wreath should be on the door. The tree in front of the door and the mailbox too. This is the centre of the card. But then the card still looks a bit empty, so I wanted to add some more. I decided I wanted to make a fence and a snow hill.
To make the snow hill, I tore some paper and used that to make the snow hill on the front.
To the right and the left of the door, I wanted to place some fences. I die-cut this from black paper.
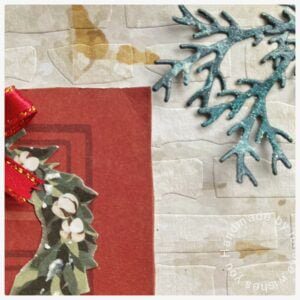
To give some interest on the top of the card I die-cut some branches out of green cardstock.
Assembling the card.
Now I have all the pieces I want to use on the Christmas door card it’s time to assemble it. First I glue the red card-stock on the base of the card. On top of that comes the brick wall. First I glued my wreath on the door and the sentiment. I decide where I want my door, so I can assemble all the other pieces around it. Under the door, I place the wooden patterned paper. You will not see much of it, but It peeks through behind the snow. I glue the fences behind my snow and put it with thick foam tape at the bottom of my card. The mailbox and the tree are coming between my snow and my door. I place them with some thinner foam tape. I place the lamp in the right upper corner and place the branches.

Adding details to this card.
Because I made the snow on the front of the card, it makes sense there is snow on the other elements as well. For this, I needed my Deco Snow again. I love to use this on my cards. On the mailbox I added the deco snow directly from the bottle, to give it a thick layer. For the rest of the items I applied the snow with a pencil, to give it a more subtle effect.
On the top of the snow in the front, I wanted to give it some sparkle. I used my glitter glue for that. And to finish the card I made a bow for the wreath.

Our Christmas door card is finished. I hope you like it. Let me know in the comments.
More card-making inspiration
I’m listing the products I used below. I will link them when I can. Click on the link to go directly to the product. Where available I use compensated affiliate links which means if you make a purchase I receive a small commission at no extra cost to you. Thank you so much for your support.
Products I used:
- Luxe Paperblock from Decotimecrafts.
- Concrete wall patterned paper from Craftsensations.
- Brick wall stencil from Dutch Doobadoo.
- The sentiment is from an old paper block from Decotimecrafts.
- Dies to make the fence from the Birdhouse set from Aveccreative.
- The branches dies from Aveccreative.
- Deco snow from Decotimecrafts.
- Tacky glue.
- Glitter glue from Craftsensations.
I would like to participate in the following challenges:
- Creative Knockouts: Anything goes
- Try it on Tuesday: Traditional Christmas
- Crafty Catz: Anything goes + Christmas
- The Holly and Ivy Christmas Challenge: Anything Christmas goes
- The 12 Months of Christmas Link Up: Anything goes + twist use patterned paper
Renske: Your front door scene is wintery and festive! Makes me think of coming home for the holidays! Thanks for linking your card to The Holly and The Ivy!!! –Becca/DT
Thank you so much
A wonderful embossed background for this super traditional card. Thank you for linking with us at Try it on Tuesdays.
Yvonne
That’s a wonderfully festive doorway. What a lovely card. Thanks for sharing with us at Try It on Tuesday Renske. hugs-Erika
Stunning card, love the background blending and your delightful colouring. x
Leuk om te lezen toe je de kaart hebt opgebouwd en de technieken die je gebruikt hebt!
Ah dank je wel! Bedankt voor de feedback. Heb het maar gelijk geprobeerd toe te passen 😉