
If you want to create a stunning Christmas card but are unsure how to incorporate a colouring page, don’t worry. You’re in the right place! Today I have a Christmas card colouring tutorial for you.
I’ve always found that the act of colouring brings a sense of calm midst the holiday rush. I remember the first time I used the Colour of Love stamps. I love the intricate details on the Colour of Love colouring pages. Each design comes to life with just a few strokes of colour. What’s special about these stamps is how the design really comes to life with alcohol markers.
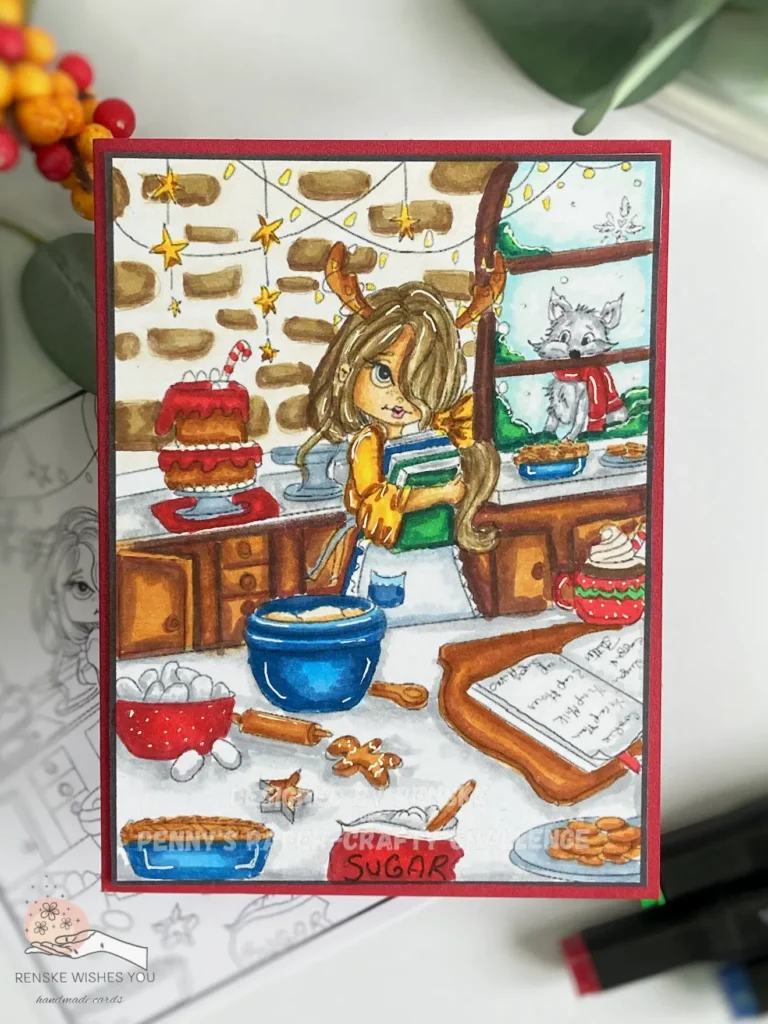
This card is part of the Penny’s Paper-Crafty Challenge, which has the theme “Anything Goes Using Paper.” We are fortunate to have two fantastic sponsors for this challenge: Colour of Love and All Dressed Up Stamps. I will be using the Christmas Star digital stamp from Colour of Love, which perfectly captures the festive spirit.


In this Christmas card colouring tutorial, I will guide you through the process. We will start with colouring the digital stamp. Then, we will continue to assembling the card. Let’s get started and create a card that’s sure to spread some holiday cheer!
- Materials for Your Christmas Card Colouring Project
- Step-by-Step Christmas Card Colouring Tutorial
- Let's Get Creative Together
- Products used
- Products without affiliate links
- I would like to enter my card in the next challenges
Materials for Your Christmas Card Colouring Project
Here’s a list of all the essential materials you’ll need to create this beautiful Christmas Star card. This collection of supplies will help you achieve a similar look. I’ll also give some alternatives if you don’t have everything on hand.
| Material or tool | Purpose | Alternative |
|---|---|---|
| Colour of Love Christmas Star Digital Stamp | This serves as the focal point of your card. It’s a colouring page that you will print and colour in to create a stunning Christmas scene. | |
| Alcohol Markers from Decotimecrafts | These markers are perfect for colouring the Christmas Star image. | Coloured pencils, watercolour mediums. |
| White Gel Pen | To add highlights and small details. | white paint marker |
| White DCP Paper | To print the colouring page on. | Any paper suitable with alcohol markers |
| Black Card Stock | To create the sentiment | Any coloured card stock you have |
| Alphabet Die from Craftemotions | For creating the sentiment | To create the sentiment |
| Glue | To assemble your card and attach the various elements. | Double Sided tape |
| Scissors | For cutting out your coloured image or trimming any other parts of the card. | Craft Knife |
| White Card Base | The base of the card | Any colour you have |
Now that we have all the materials ready, let’s start the step-by-step process to bring this card to life. I’ll walk you through each stage, from colouring the Christmas Star image to assembling the final card. Let’s get started!
Step-by-Step Christmas Card Colouring Tutorial
Transforming a beautiful colouring page into a handmade Christmas card is a rewarding and creative process. In this section, I’ll guide you through the steps. We will bring Colour of Love’s Christmas Star digital stamp to life. We’ll use simple techniques and a touch of your personal style. Let’s create this cute Christmas card.
Step 1: Printing and Preparing the Christmas Star Digital Stamp

In this step, you will learn how to prepare your colouring page for use on a handmade card.
Before you start colouring, it’s essential to properly prepare your digital stamp. I printed the Christmas Star colouring page from Colour of Love onto DCP paper, which is ideal for alcohol markers. This type of paper ensures smooth blending and vibrant colours.
I resized the image to 11.5 x 9.5 cm, which is perfect for a card base measuring 10.5 x 14.8 cm. This leaves enough space to add a sentiment.
If you plan to use a different colouring medium, consider selecting a paper type that better suits your needs.
Tip: Adjust your printer settings to the highest quality to capture all the fine details of the design. Make sure the size you choose complements your card layout for the best results.

Having trouble editing or colouring digital stamps? Download my free guide for extra tips and tricks to help you perfect your digital stamps!
Step 2: Colouring the Christmas Star with Alcohol Markers
Now it’s time to bring your Christmas Star colouring page to life with vibrant shades and smooth blends. I used alcohol markers for this step, selecting a range of colours to create depth, texture, and a festive feel.
Here are the colouring combinations I used:
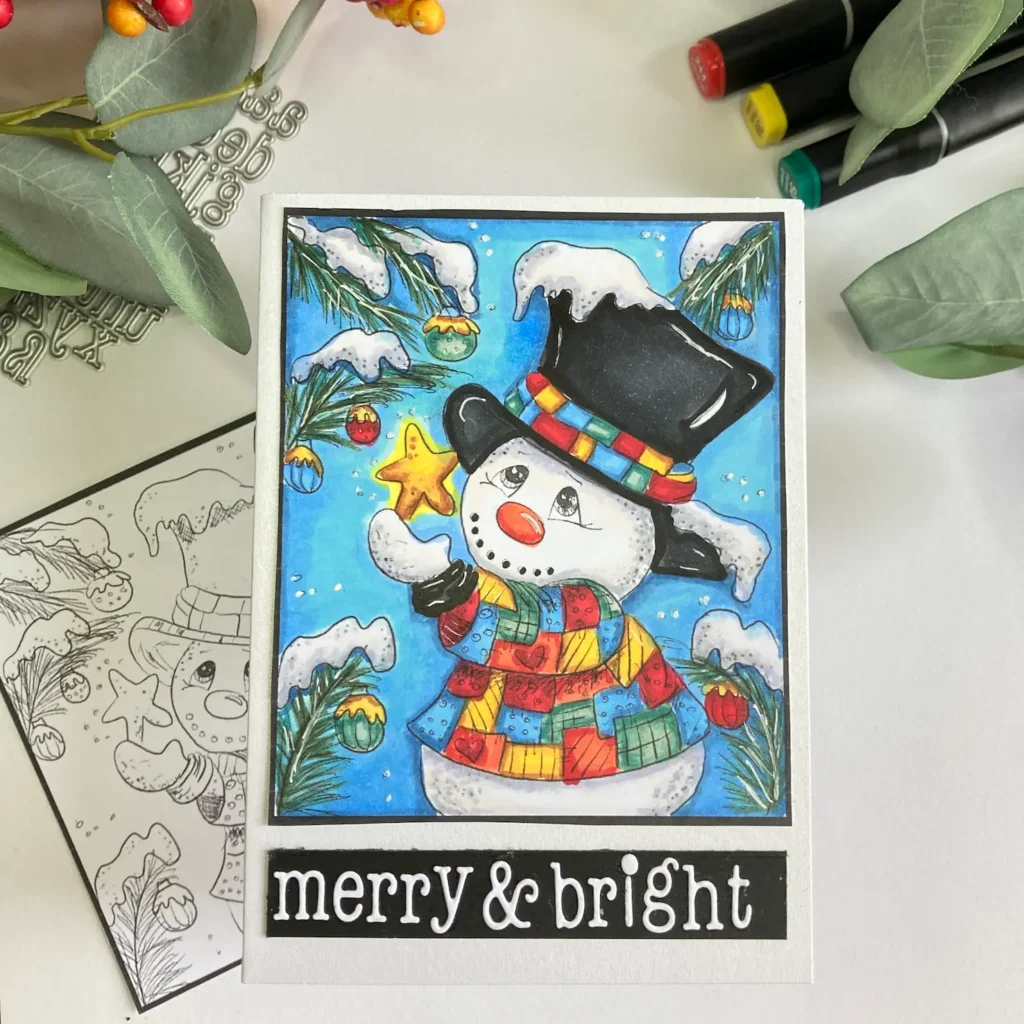
- Snowman: I used Cool Grey 4 (CG4) and Cool Grey 3 (CG3). I also used a Colourless Blender to achieve a soft, snowy look.
- The Hat: The hat has a rich finish with layers of Black (120). It also includes Cool Grey 9 (CG9), Cool Grey 8 (CG8), Cool Grey 7 (CG7), and Cool Grey 5 (CG5).
- The Stars: The stars on the snowman’s patchwork coat shine in Barn Red (245). The golden details sparkle in Golden Yellow (222) and Primary Yellow (221).
- Blue Patches and ornaments: I blended Mint Blue (143), Boy Blue (144), and Neon Blue (129).
- The Greenery: The greenery on the branches features Pine Needles (252) and Forest Green (50). The green patches also include these tones for continuity.
- Red Patches: I combined Cardinal (244), English Red (149), and Burgundy (247).
- Orange Patches: They were brightened with Yellow (34) and Orange (244).
- Background: I blended Midi Sky (191), Neon Blue (129), Boy Blue (144), and Mint Blue (143), making the image pop.
- Snow: To create dimension in the snow, I used Cool Grey 4 (CG4). I also used Cool Grey 3 (CG3) and the Colourless Blender (0).
Blending Tip: Use small circular motions when blending to achieve smoother transitions between colours. Layering darker shades on the edges and lighter ones in the centre adds depth and creates a three-dimensional effect.
This step transforms your colouring page into a vibrant and dynamic piece, ready for the next stage of card making.

With the colouring finished, your Christmas Star image is full of depth and vibrant hues. Still, there is another step to make it truly shine. Adding highlights with a white gel pen will enhance the details and create a polished, professional look.
Step 3: Adding Highlights to Your Christmas Card Design
once you’ve finished colouring, enhance your card with a white gel pen. Highlights can make the image pop and draw attention to key details.
I began by applying highlights to the snowman’s hat, focusing on areas where light would naturally reflect. Next, I added white accents to the ends of the coat sleeves to emphasize their shape. For the background, I dotted small white specks to mimic falling snow, which added a whimsical touch to the scene.
These subtle details seem minor, but they significantly impact the final look of the card. With the highlights finished, we can prepare to assemble the card. This coloured page will become a stunning handmade creation.
With the highlights in place, your image now exudes character and charm. Next, we will be cutting and assembling the card, into a finished masterpiece.
Step 4: Cutting and Assembling Your Christmas Card
Your colouring is finished. The highlights are in place. It’s time to transform your artwork into a finished card. In this step, we’ll cut out the image, prepare the sentiment, and assemble everything into a polished design.
Cutting Out the Coloured Image
The “Colour of Love” digital stamp makes this step easy by including a black border around the artwork. I decided to keep this border intact for added definition. Using a pair of sharp scissors, carefully cut along the outer edge of the black border. If you prefer a different look, you can trim closer to the coloured design instead.
Creating the Sentiment Merry & Bright
Next, let’s add the sentiment to the card. I chose the sentiment “Merry & Bright” to fit the festive theme.
- Cut a piece of black cardstock to match the width of your coloured image—9.5 centimetres wide—and make the strip 1.5 centimetres tall.
- For the letters, I used Craftemotions’ alphabet die. This handy tool cuts the entire alphabet in one pass, making it easy to save spare letters for future projects. Since I already had white letters from an earlier die cut, I skip the cutting step this time.
- Align the letters on the strip using a T-ruler to make they’re straight. Use tweezers to pick up each letter and glue them onto the black strip one at a time. This method creates a crisp, professional look.
Assembling the Card Layers and Final Touches
Now we’ll bring everything together to finish the design.
- Start by attaching your coloured image to the top section of a white card base measuring 10.5 by 14.8 centimetres. I used glue for a secure hold.
- Leave a small gap below the image, then adhere to the sentiment strip underneath.

And that’s it—your card is ready to send to someone special this holiday season. It’s a simple yet impactful design that showcases your creative effort.
Let’s Get Creative Together
Every card tells a story. This one brings the magic of Christmas to life with its rich colours. It also has a festive sentiment. Now you know it’s easy to create a handmade card using a colouring page. You should try it yourself. Gather your supplies and enjoy the process of crafting something truly special.
Join the Penny’s Paper-Crafty Challenge
Are you ready to showcase your creativity? This card was inspired by the latest theme over at Penny’s Paper-Crafty Challenge. It’s a wonderful opportunity to share your designs, connect with other crafters, and maybe even win a prize!
Enter the “Anything Goes Using Paper” Challenge and share your creations:
Never miss a tutorial, tip, or crafting idea by subscribing to the blog. Enter your email below to stay inspired with weekly updates on card-making techniques, new projects, and creative challenges.
Discover More Christmas Card Colouring Tutorials and Tips
Looking for more festive ideas? Here are a few blog posts to explore:
Happy Crafting!
Products used
I’ve shared all the materials and tools I used to create this Christmas card colouring below, including affiliate links. If you choose to buy through these links, I earn a small commission at no extra cost to you. Thank you for supporting my work and creativity!
Products with affiliate links
Alfabeth Letter die from Craftemotions

White gelpen

Products without affiliate links
Colouring page Christmas star from Colour of Love

- Twinmarkers from Decotimecrafts
- DCP paper from Clairfontaine
- Black Card stock (brand unknown)
- Sticky Glue from ActionNL
- Scissor from ActionNL
I would like to enter my card in the next challenges
- A Place To Start: Anything goes + Happy Holidays
- The Sisterhood of Crafters: Anything goes
- Crafty Catz: Anything goes + Blue Christmas
- Dragonfly Dreams: Christmas
- A Perfect Time To Craft Open Challenge: Anything goes
- Carlin’s Kaartenparadijs: It is cold outside + blue the main colour
- Crafts Galore Encore Challenge Blog: Anything goes
- Pearly Sparkles Challenge Blog: Christmas
- Peace On Earth Christmas: Anything goes
- The 12 Months of Christmas Link Up: Anything Christmas goes
Lovely card Thanks for entering you card at Pearly Sparkles Challenge
Geweldige kaart Leuk dat je meedoet met onze challenge bij Pearly Sparkles Challenge
Creatieve Groetjes Claudia
<aMijn FB pagina: Claudia’s Kaartjes and more
<aBlog:Claudia’s Kaartjes
Challenge blogs:
<aGirlz Creative Christmas
<aGirlz makes Guyz Cards
<aGirlz creative crafts
<aCreative sketchy girls
<aGirlz Rebel Challenge
<aGirlz Creative Fun Art of Scrap
Dank je wel!
Thanks for the tutorial! Your project is delightful. I must give this a try!
Happy Holidays! Thanks for your awesome submission to A Place to Start and for your support. We look forward to seeing more fabulous creations in 2025!
Hugz,
Chana Malkah, Owner, A Place to Start
Co-Owner, 613 Avenue Create
Thank you so much. Hope you do, and let me know if you have give it a try. Would love to see it.
Loving the sweet image, great coloring and it’s always nice to know “how to”. Thank you for joining us at the Crafts Galore Encore Challenge.
Thank you for your lovely comment.
stunning thanks for sharing at Crafty Catz and Merry Christmas & Happy New Year
Thanks a lot
SO sweet! Great coloring! Thanks so much for joining in the fun at our Peace On Earth & Sisterhood of Crafters challenges! Good Luck and we hope you’ll come back often.
Darlene
DAR’S CRAFTY CREATIONS
Peace On Earth Co-Owner
Sisterhood of Crafters Owner
Thanks a lot
What a cute, colorful snowman. I like it a lot!
Lia DT POE
Thank you, I am glad you like it.
Mooi kaartje, prachtig ingekleurd.
Bedankt dat je meedoet met de Challenge bij Carlin’s Kaartenparadijs.
Groetjes,
Karin DT
Dank je wel.