
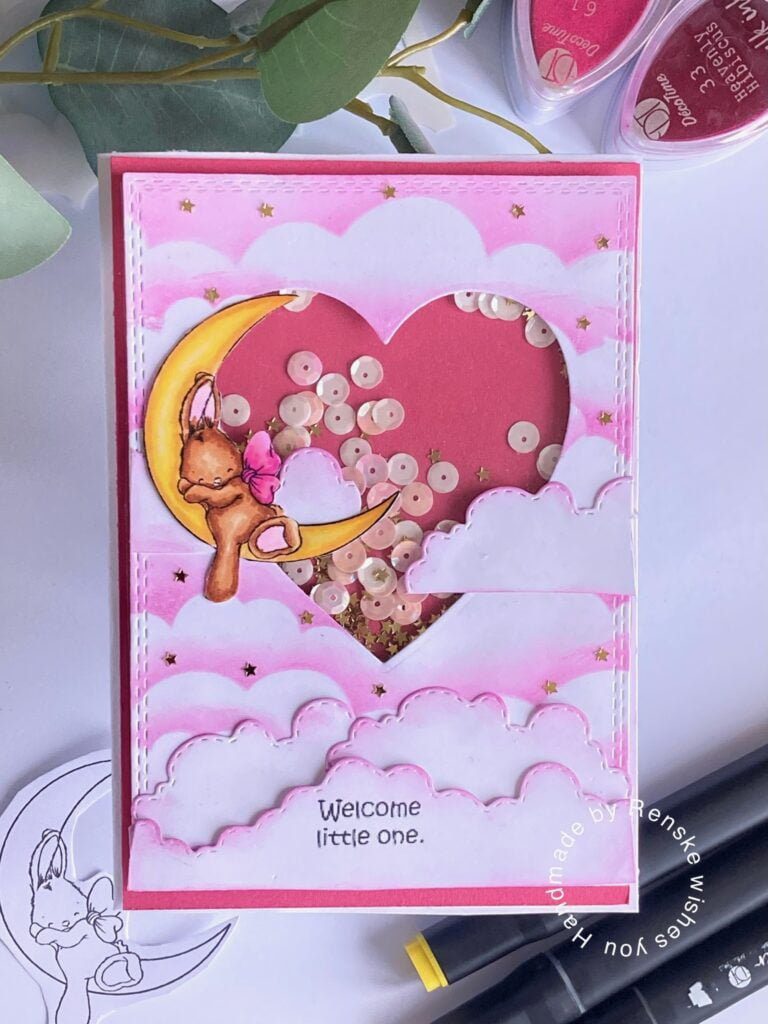
Today, I am happy to take you on a creative journey in this step-by-step shaker card tutorial.
This baby shaker card was lovingly designed for the CRAFT challenge blog, following the delightful theme of baby and family cards. I would like to mention our sponsor for this project, Sweet ‘n Sassy. You can find their logo here:

So, let’s dive right in and make some magic happen!
Gather Your Magical Supplies to make a shaker card.
Let’s gather our materials before embarking on this creative adventure. For this project, you will need:
- A sturdy card base (measuring 10,5 centimetres by 15 centimetres).
- Pink card stock measuring 10 centimetres by 14,5 centimetres.
- White card stock measuring 9,5 centimetres by 14 centimetres.
- Cloud stencil to make the background.
- Ink. You can use any ink you like.
- Paper Glaze.
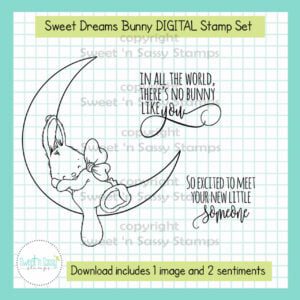
- Digital stamp featuring a sleeping bunny on the moon from Sweet ‘n Sassy Stamps.
- Alcohol markers or any colour medium you like.
- Shaker elements.
- Acetate sheet.
- Foam tape.
- Decorations. I used golden stars.
- Sentiment
Now that our supplies are ready, let’s explore the creative process step by step.
Colouring the digital stamp
Before we start making the shaker element, let’s focus on the first step, colouring the digital stamp with the sleeping bunny on the moon.
I used the following colour combinations with my Twin markers:
- The Moon: Buttercup Yellow (141), Lemon Yellow (35), Pastel Lemon (39) and, Golden Yellow (222).
- The Bunny: Caramel (253), Sand (107) and Barn Red (245).
- Ears and feed: Blush (136), Pastel Pink (17).
- The Bow: Pastel Pink (17), Pale Pink (09), Rose Pink (08), and Azalea Purple (87).
As a finishing touch, I applied paper glaze to the moon. This gives a nice shining effect to the moon.
Crafting the Dreamy Background for Your Baby Shaker Card
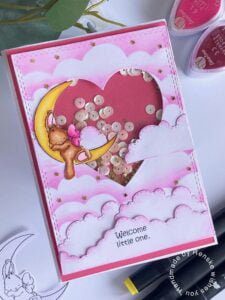
Now it’s time to make our background for our digital stamp. Here you need the white paper measuring 9.5 centimetres by 15 centimetres. I decided to make pink clouds on this panel. For this, I used a cloud stencil. If you don’t have this right now, you can always make your cloud stencil. Cut out a pattern from paper and use that to make the clouds on your background.
I used the following colours:
- heavenly hibiscus
- sugar doughnut
- pink lady
- Lovable
I have two cloud stencils. One with larger clouds and the other makes smaller clouds. I place the stencils at different angles so you don’t get the same kind of clouds in the same place all the time. That way you make it just a bit more interesting.
When the background is finished, you have created a dreamy pink world of clouds. Now we can make the shaker part.
The Shaker Card tutorial: The Magic Unveiled
In this section, I tell you what steps to take to make this shaker part of the card.
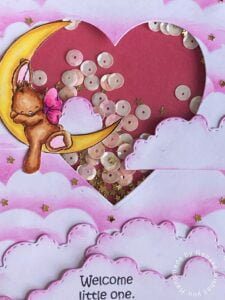
- Creating the shaker window: For our baby card, I decided to make a heart-shaped window. You can choose any shape you like. To make this window, I used a die with a heart shape. Place the die-cut exactly where you want the window and run it through your die-cutting machine.
- Adding acetate: To make the front transparent, use acetate. You stick this to the back of your shaker panel. I bought acetate from the shop, but you can also use plastic from packaging, and even plastic from card storage bags. To attach it securely, it is best to use double-sided tape.
- Placing the foam tape: Now you are going to place foam tape around the heart. Follow the heart shape with your foam tape. Make sure that the different strips of foam tape close tightly so that no shaker elements can slip between them later. once you have done that, place the rest of the foam tape p the rest of the panel.
- Anti-static treatment: To ensure that the acetate is no longer static and the foam tape’s edges are no longer sticky, gently run an anti-static tool over the acetate and the foam tape.
- Filling the shaker element: Now, it’s time to fill the heart-shaped shaker window with your chosen shaker elements, whether it’s glitter, beads, sequins, or confetti. This is where your creativity shines through. For my shaker, I used pink and white embellishments and golden stars.
- Sealing the shaker: To seal the shaker element, take a 10-centimetre by 14.5-centimetre piece of pink paper. Attach this paper over the foam tape on the back of the cloud panel, making sure it completely covers the heart-shaped shaker window.
Once you have completed these steps, your shaker element is ready. Now you can move on to adding the finishing touches.
Decorating the baby shaker card
With the key elements of our baby shaker card in place, it’s time to wrap up the card-making process and add those final touches. Follow these steps:
- Adding the sentiment: For my card, I used the text “Welcome little one”. I thought it would be fun to make some more layers of clouds at the bottom of the panel for this card, and that the front layer of clouds would contain my sentiment. I printed out the sentiment and then die-cut it with a cloud die.
- Die-cutting some more clouds: Using different cloud punches, I punched different shapes of clouds. To make them a bit more interesting, I put some pink ink around the edges of the clouds. I place my cloud layers on the bottom of the panel. I attached the panel with the sentiment on it with foam tape.
- Place the digital stamp: I decided to place the digital stamp on the edge of my shaker window. Behind the digital stamp, I stick a little cloud.
- Placing embellishments: To give the card some shine and interest I glue golden stars all over my background.
Craft, Create, and Join the Celebration
Now that you’ve seen all the steps in this baby shaker card tutorial, it’s your turn to have a good time. Create your own unique craft project with a baby theme, be it a card, scrapbook page or any other craft that captures the essence of the theme. And share your creation with us.
I hope this card has inspired you to make your shaker card. These steps make it easy to create a shaker card.
If you also want to craft with the Rocket-Man digital stamp from Jan’s Digi Stamps, you can find the link below
Until next time.
Happy Crafting!
Non affiliate products used
van Sweet “n Sassy
Cloud en Grass Stencil from Carlijn Design
- Twin markers (alcohol markers) from Decotimecrafts
- Chalk ink from Decotimecraft
- Heart die from Aveccreative.
- Cloud dies from Kokorosa
- Embellishment brand unknown
- Paper Glaze
I would like to enter my card in the following challenges.
- Crafty Catz: Anything goes
- Allsorts challenge blog: Anything goes
- Lil Patch of Crafty Friends Challenge …: Anything goes
- A Perfect Time To Craft Open Challenge:
- Classic Design Challenge Blog: Anything goes
- Critter Crazy CHALLENGE BLOG: Anything goes + featured critter
- Crafty Animals: Anything goes + must use an animal
- Crafting Happiness Challenges: Anything goes
Super cute shaker card – so pretty!
Thanks for joining us at the Critter Crazy Challenge.
Helen x
DT
Wonderful shaker baby card. Thank you for joining in the Allsorts Challenge this week using the Die Cuts option.
Liz xx
Your new baby shaker card is just adorable, many thanks for sharing with us at Allsorts challenge this week and including the die optional theme.
B x