

Hello everyone!
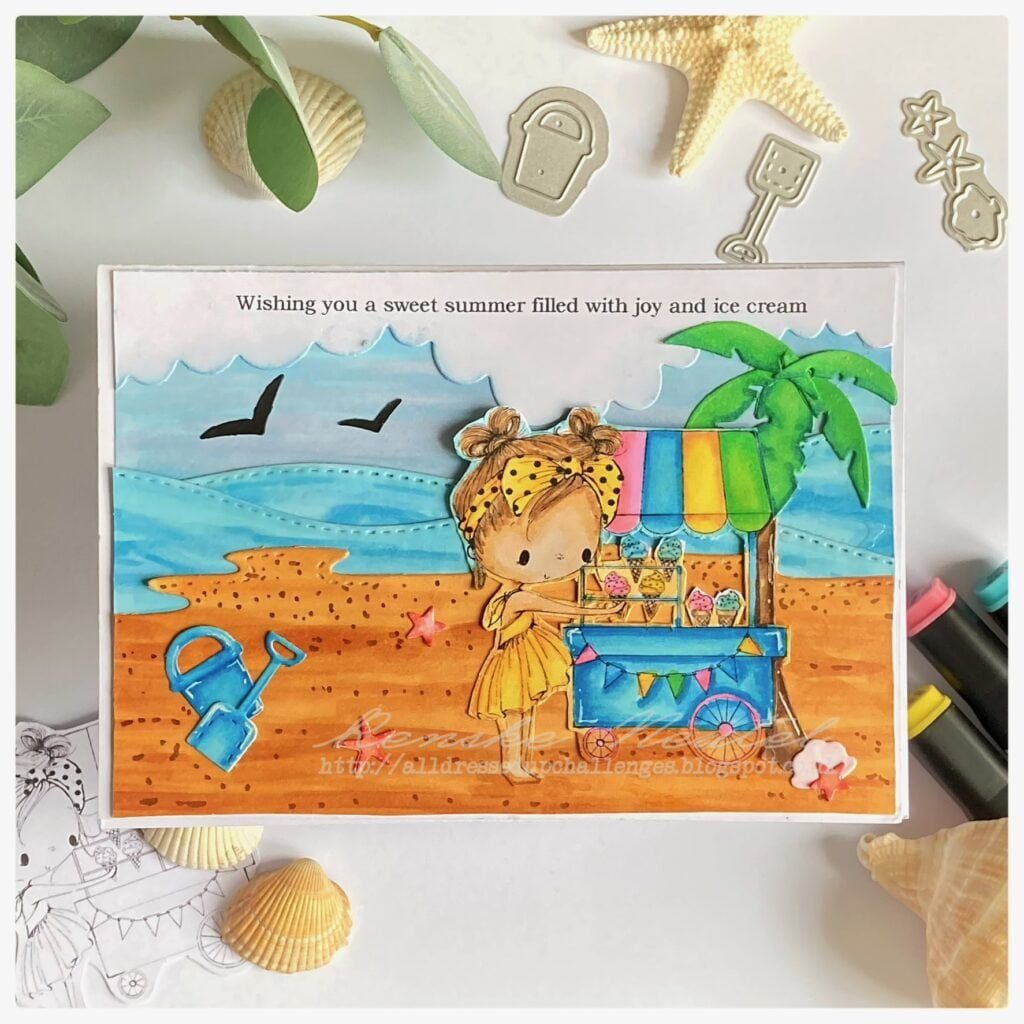
Welcome to a new post focusing on the sun, sea, and beach. For this lovely slimline beach card, I used the cute bears from Last Minute Manda. She is one of the sponsors of the new challenge on Penny’s Paper-Crafty challenge blog. And I got to work with the digital stamp set “Little Bear Beach Days. In this set, you get six of these cute little bears. On my card, I used four of them. These little bears are perfect pictures to make them 3D. I will discuss this technique, among others, in this article.
As I mentioned, another new challenge has started at Penny’s. As always, our theme of the challenge is “anything goes using paper”. Our sponsors and prizes for this challenge are:
Last Minute Manda

Mirtillamente

Those are great prices, right? So don’t wait a moment and enter.
Let’s talk about the card I made and how you can make it.
Inspiration from Last Minute Manda
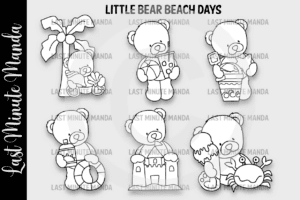
The creative process starts with coming up with a cute card featuring these adorable little bears. This fun set includes six adorable bears, each with the essence of a sun-drenched day by the sea. From lazing under palm trees to building sandcastles and eating ice cream, these digital stamps will get you right into the holiday spirit.
You can use these bears in any direction to make a lovely summer card. With the ability to mix and match the bears and their accessories, your creative options are expanded.
Be inspired by the stories the bears tell and the adventures they have. To come up with an idea for this card myself, I initially printed out all the bears and made a quick cut-out. I find this a great way to find out which image to work with and which story I want to tell with the card.
In the rest of the article, we will delve deeper into the techniques, colours and designs that bring these bears to life on this slimline beach card. Let’s get started.
Getting started: Materials and dimensions
Before we dive into the details of crafting our slimline beach cards, let’s take a moment to gather our supplies.
Materials you’ll need
Before we get started, you will need the following materials to make this card.
- White Card stock: A heavy card stock for your slimline card base and beach scene elements.
- Digital Stamps: The Little Bear Beach Days set from Last Minute Manda, featuring our charming little bears ready for a day by the sea. But you can use any kind of image you like. Print every bear three times, we need that to create the 3D effect.
- Colour medium: I used alcohol markers, but you can use any colour medium you like.
- Inks: To create a beach and sea background that radiates warmth and sunshine. I used chalk inks, but you can use any ink you like.
- Stencils: I used a stencil with sunbeams for the background.
- Die Cutting Machine: This is optional. I used dies to make the beach and the sea. But you can also hand-cut them yourself or use stencils.
- Sentiment Stamp: I used the text “I find my happiness where the sun shines” on my card. But you can use any sentiment you like.
- Ink Pad: Memento ink in a coordinating colour for stamping sentiments.
- Highlighting Mediums: To add sparkle and dimension to your elements.
- Adhesive: For assembling your slimline beach card
Slimline Card Size
- Make the card base: You need a piece of white card stock measuring 21 centimetres by 21 centimetres. Score at 10,5 centimetres.
- Panel for the background: you need a piece of white smooth card stock measuring 20,5 centimetres by 10 centimetres.
In the next section, we take a closer look at designing, strategically placing our bears and creating an inviting beach scene that exudes the fun of summer.
Designing the Slimline Beach Card
With all our materials ready, we can get to work creating our card.
Consider the scene
Before you get started, consider what story you want to tell on the card. The little bears are obviously the focal point and the background you will create reinforces the story you want to tell.
Think about what story you want to convey – whether it’s a relaxing day at the beach, a playful exploration or a combination of both.
Remember that elements like the sunbeams and the stamp with the sentiment also play a role in the overall design. The sentiment “I find my happiness where the sun shines” adds a cheerful feel to the card.
Preparation
Before getting started with the card, I like to move different elements around on the card. In this case, I printed out all the bears from the set. I cut out all the bears and this way I can try out different options on the card that I like. I move them around, till I am satisfied with my arrangement.
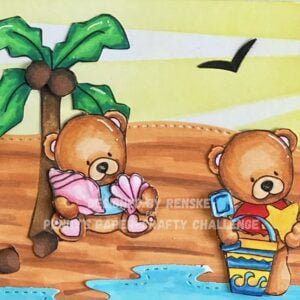
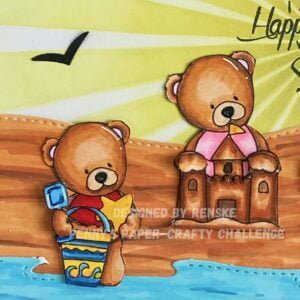
In my project, I choose to place the little bear on the left under the palm tree, so that the viewer is welcomed into the scene. The little bear with the sandcastle and the bear with his bucket are placed in the centre, creating a focal point with the sandcastle as the focal point. Finally, the little bear with the ice cream and crab is placed on the right, a delightful conclusion to our beach scene.
To create the 3d effect with these bears later, I printed these bears 3 times. Now you have enough pictures to cut out the different parts of the picture.
So go try different options yourself and go create the scene you like.
Coloring the little bears and beach elements
Okay now it’s time to start coloring our little bears. I used my alcohol markers for the colouring, but you can use any colouring medium you like.
Colour combinations Twin markers
Bear with palm tree
- Fur: Barely Beige (29), Sand (107), Rose Beige (97), Clay (116).
- Shirt: Pale Pink (09), Pastel Pink (17), Blush (136).
- Shells: Pale Pink (09), Pastel Pink (17), Blush (136).
- Green leaves palm tree: Weeds green (162), Grass Green (47) and Forest Green (50).
- Palm tree trunk and coconuts: Dark Wood (119), Chocolate (118), Clay (116) and Walnut (100).
Bear with ice cream and crab:
- Fur: Barely Beige (29), Sand (107), Rose Beige (97), Clay (116).
- Shirt: Deep Yellow (32), Lemon Yellow (35), Pastel Lemon (39).
- Ice Cream Cone: Barely Beige (29), Hazelwood (108), Walnut (100).
- Scoop of ice cream(lower): Blush (136), Pastel Pink (17), Pale Pink (09).
- Scoop of ice cream (top): Buttercup Yellow (141), Pale Yellow (38), Pastel Lemon (39).
- Crab: Cardinal, English Red, Burgundy.
Bear with bucket, shovel and star
- Fur: Barely Beige (29), Sand (107), Rose Beige (97) and Clay (116).
- Blue parts bucket and shovel: Frost Blue (82), Baby Boy (144) and Midi Sky (190).
- Yellow part bucket: Deep Yellow (32), Lemon Yellow (35), Pastel Lemon (39).
Bear with sandcastle
- Fur: Barely Beige (29), Sand (107), Rose Beige (97) and Clay (116).
- The sand and sandcastle: Barely Beige (29), Sand (107), Rose Beige (97) and Clay (116).
- Pink shirt: Blush (136), Pastel Pink (17) and Pale Pink (09).

Creating the Beach-Themed Background
Now that our bears are coloured, it’s time to make the background.
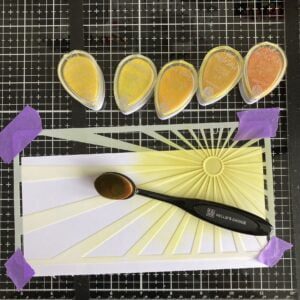
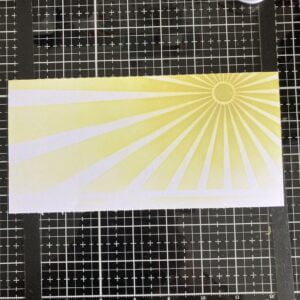
Making the sun rays on the background
We start with the background panel to create the sun rays on the 10-centimetre by 20.5-centimetre background panel. Let’s add warm sun rays to our scene.
With a light hand, apply the different colours of yellow ink to the background. I used chalk ink in the colours Mellow Gold, Golden Sunset, Golden retriever, Baby banana and Pastel Yellow. I start with the darkest colour near the circle of the sun. Slowly I work outwards, using lighter and lighter shades of yellow. This already gives the feeling of a lovely summer day, doesn’t it?
Creating the sun and sea with slimline dies
To complete our beach landscape, we set to work with the sea and beach elements. I stood the beach and sea with special slimline sea and beach die-cuts. If you don’t have this, you could also consider cutting out or drawing your own beach and sea.
I used the following colour combinations:
- Sea: Frost Blue (82), Baby Boy (144) and Midi Sky (190).
- Beach: Barely Beige (29), Sand (107), Rose Beige (97) and Clay (116).
These shades texture the beach and evoke the feeling of warm sand between your toes. The background enhances the feeling of our bears.
Next, stick the sea and sand elements you have punched onto the background.
Elevating Your Craft – Creating Captivating 3D Effects
Now that we have coloured in the bears and finished the beach scene in the background, we can turn our attention to making the bears 3D. In this section, I will tell you how I turned the digital stamps into 3D images.
Breathe life into your characters
When you assemble the elements on your beach-themed background, we add a new dimension. But by adding a dynamic 3D effect to your digital stamps, you create a visual effect that demands even more attention.
The 3D technique unveiled
As I mentioned once above, I printed out all the bears three times.
From each bear, cut out certain parts you would like to raise with foam tape. I cut out the following parts:
- Bear by palm tree: The coconuts, the hands of the bear holding the shells, and then again separately the hands.
- Bear with bucket and scoop: the bucket and hand with scoop, and separately the hand with the scoop.
- Bear with the sandcastle. The front part of the sandcastle, and the hands separately.
- Bear with ice cream and crab: the hand with the ice cream, the body with the legs of the crab. Separately the hand holding the ice cream and the body of the crab.
Putting the elements together
Now it’s time to assemble the bears.
First, colour all the parts in the colours as already indicated when colouring the digital stamp. I also colour the bottom late where the raised parts come on, so you don’t see any white areas when looking at them from the side.
You raise each part using foam tape. As an example, I take the bear with the shells. So, there are two layers on top of that. First, you put the layer with the hand and the shell together. Then attach the loose hand you cut out. And so, you go along all these bears.
Bringing it all together – Crafting Captivating Slimline beach cards
Now that our bears have been coloured and the background in beach scene created, it’s time to bring all the elements together.
Assembling the elements
We start by placing our bears. At the beginning of our process, of course, we thought about this. Now you can start attaching the bears to the card.
Stamping Sentiments and Adding Highlights
Now it’s time to stamp the text “I find my happiness where the sun shines” I decided to stamp my text in the center of the sun. I felt this is where it would stand out the most.
To give the bears just a little more ge, you can add highlights. I added highlights using my white gel pen. I also used a glitter pen to add glitter to the shells. To enhance the vibrancy of your bears and elements, add highlights using your chosen highlighting mediums. These touches of shimmer and dimension add a touch of magic to your cards, making them truly special.

Let’s Get Creative Together
In this section, I invite you to dive deeper into the world of card-making inspiration and creativity. Let’s explore together and unleash our creativity!
Join the challenge
Are you ready to take your card-making skills to the next level? Join the Penny’s Paper-Crafty Challenge and showcase your creativity using paper.
More Beach card inspiration
Looking for more inspiration? Check out these articles for more beach -themed card ideas.

Products with Affiliate links
This post may contain affiliate links. As an Amazon Associate and participant in other affiliate programs, I earn a small commission from qualifying purchases through these links, at no extra cost to you.”
Spring Gnomes Digital Paper set

Memento Tuxedo Black

White Gelly Roll 08 Pen

Products with no affiliate links

I would like to enter my card in the following challenges
- A Place To Start: Anything goes
- Crafty Gals Corner: Summer fun
- The Paper Funday Challenges: Anything goes + the great outdoors
- Craft Rocket Challenges: Animals
- My Time To Craft!: Stencilling
- Cut It Up: Create a scene
- Lil Patch of Crafty Friends Challenge …: Anything goes
- A Perfect Time To Craft Open Challenge: anything goes
- Classic Design Challenge Blog: Anything goes
- Critter Crazy CHALLENGE BLOG: Anything goes + feature critter
- Crafty Animals: Anything goes + must use an annimal
Very cute scene. Thanks for all the crafty details. Last Minute Manda has such fun digis and clipart. Thanks for joining our Cut it Up Create a Scene challenge.
Hugs,
Larelyn (CIU owner)
Yes they really do. Thank you for your lovely comment ❤️
What a sweet beach scene with the little bears. Thanks for sharing with us at MTTC :)
Thank you ❤️
A fantastic card!
This is a great project!
We always love to see all the entries at Classic.
Thank you for sharing in our challenge at Classic Design Challenge
We really appreciate you joining in.
Jackie DT
Thank you
We are delighted you chose to share your creation with us at Cut It Up!
Please do come back again!
All the best, Jackie DT xxx
Thank you so much